The aim of applying thermal pads is bridging the gap between heat source (e.g. GPU, RAMs, IC chips) and heatsinks.
To fill up the gap and cover the surfaces completely, it is essential to select proper thickness of thermal pads by selecting the thickness of pad above the gap distance. For instance, you should use one piece of 1.5 mm thick pad for a 1.2 mm gap / stack up 2 pieces of 1.5 mm thick pad for a 2.6 mm gap.
* If the gap is more than 3 mm, we suggest you review your design, since thermal pads are used to fill in small gaps and will not work well for huge gap.
* If there is almost no gap (i.e. < 0.2 mm), it is suggested to use thermal grease instead.
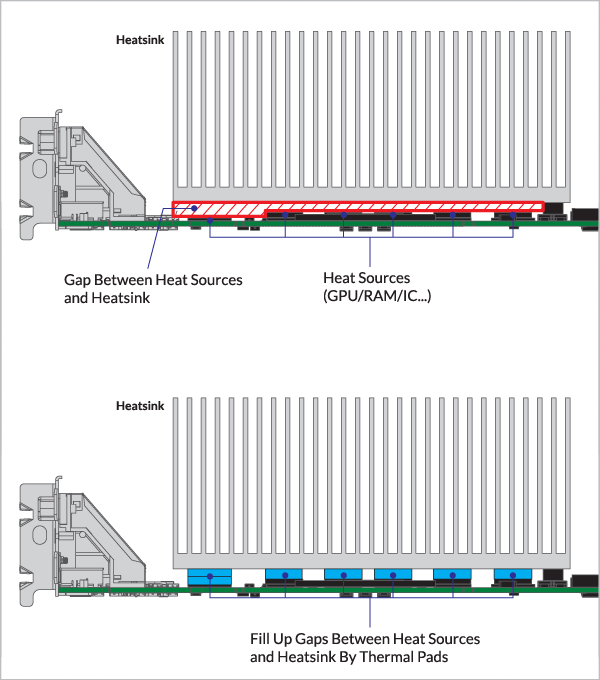
Factors affecting performance of thermal pads
Thermal pad with high thermal conductivity means that it could transfer heat more efficiently, resulting in a better cooling solution.
Softer thermal pads allow better deformation and fill gaps better, and thus improve cooling performance by increasing contact surface for heat transfer, as well as reducing the pressure applied on the electronic components and prevent bending.
High power applications (e.g. GPU) may require the thermal pad with higher thermal conductivity. According to your applications, please select suitable spec. thermal pads from our product list
Store this silicone thermal pad in air tight container, cool, dark place (temperature range from -10⁰C to 40⁰C) to prolong shelf life. Prevent moisture condition.
Remove previously used pad (if present)
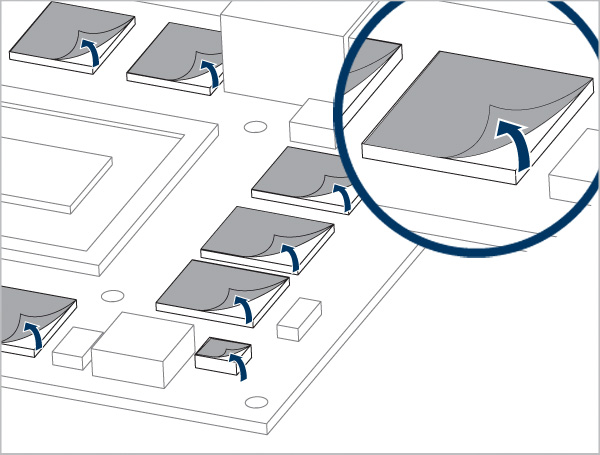
Check the removed pad whether its thickness is the same as the purchased pad
Clean up surface with MX Cleaner, an eraser, a microfiber cloth or paper towel with some isopropyl alcohol on it. The reason is that the dirt affects heat transfer of thermal pads by reducing the contact surface area.
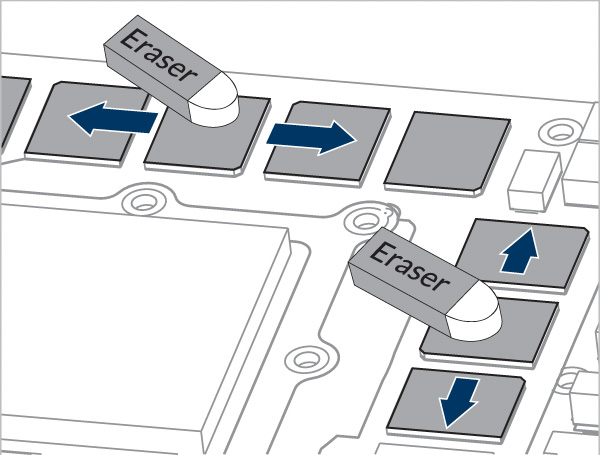
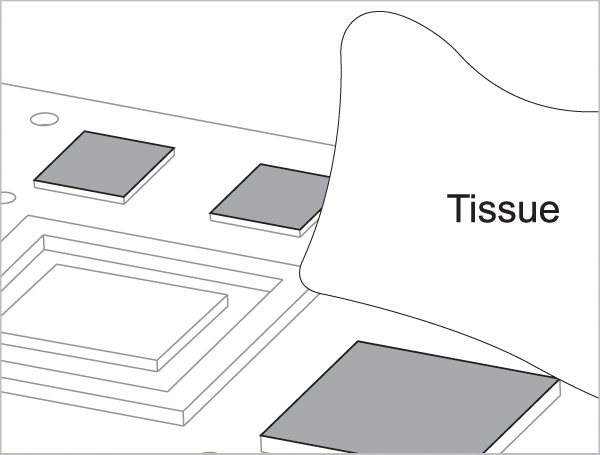
Overview
Before starting, re-verify that the purchased pad is the same thickness as the pad you are replacing
Measure the size of area that you would like to apply. *** For detailed instructions, please check the corresponding product categories (i.e. RAM sticks, M.2, etc.).
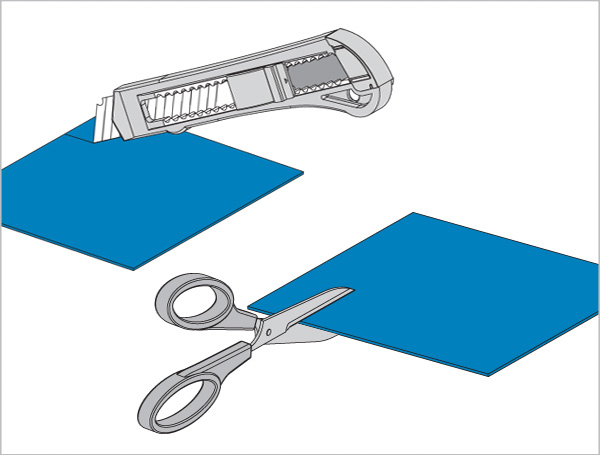
You could cut the thermal pad with scissors or utility knife with the plastic protective sheets on.
Peel the corner with utility knife / scissors.
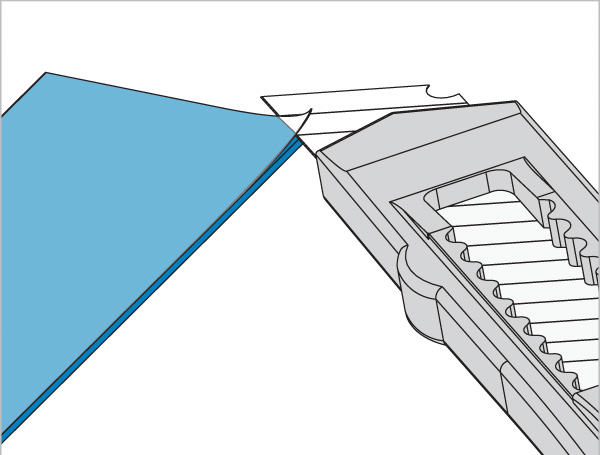
Remove the transparent protective sheet by carefully rolling back the sheet to create a 180 degree peel angle.
* Do NOT pull the pad upward.
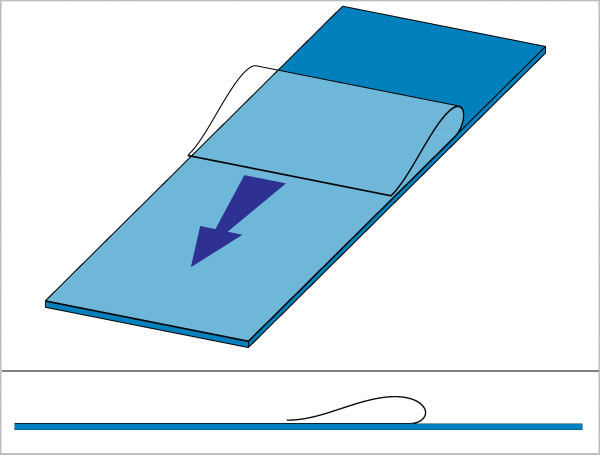
To avoid any tearing of slim pads, using a utility knife helps to peel off the plastic liner.
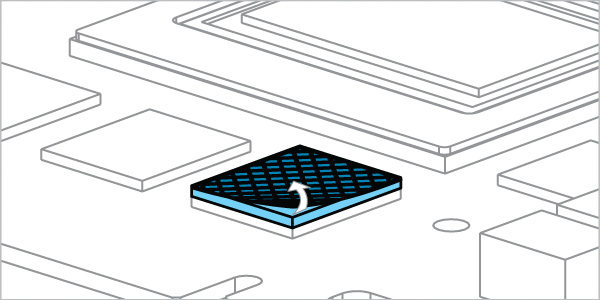
Gently put on the thermal pads starting at one end and gradually moving to the other end.
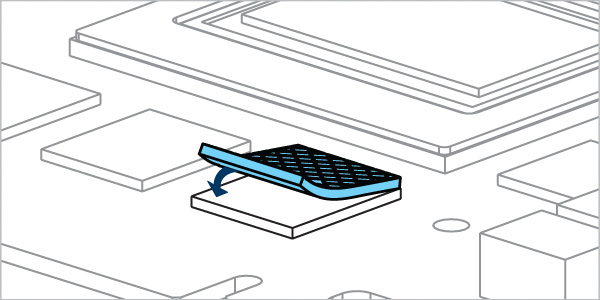
Peel off the rhombic grid plastic sheets and finish the remaining assembly.
RAM Sticks
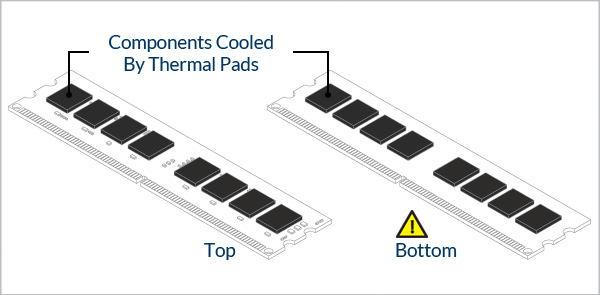
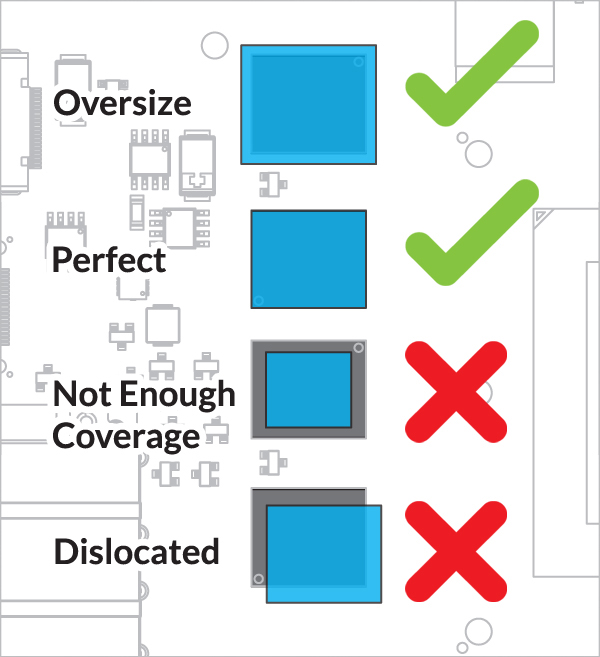
The chips are usually the area that requires cooling. Therefore, it is essential to cut sufficient length and width of thermal pad to cover all these chips. For the thickness, choose thermal pads with the same or the thickness right above the stock ones.
For most of the standard size RAM sticks, you should be able to directly apply our 120*20mm thermal pad without additional cutting. If you find that you could not cover all the chips with one piece of thermal pad, cut more and apply on the remaining area.
For SODIMM form factor, you have to cut a shorter length thermal pad.
Attention
If there are chips on the bottom of your RAM sticks, remember to apply thermal pad on that side as well. If not, it is still suggested to apply thermal pad on the PCB, since it could help transfer heat away from the memory chips.
M.2
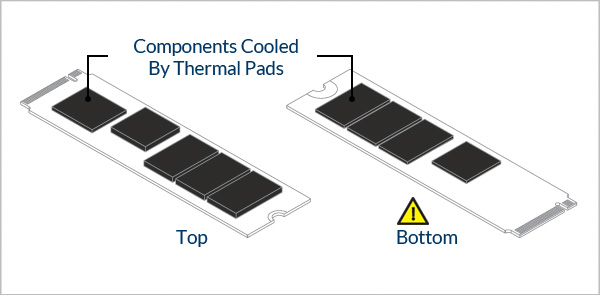
The chips are usually the area that requires cooling. Therefore, it is essential to cut sufficient length and width of thermal pad to cover all these chips. Or you could download and print out the “M.2 Thermal Pad Standard Cut.pdf” and cut according your M.2 type / size (i.e. 2230, 2242, 2260, 2280, 22110).
Attention
If there are chips on the bottom of your M.2, remember to apply thermal pad on that side as well. If not, it is still suggested to apply thermal pad on the PCB, since it could help transfer heat away from M.2.
For M.2, the chips that need cooling with thermal pad and heatsink often have different height. You may have to cut multiple pieces of thermal pad with different sizes and thicknesses in order to fill all those gaps.
Determine which type of heatsinks you are using.
If your M.2 comes with a small heatsink on top by default and you are just replacing the old thermal pads, you could simply choose the same or the thickness right above the old one.
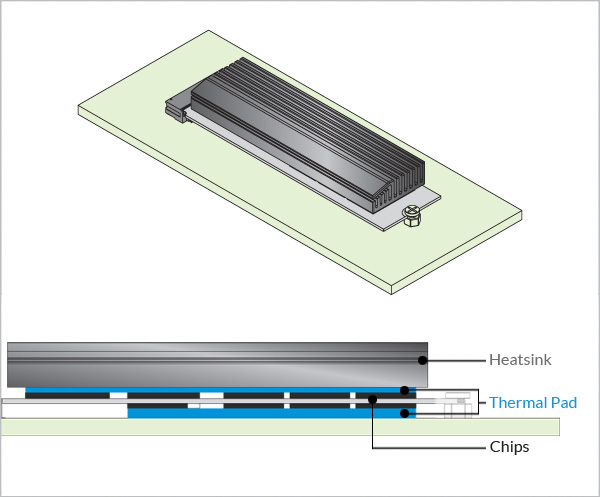
Otherwise, e.g. you are installing a new M.2 to your PCIe extension card with a large heatsink, the mounting system is different. Therefore, it is suggested for you to follow the guidelines below step by step.
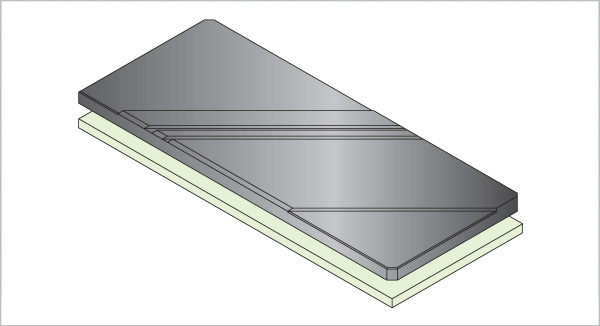

To make sure there is complete contact between heat sources and the heatsink, the dimensions and thickness of the thermal pads are critical to the efficiency and effectiveness of cooling.
For a full guideline for selecting the appropriate thickness of thermal pads for our M.2, please click the below “Detailed Instructions” for more detailed explanation.
Detailed Instruction
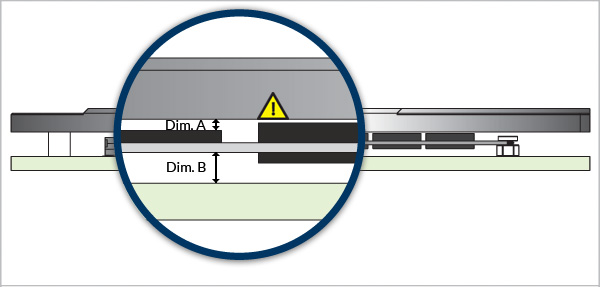
There are several critical dimensions affecting your selection of thickness of thermal pads:
Dim. A – Gap between the top-side chip of your M.2 to the heatsink
Dim. B – Gap between the bottom of the PCB to the base
Attention
You may find that the thickness of the chips are not the same. For example, the height of the controller (Grey chip) is lower than the memory chips (Black chips). If you only use one piece of thin thermal pad for the whole M.2, you might not be able to cool down the controller or the thinner chips.
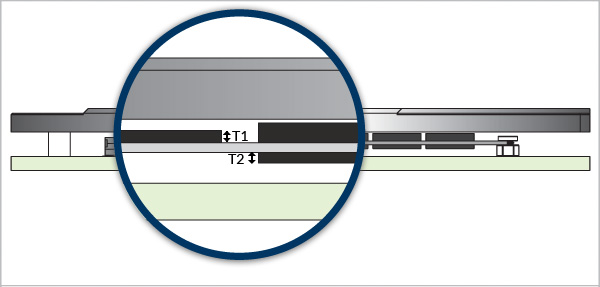
Here are the critical dimensions for you to figure out the two dimensions stated above, you could measure:
- T1 – Thickness of the top-side chip
- T2 – Thickness of the bottom-side chip (Ignore this dimension if there is no chips on the bottom of your M.2

Dim. C – Height of the M.2 slot
It basically tells you Dim. B if there is no chips on the bottom of your M.2, since the Bottom Gap is restricted by the M.2 slot’s height. If there is chips on both sides of your M.2, you could deduct the height of chips out of the Bottom Gap value. Please refer to the table below to check the reference values.
Hence,
- For M.2 without bottom chips Bottom Gap Between PCB and Base= Dim. B
- For M.2 with bottom chips Bottom Gap Between Bottom Chips and Base = Dim. B – T2
| Height of M.2 Slot (mm) | For Double Sided Moduleses | Dim. B |
|---|---|---|
| 2.15 | No | t0.6 |
| 3.1 | Yes | 1.5 |
| 4.1 | Yes | 2.5 |

Dim. D – Height of the standoffs for the heatsinks.
It restricts the gap between the heatsink and the top chips of your M.2. Since you got the dimension between the bottom surface of the M.2 PCB to the base, you could figure out the distance from the top surface of the M.2 PCB to the base as the thickness of the PCB is fixed (i.e. 0.8 mm).
Hence,
- Top Gap Between Top Chips and Heatsink = Dim. A = Dim. D – Dim. B – 0.8 – T1
After you have finished both the calculation of Top Gap and Bottom Gap, select the thickness of thermal pads right above each value (i.e. use 1.5mm pad for 1.2mm gap).
If you find the textual description difficult to understand, please click the “Case Study” below and follow the guidelines step by step.
Case Study

You are installing a M.2 with chips on both sides in a PCIe extension card with a heatsink.
You measured T2 (Thickness of bottom chips) = 0.85 mm, and Dim. C (Height of M.2 slot) which is 4.1 mm. Refer to the table, Dim. B = 2.50 mm.
Hence, Bottom Gap Between Bottom Chips and Base = Dim. B – T2 = 2.50 – 0.85 = 1.65 mm.
-> You should choose a 2 mm or stack two pieces of 1 mm thick pad to fill that gap.

In addition, you discovered that the controller chips and the memory chips are having different thickness, which are T1a = 1 mm and T1b = 1.60 mm. You then measured Dim. D (Height of standoff for heatsink) = 5.20 mm.
Hence, Dim. A1 (Top gap for controller chips) = Dim. D – Dim. B – 0.8 – T1a = 5.20 – 2.50 – 0.8 – 1 = 0.9 mm.
-> You should use a 1 mm thick pad to fill that gap.
While, Dim. A2 (Top gap for memory chips) = Dim. D – Dim. B – 0.8 – T1b = 5.20 – 2.50 – 0.8 – 1.6 = 0.3 mm.
-> You should use a 0.5 mm thick pad to fill that gap.

At the end, you come up with a short pad with 1mm thickness for the top-side controller chip, a long pad with 0.5mm thickness for the memory chips, and a long pad with 2mm thickness for the bottom chips.
Graphics Card
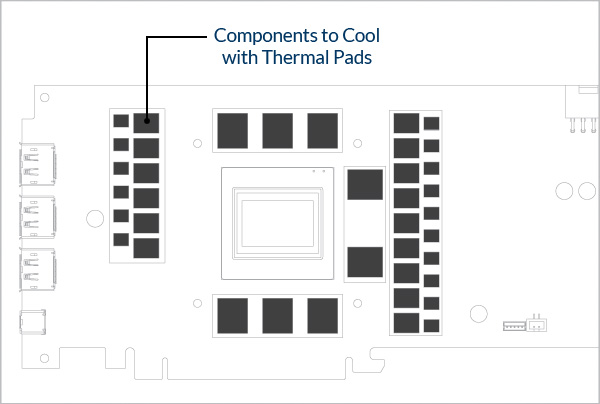
The RAM chips and VRMs are the major area that requires cooling with thermal pads. Therefore, it is essential to cut sufficient length and width of thermal pad to cover all these chips.
It is suggested to check carefully where the stock cooler applied the thermal pads. First, try to look for the thermal pad guidelines in the website of the brand of your cooler. If there is no relevant information, you could measure the old thermal pad instead, pick the same thickness and cut the same size for replacement.
Chipset Heatsinks
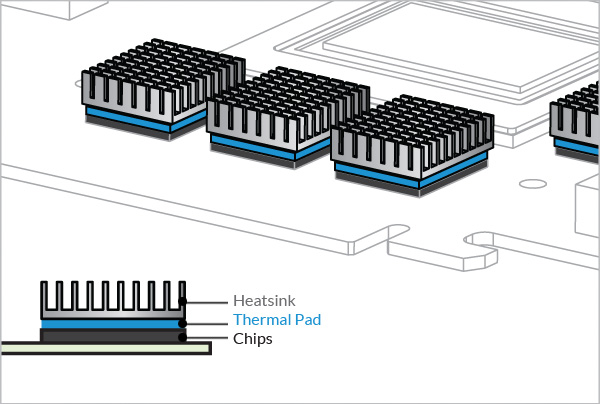
For those chipset heatsinks, cut the same size as the chip and replace the thermal pad between them.