Unfortunately, this document is not available in English, below is the English version.
- Ampere – LGA4926
- AMD – SP3, TR4, sTRX4, sWRX8, SP6, sTR5
- Intel - LGA4710, LGA4677, LGA4189
Select your CPU Socket
Required Tools
 PH1 Philips Head Screwdriver
 PH2 Philips Head Screwdriver
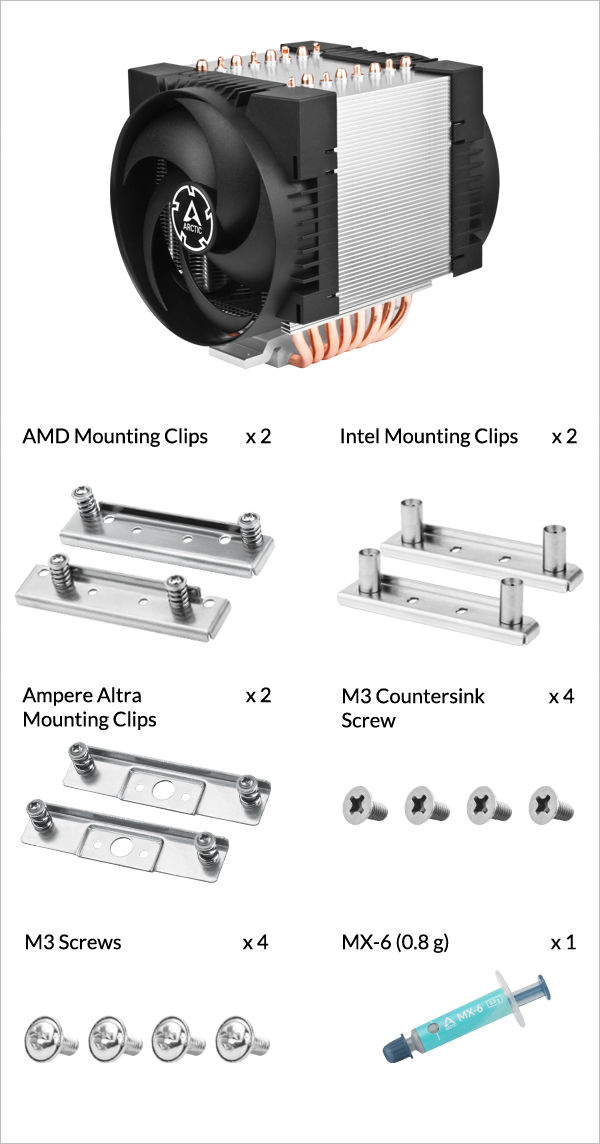


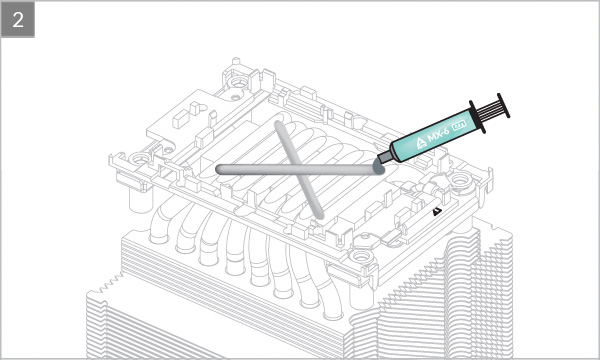
* Follow this link to learn more about how to apply thermal pastes correctly.


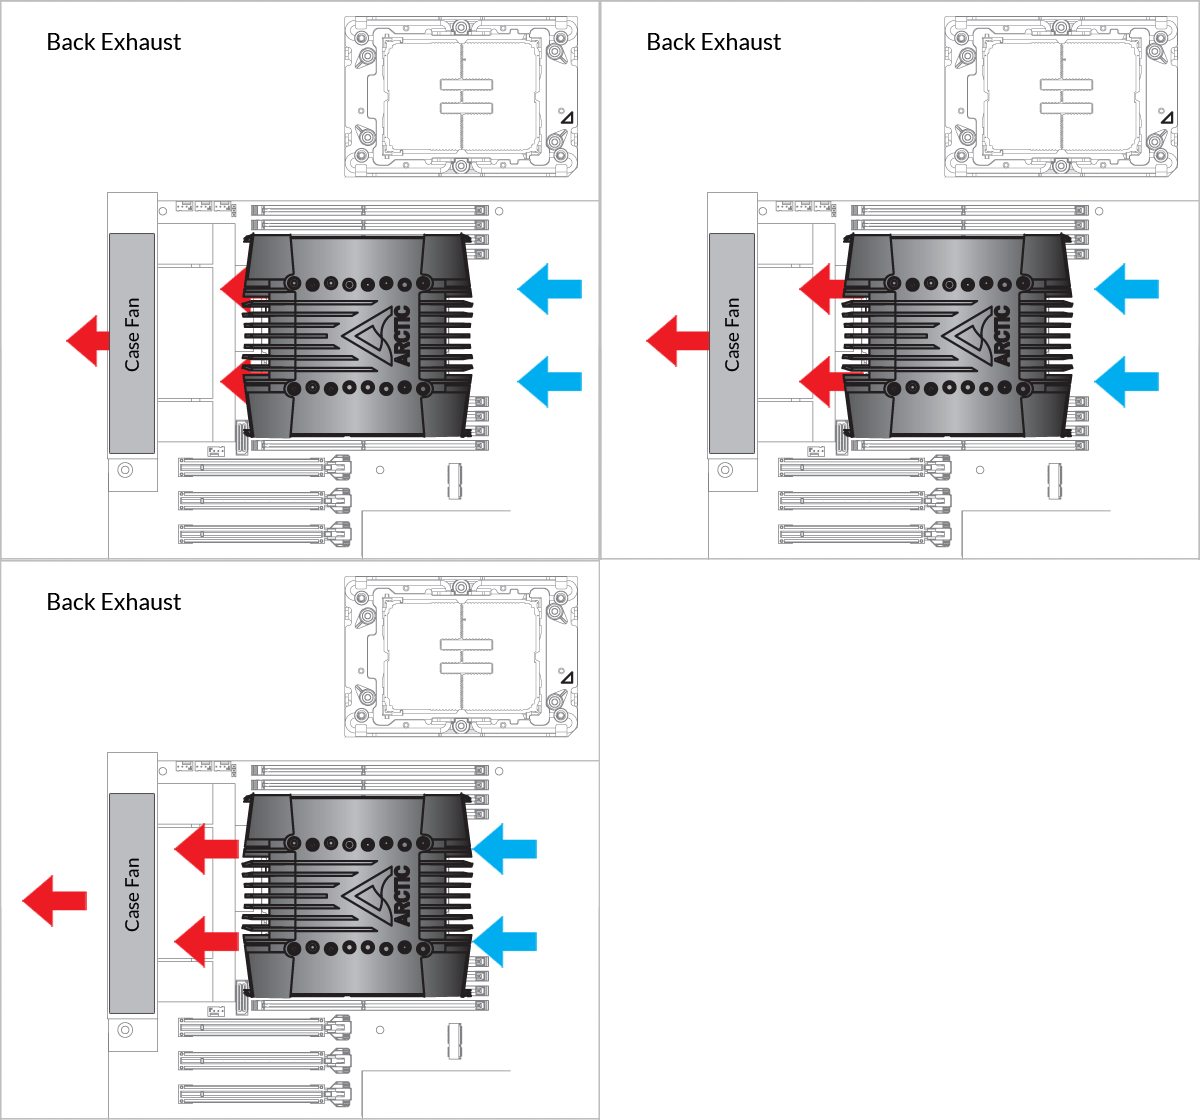
Install push fan on the inlet side of the heatsink

Install pull fan on the outlet side of the heatsink


Required Tools
 PH1 Philips Head Screwdriver
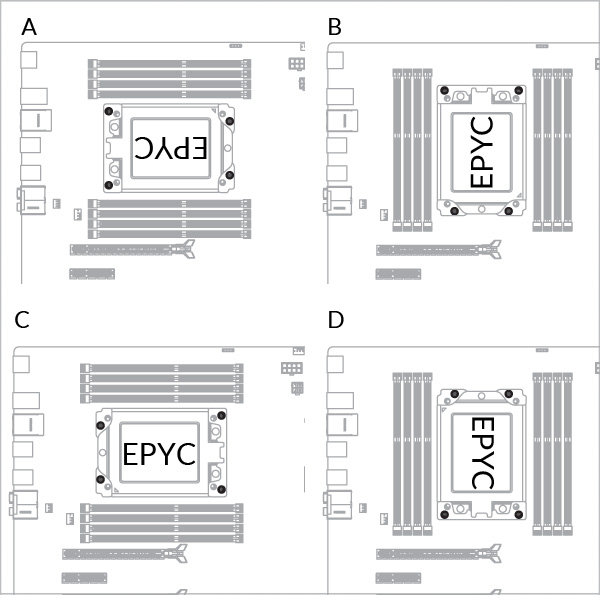
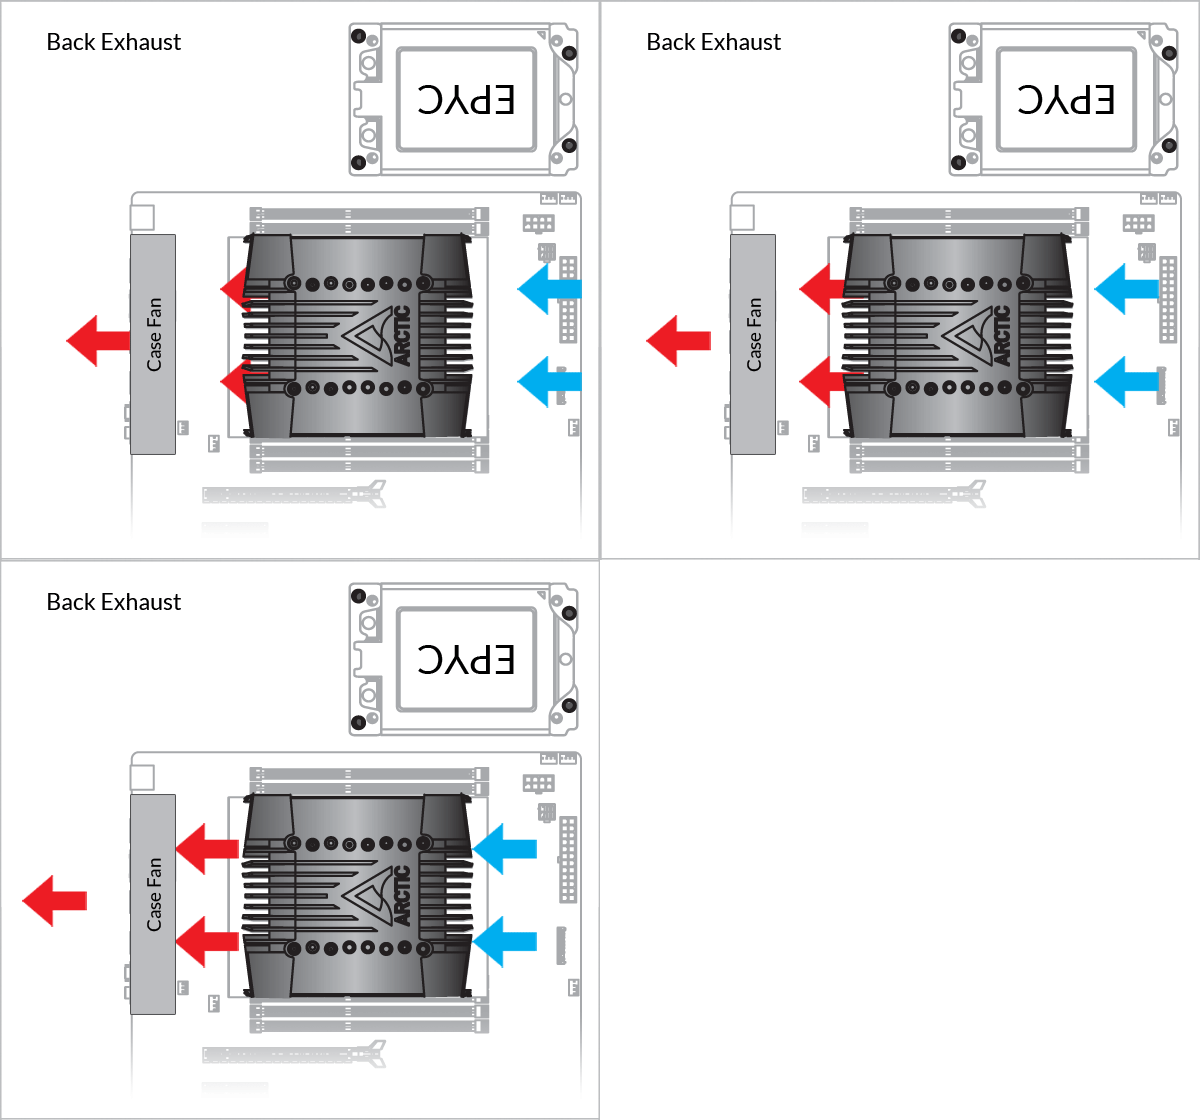
 Attention
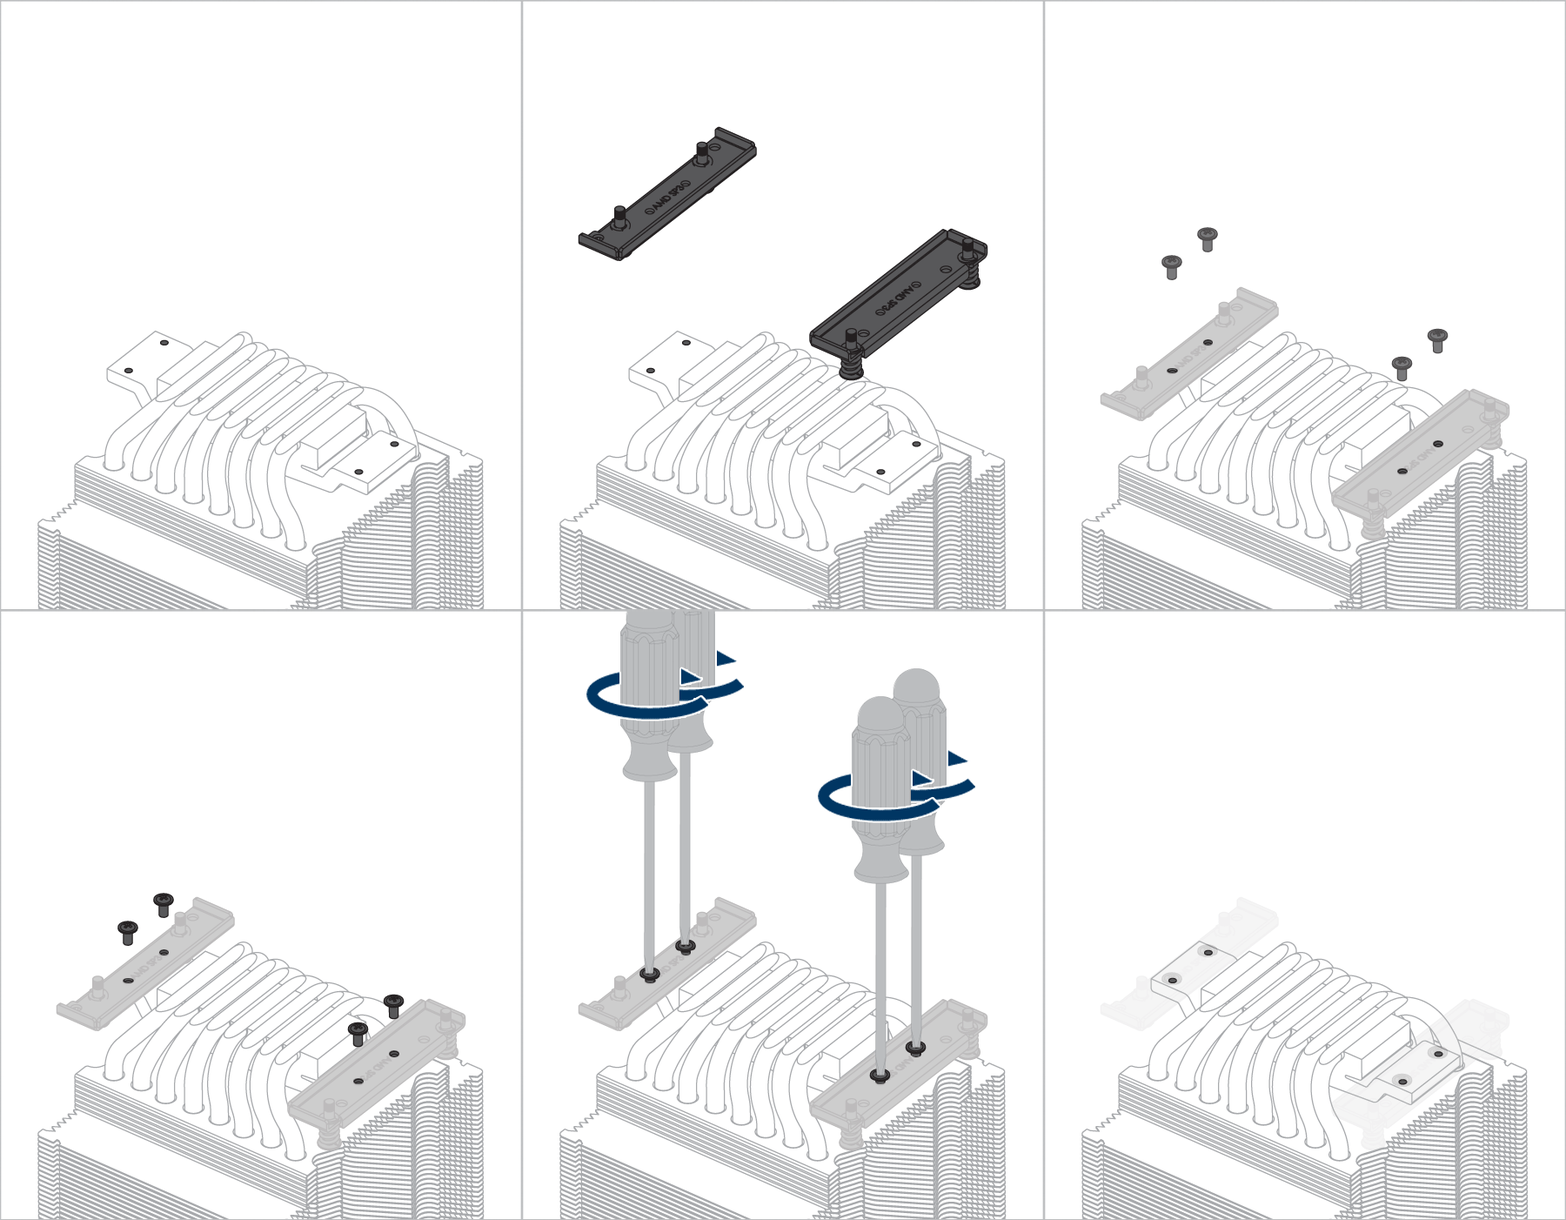
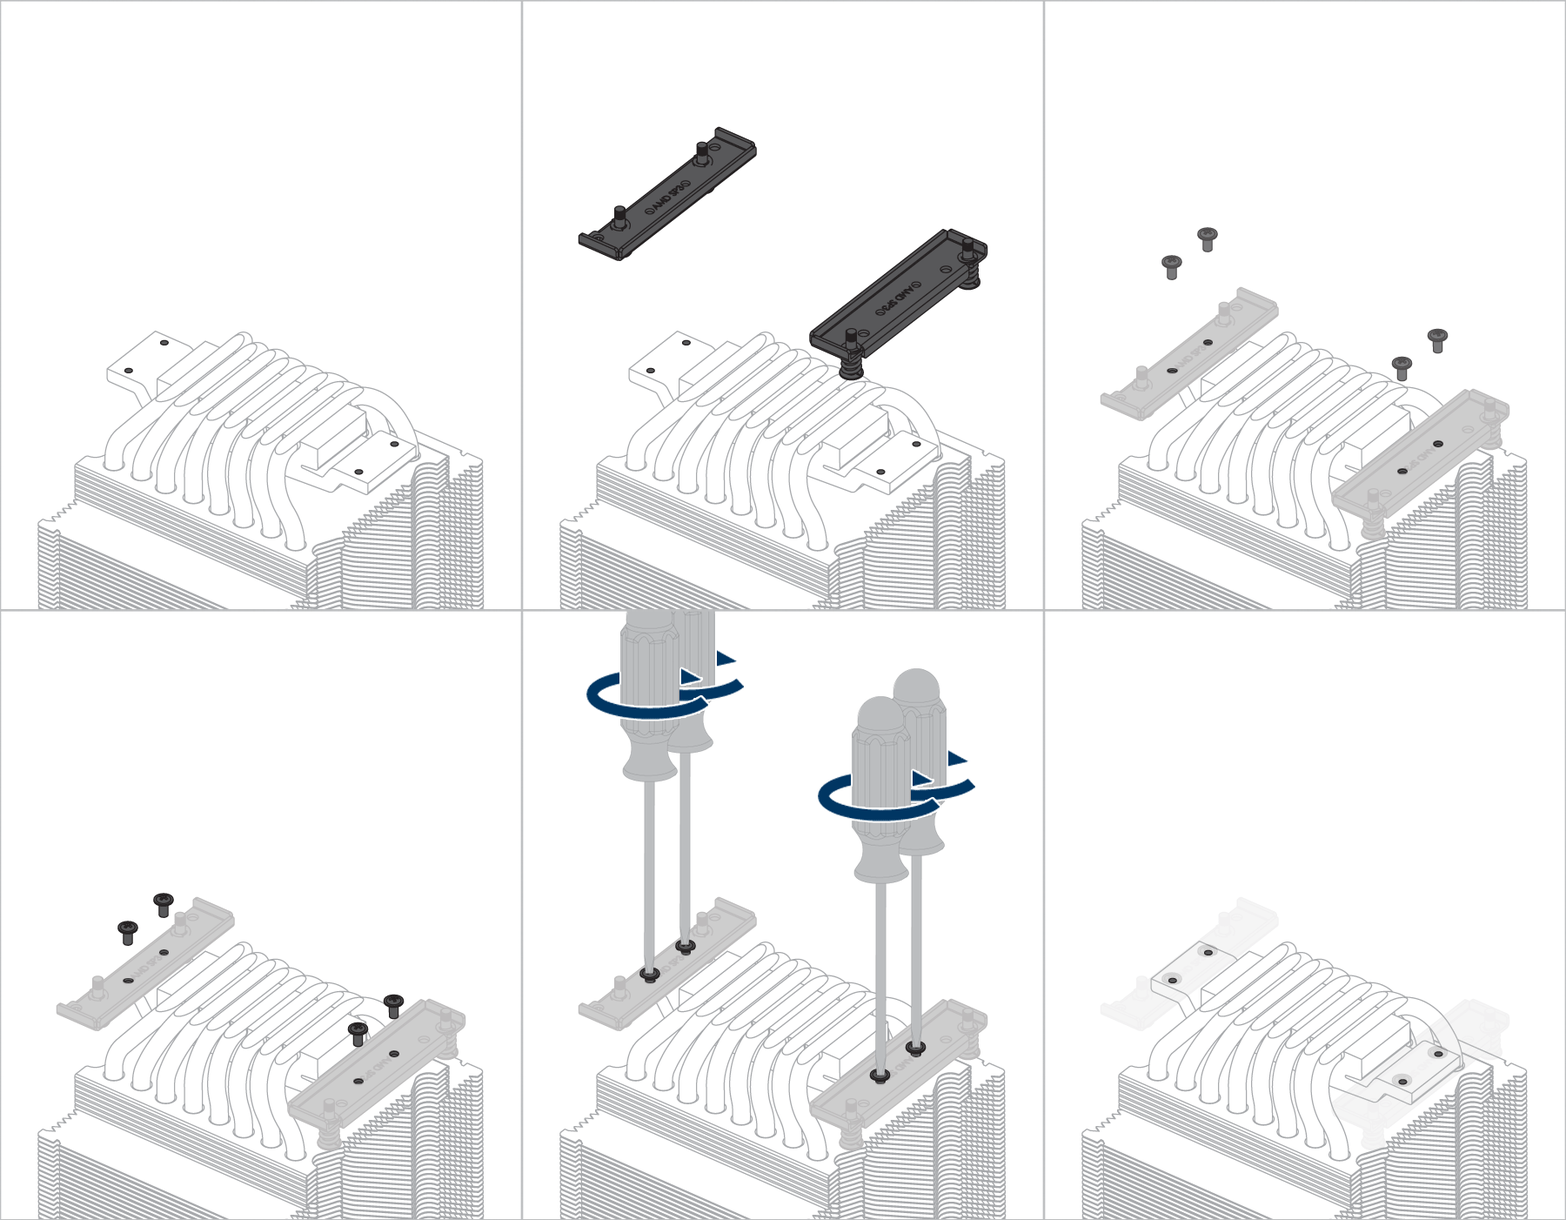
Please note: The AMD mounting clips are asymmetric. Make sure to mount the clips correctly by following the instruction below.
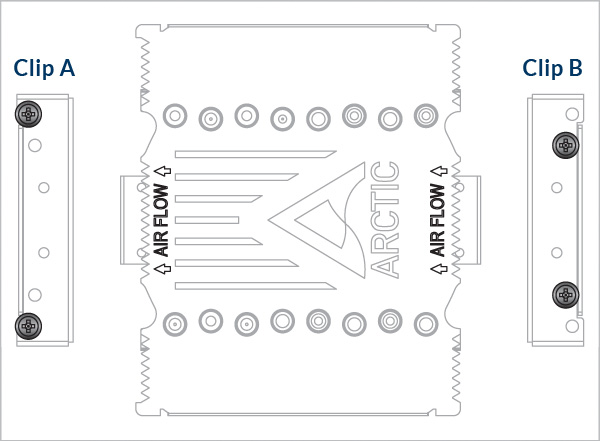
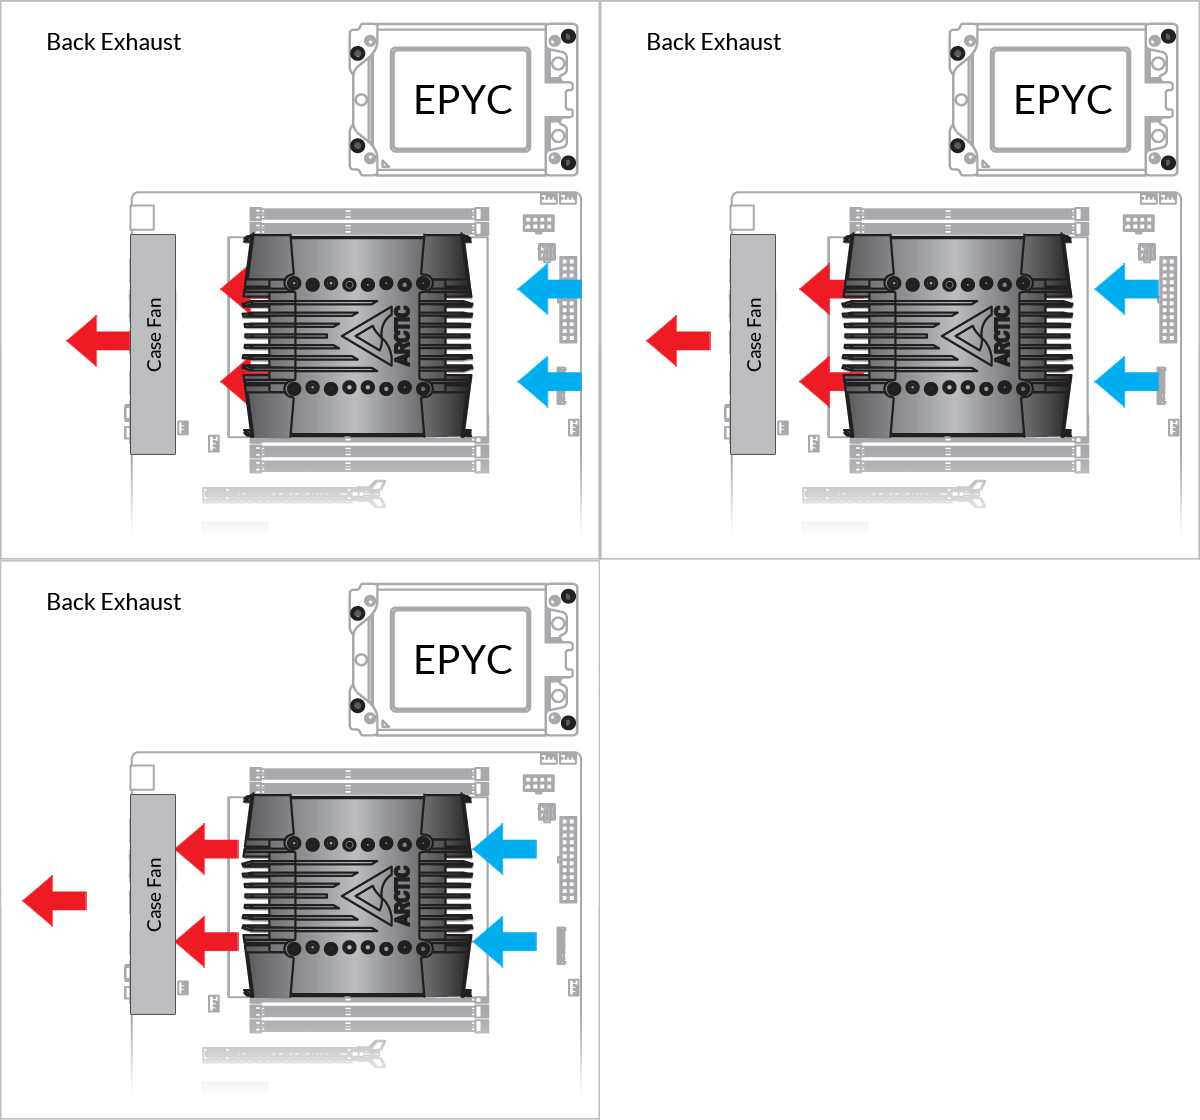
Line up the Clip A to the outlet airflow arrow, and align the Clip B to the inlet airflow arrow.
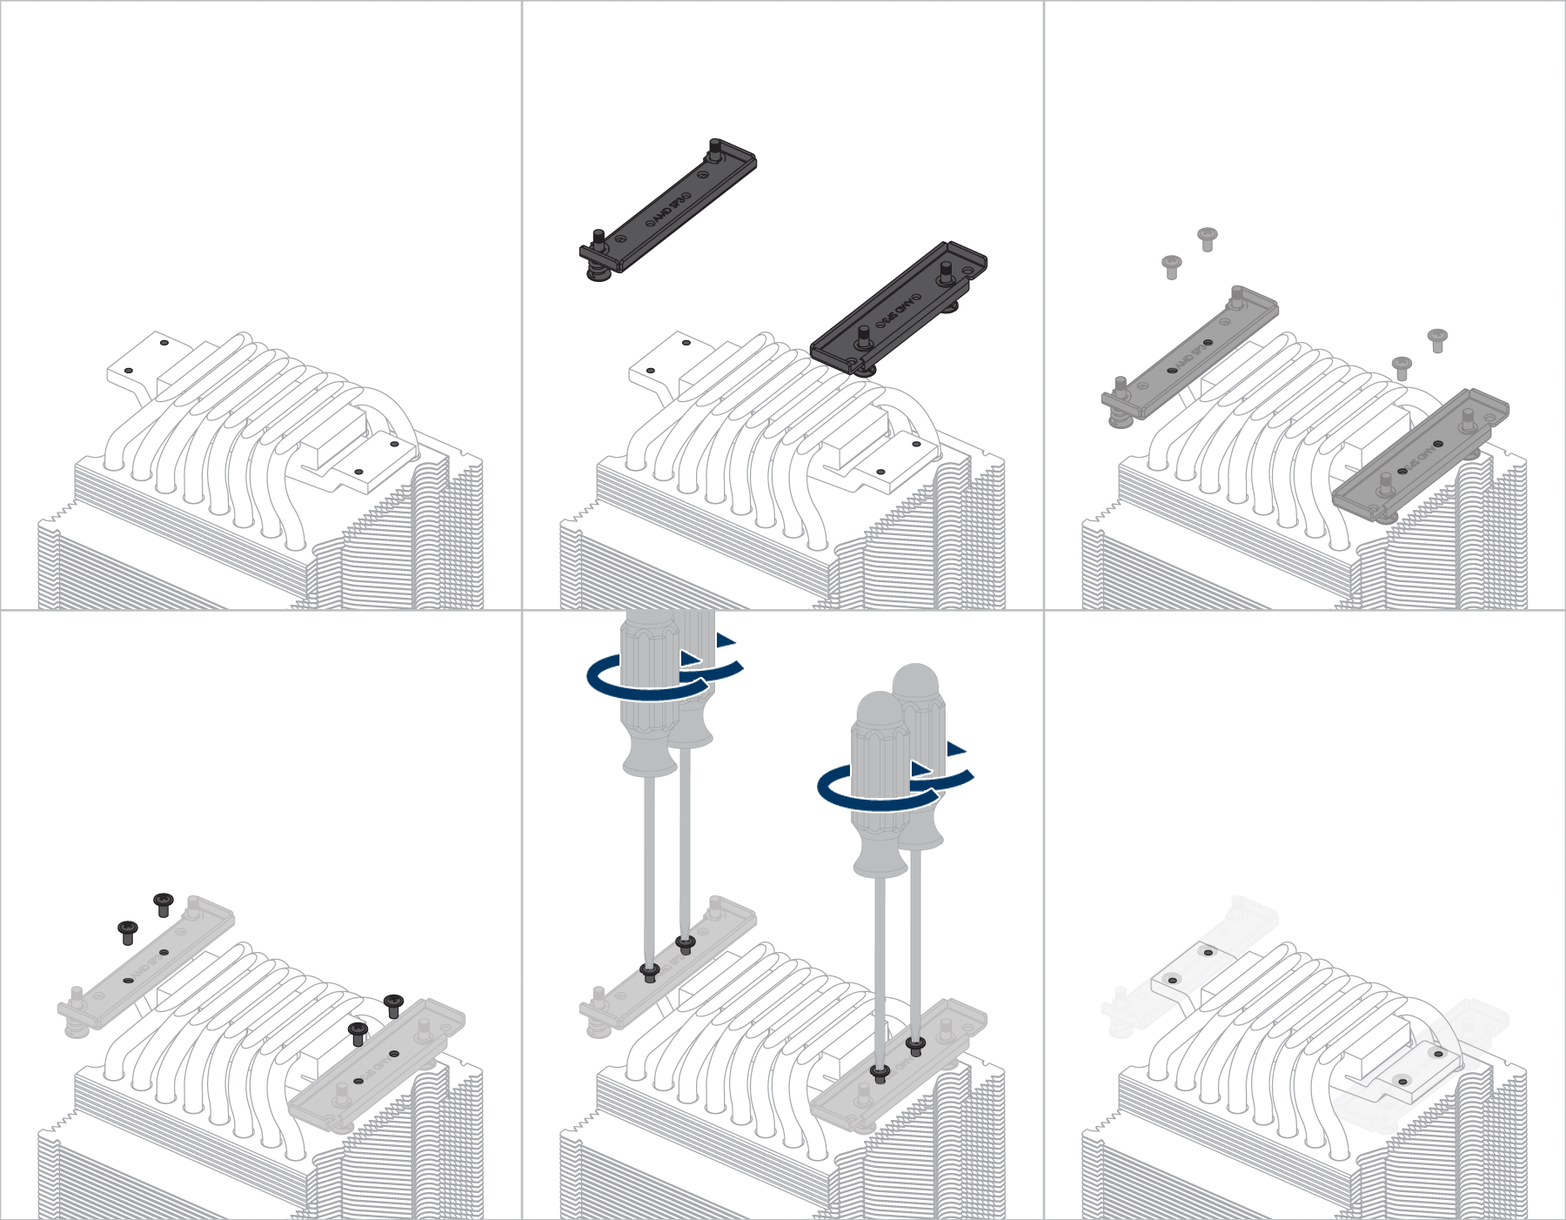

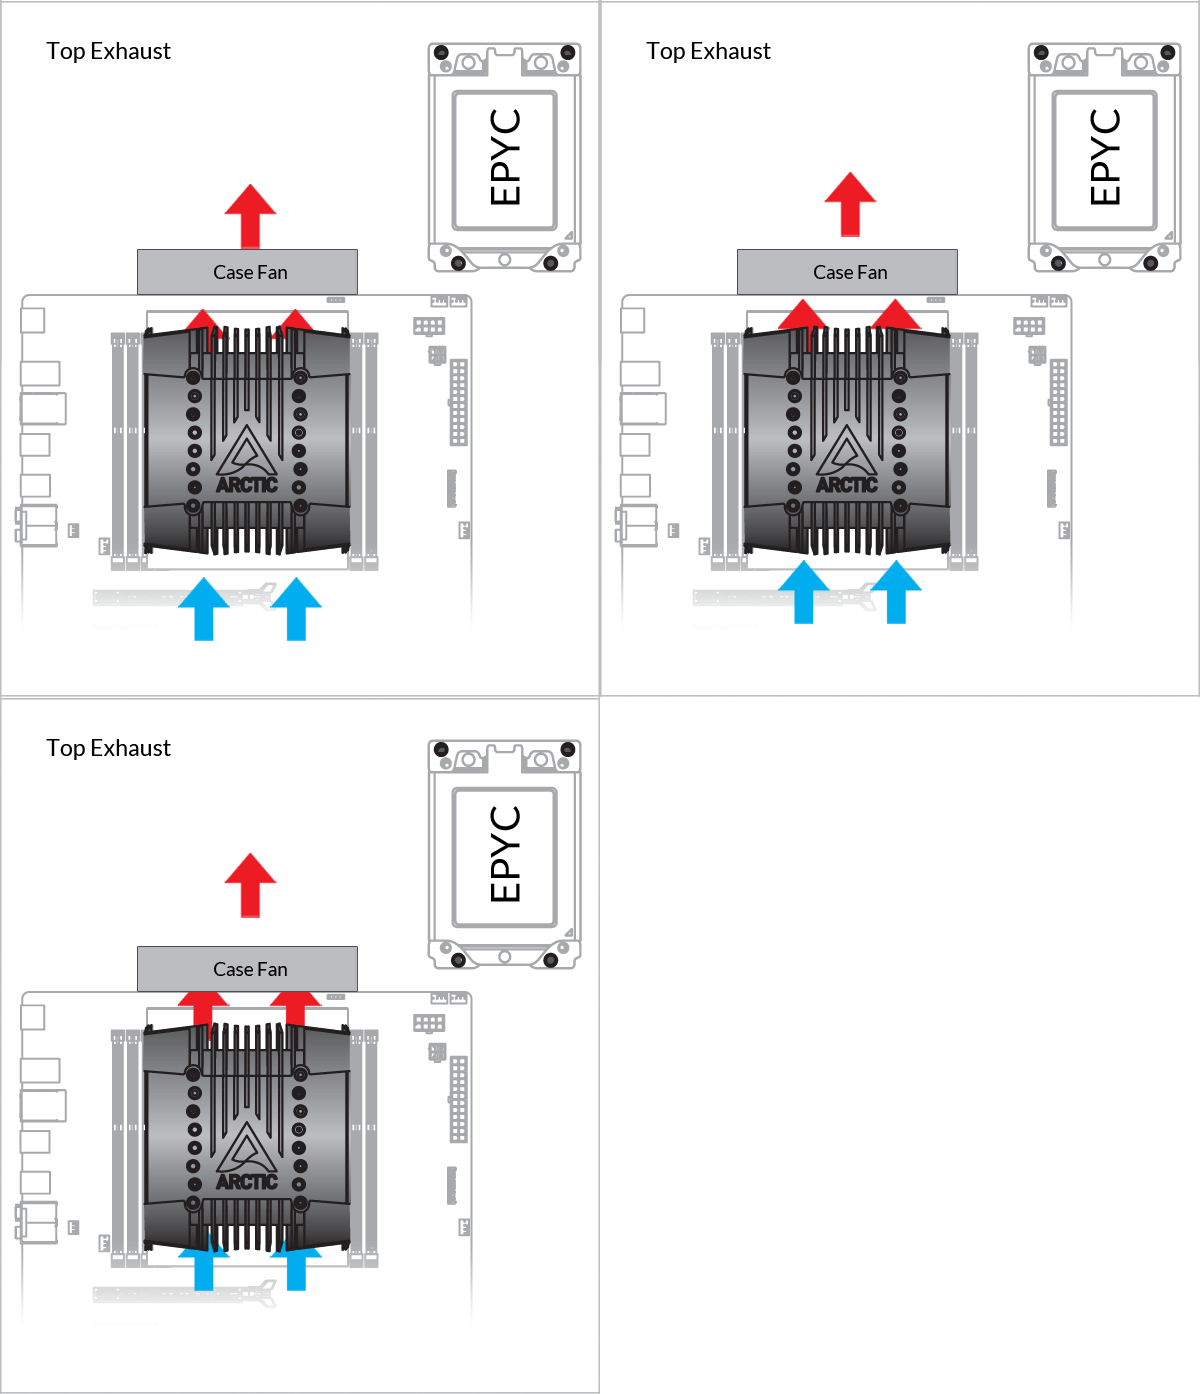
 Attention
Please note: The AMD mounting clips are asymmetric. Make sure to mount the clips correctly by following the instruction below.
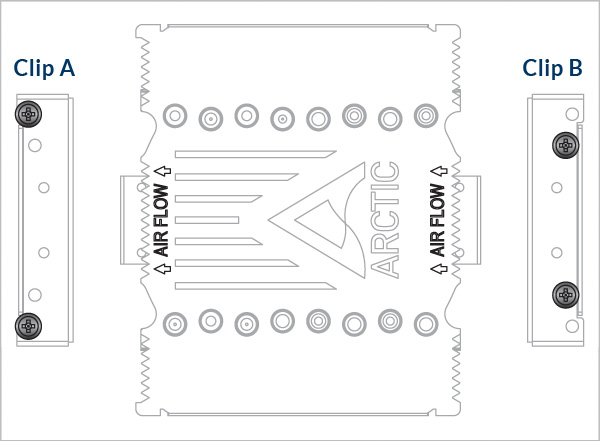
Line up the Clip A to the outlet airflow arrow, and align the Clip B to the inlet airflow arrow.


 Attention
Please note: The AMD mounting clips are asymmetric. Make sure to mount the clips correctly by following the instruction below.
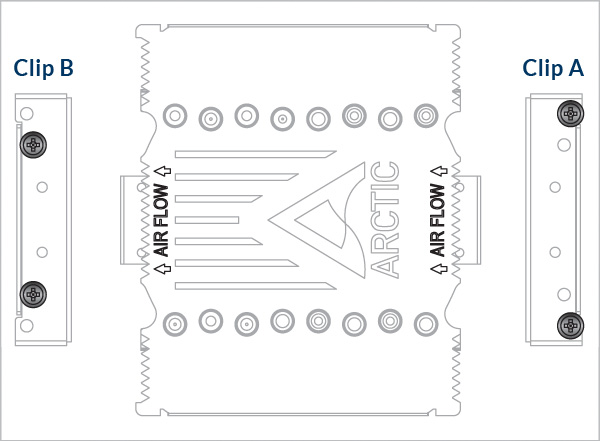
Line up the Clip A to the inlet airflow arrow, and align the Clip B to the outlet airflow arrow.

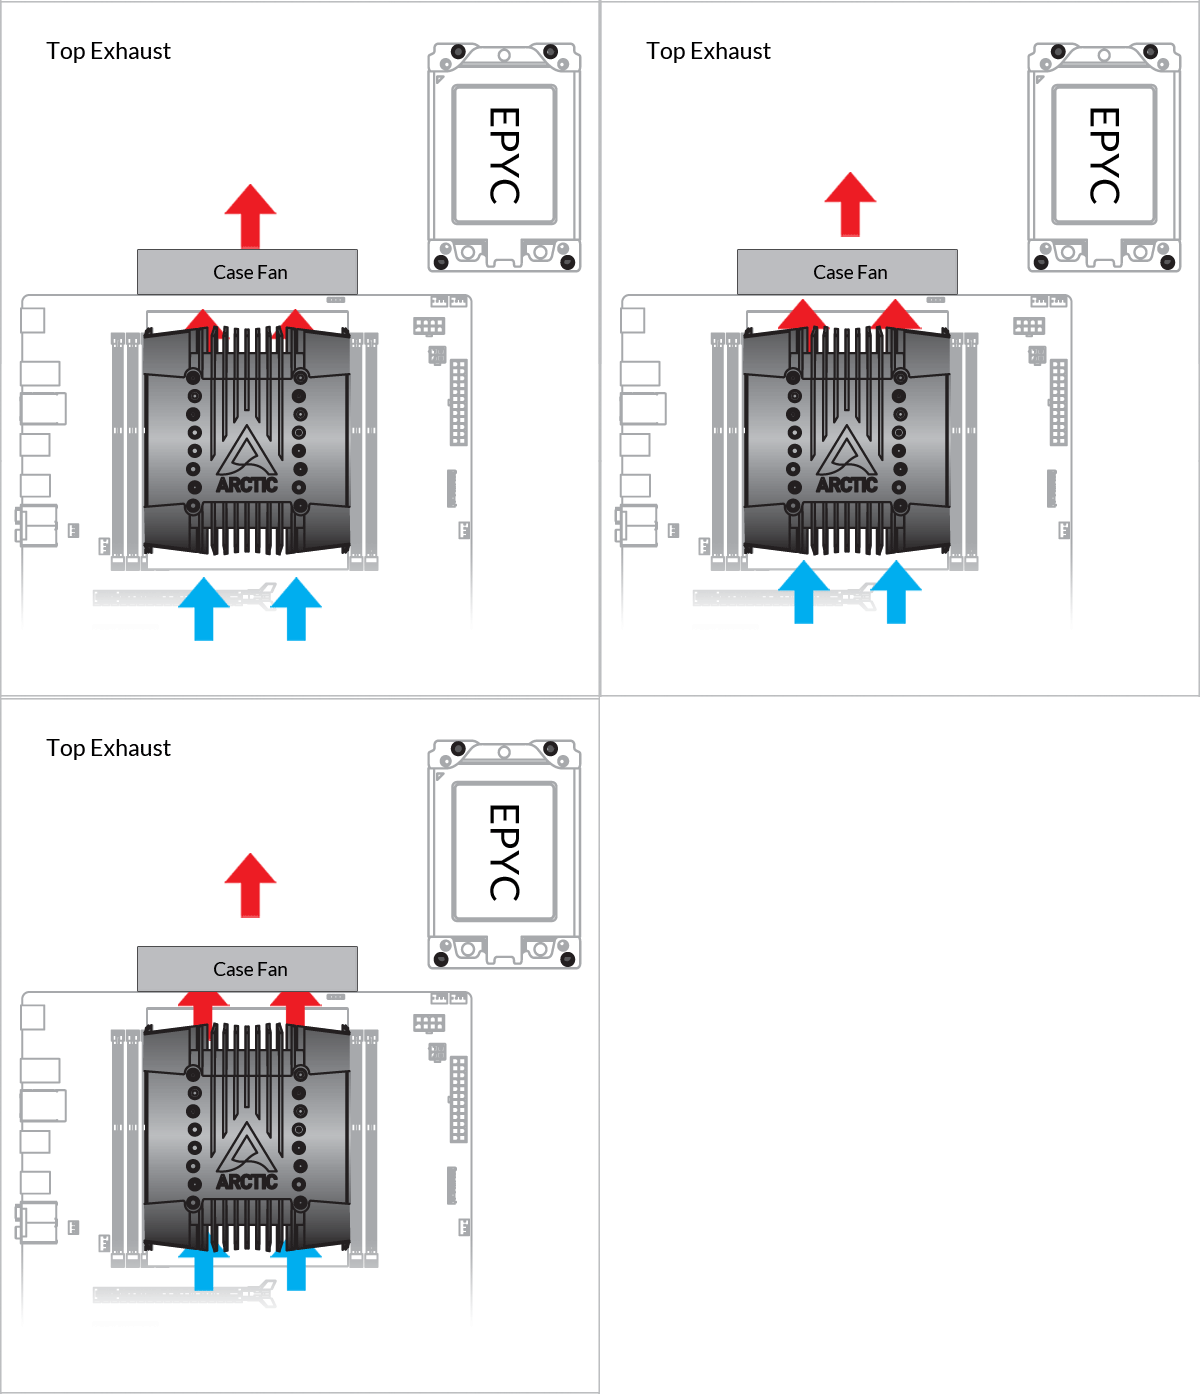
 Attention
Please note: The AMD mounting clips are asymmetric. Make sure to mount the clips correctly by following the instruction below.
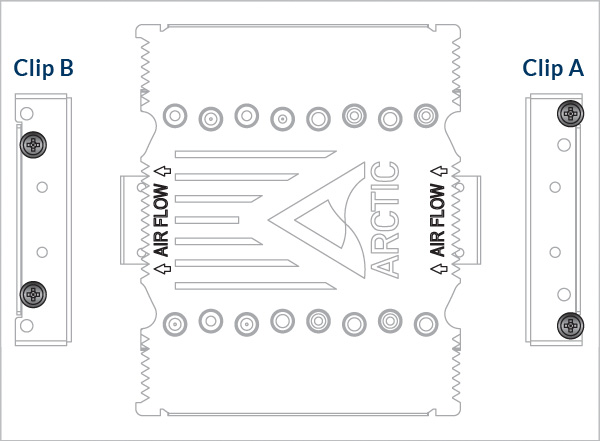
Line up the Clip A to the inlet airflow arrow, and align the Clip B to the outlet airflow arrow.


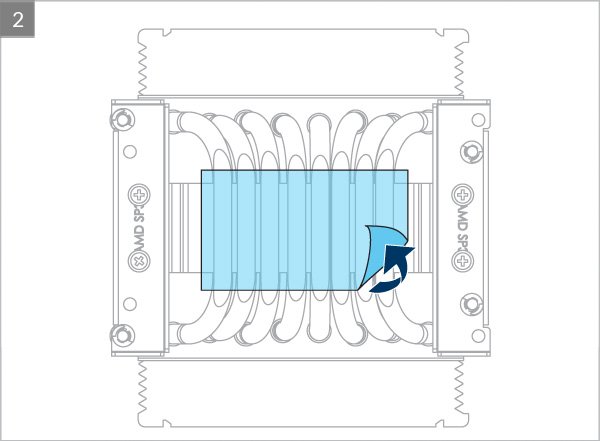
* Follow this link to learn more about how to apply thermal pastes correctly.
Install push fan on the inlet side of the heatsink

Install pull fan on the outlet side of the heatsink

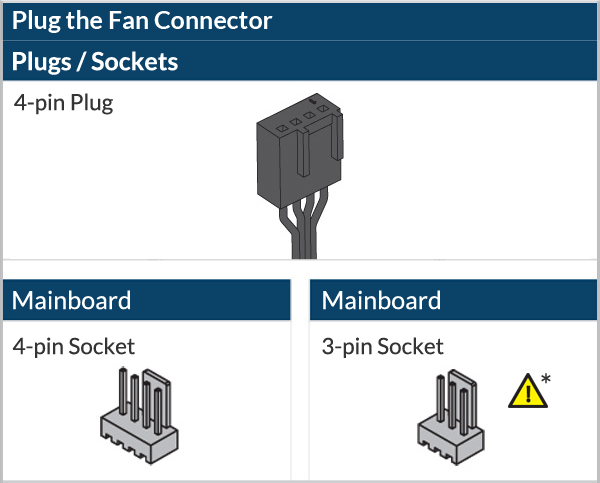
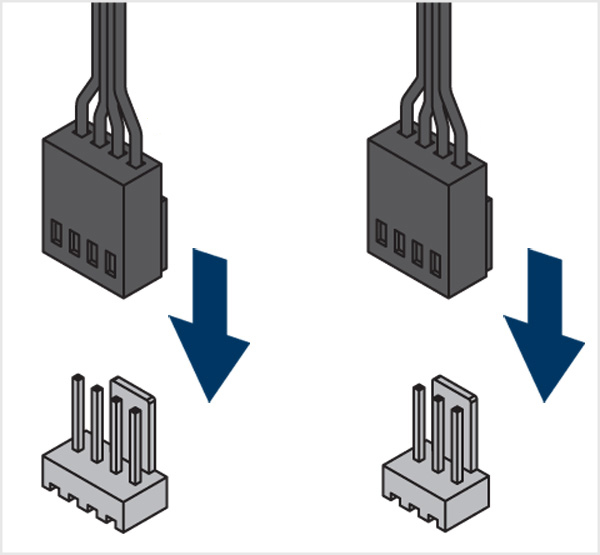
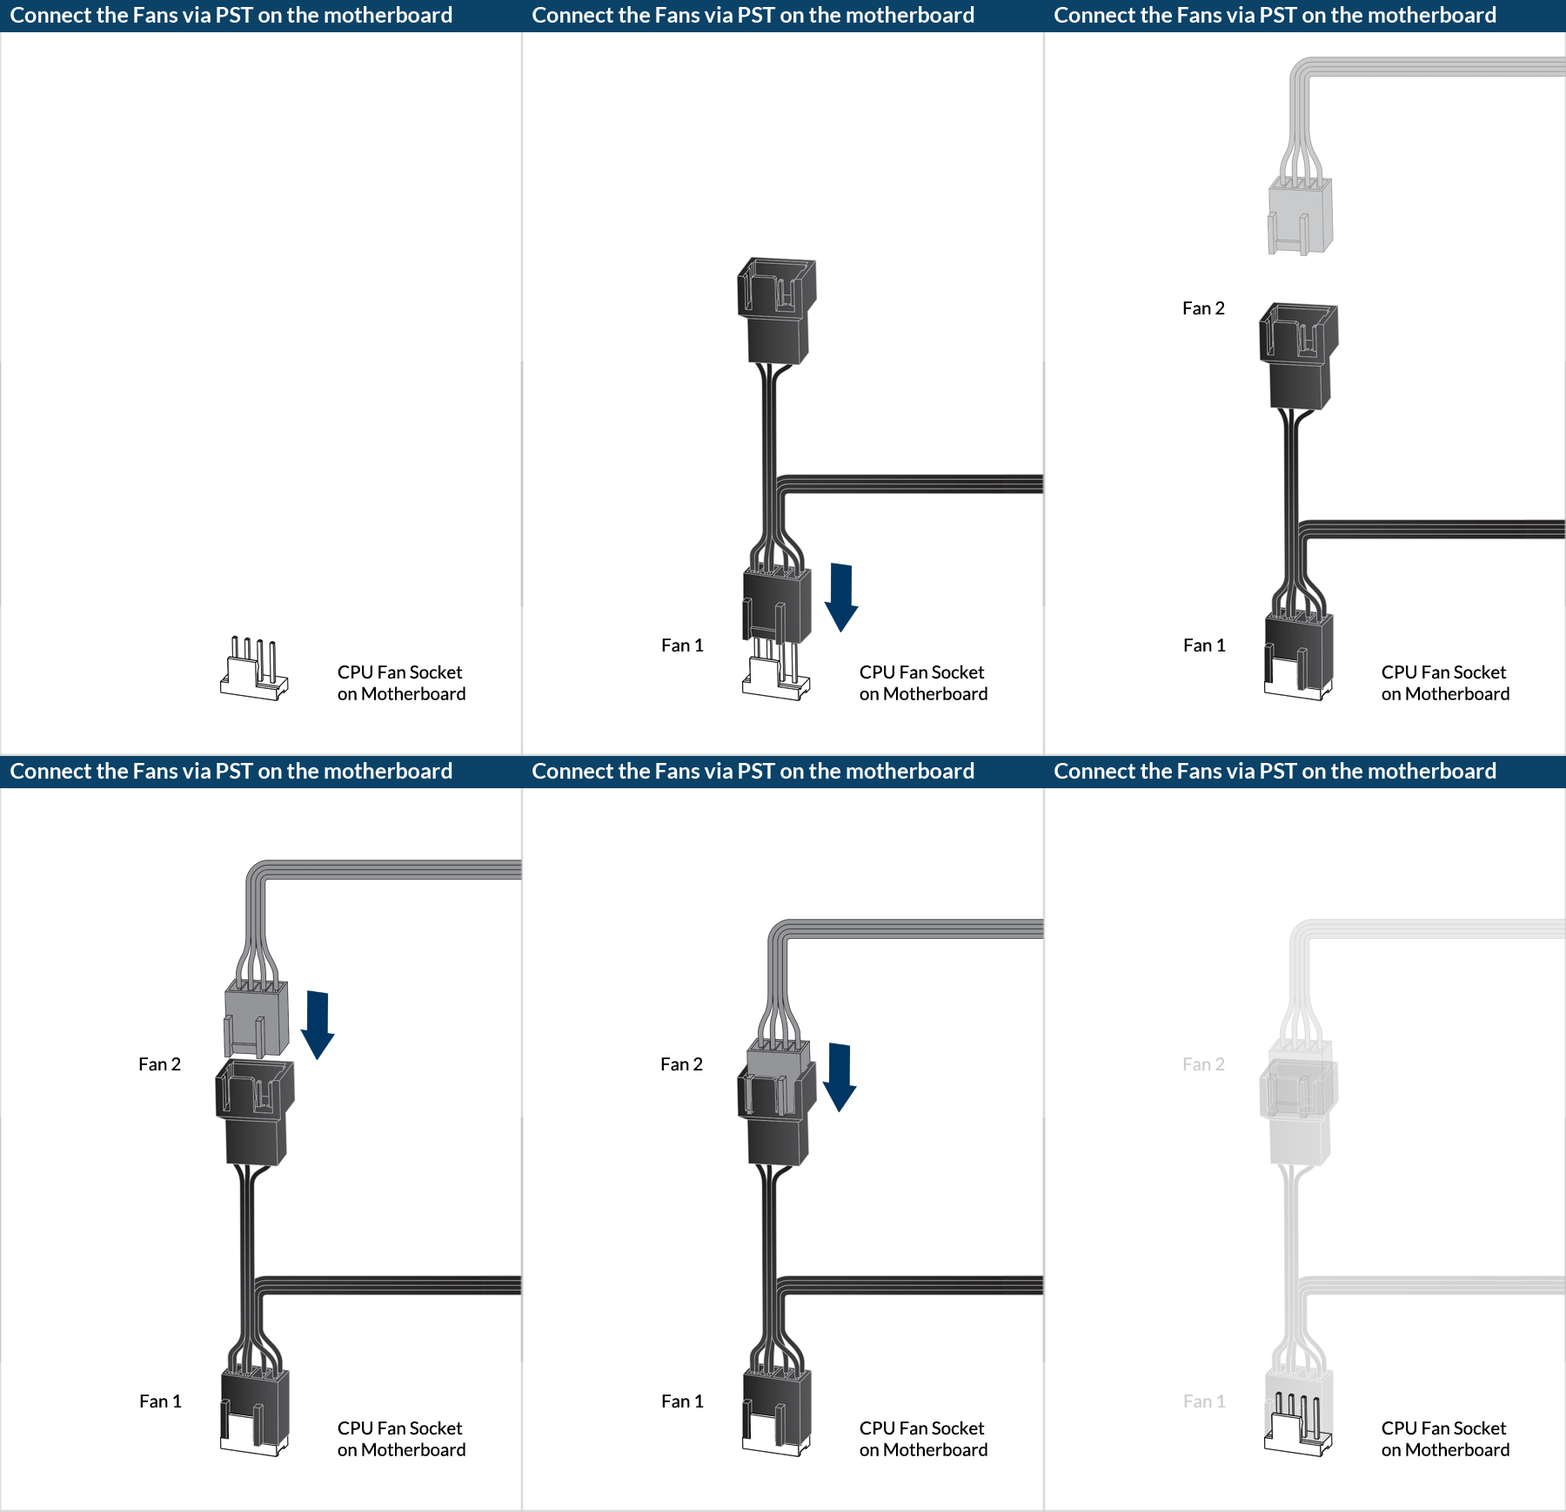
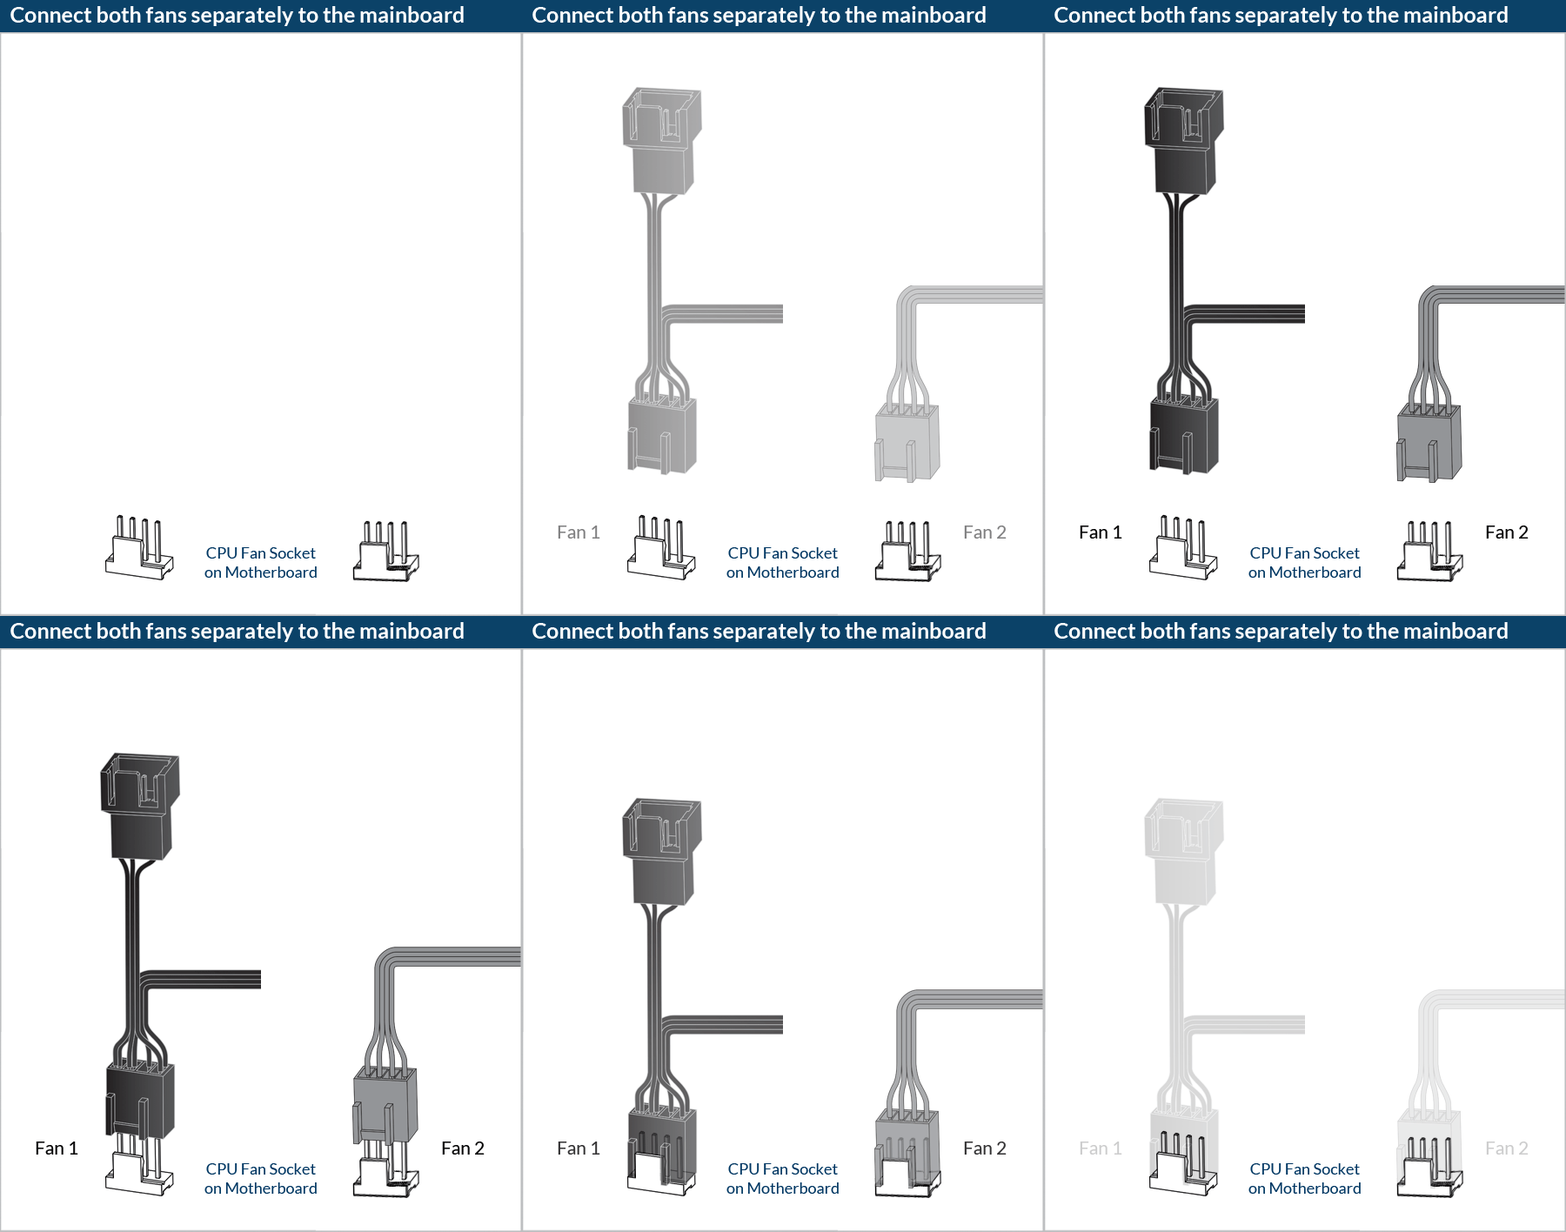
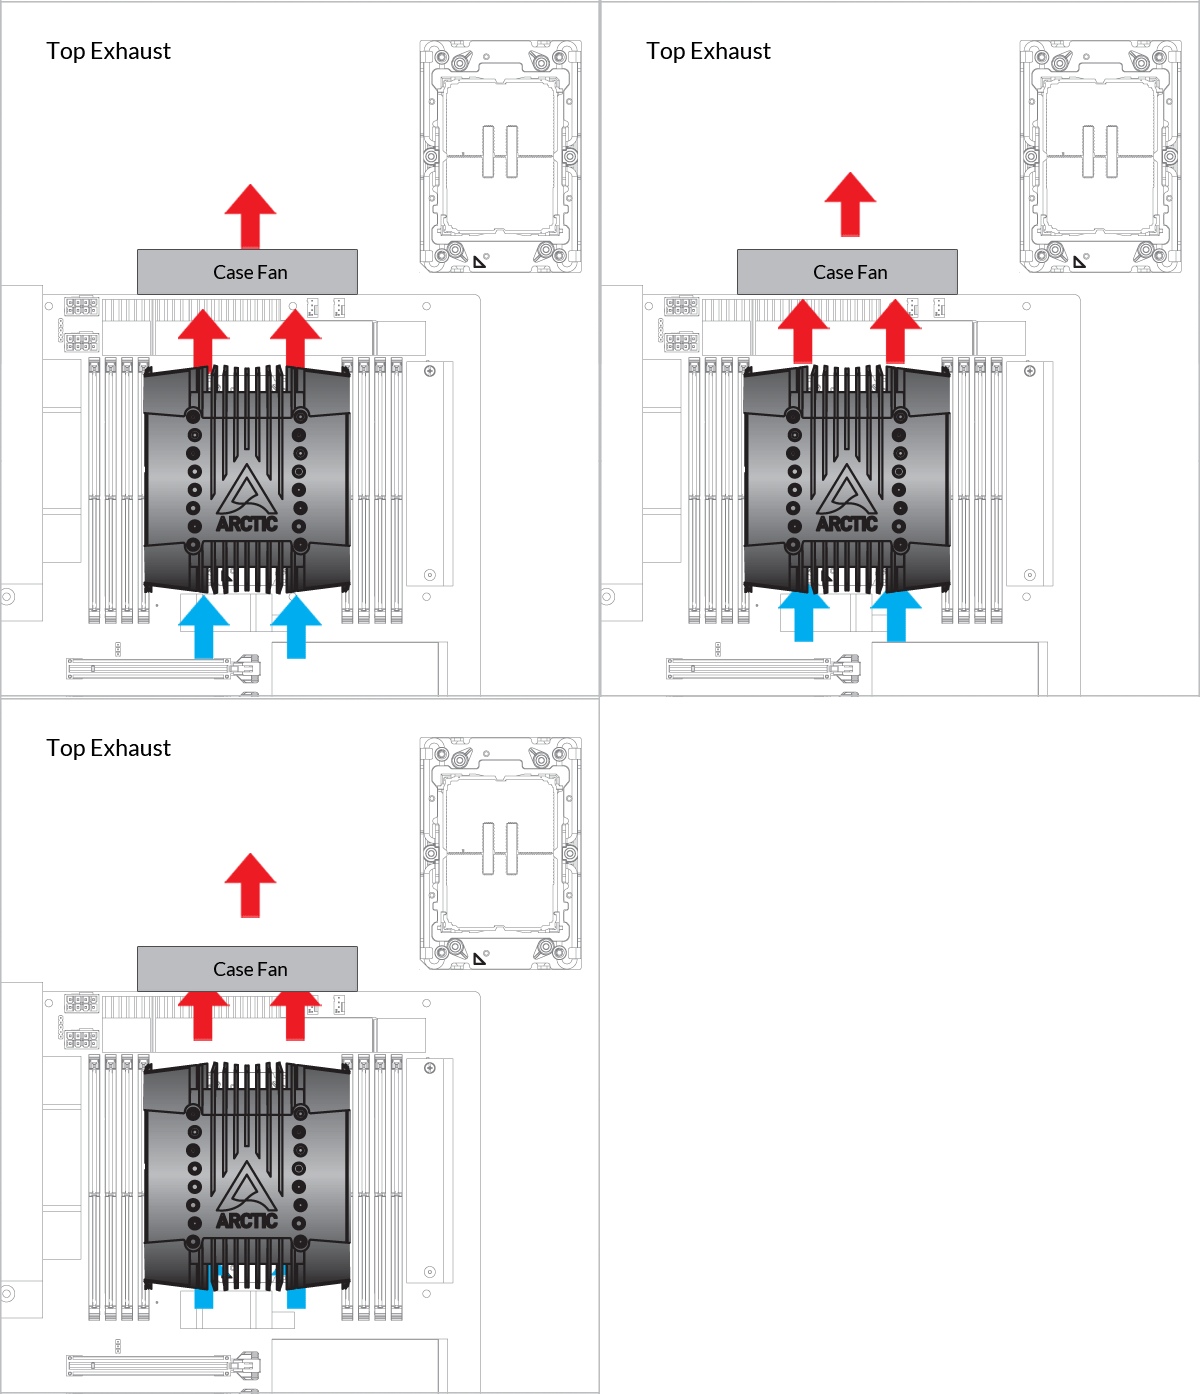
* Some mechanical interference with surrounding components may appear. The fan will not be controllable by PWM.
Required Tools
 T30 Torx Screwdriver

Attention
The Intel mounting clips have two sets of mounting holes.Please make sure to select the correct fixing holes for your socket.
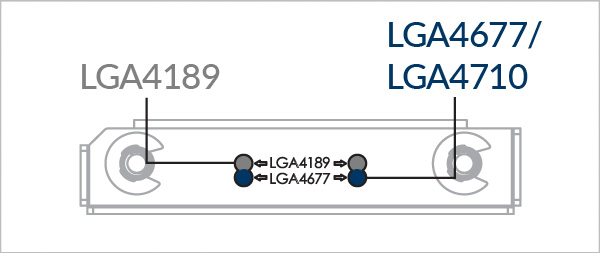


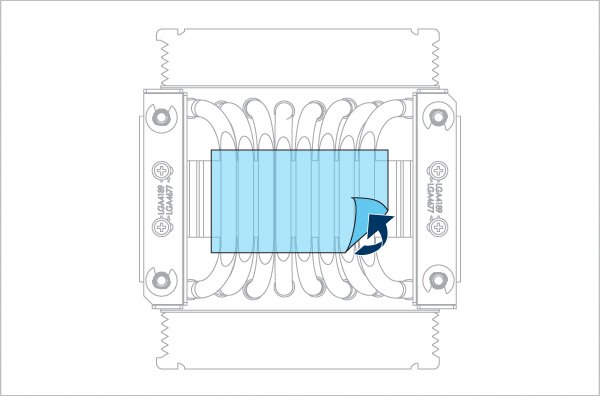
Attention
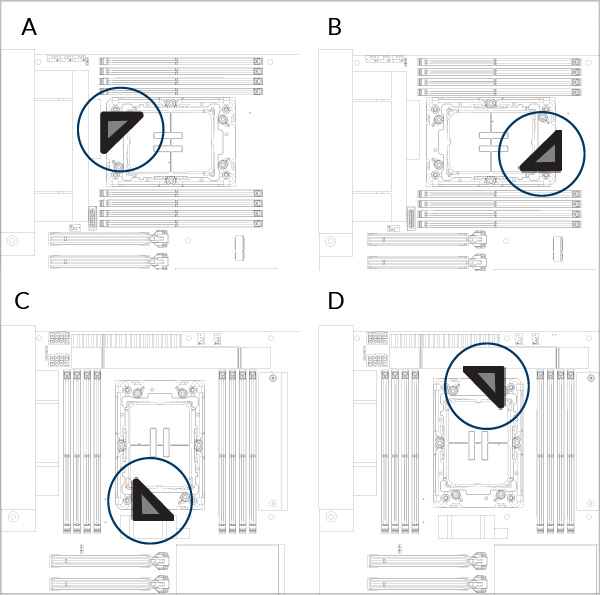
Please be careful when removing the dust cover and check the socket orientation. Look at the socket closely and see if the pins are intact. A damaged socket may prevent the system from booting.
Check your socket orientation

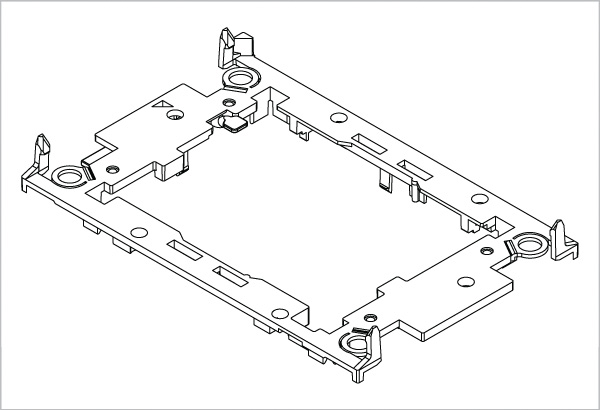
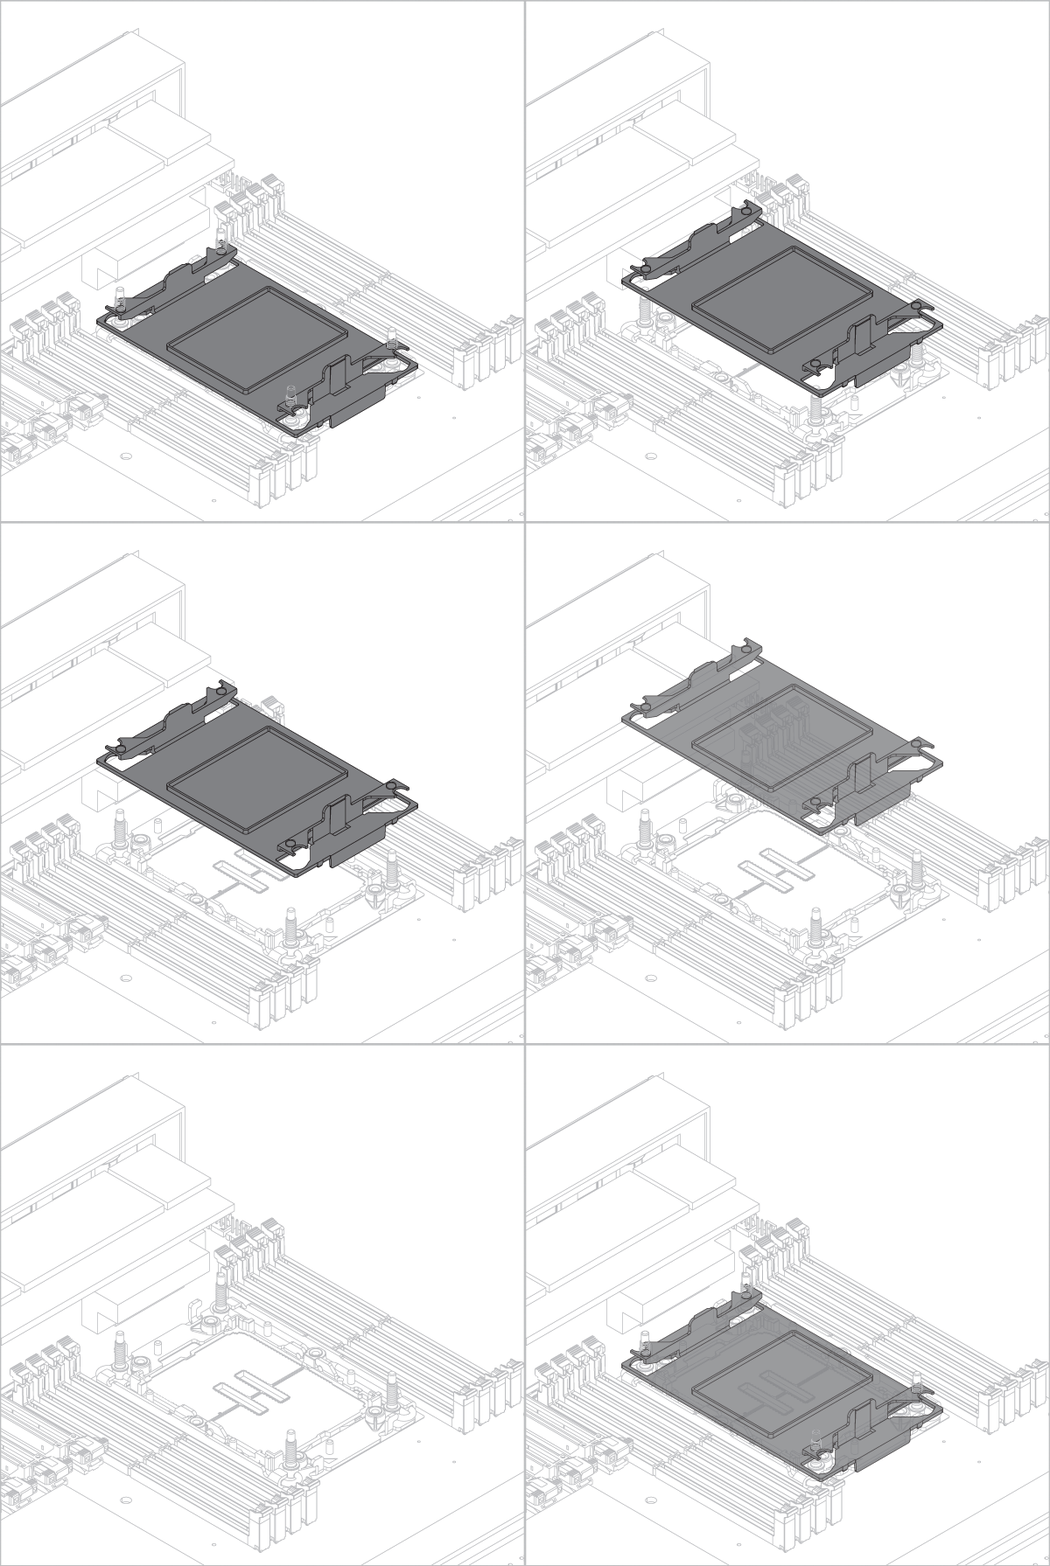
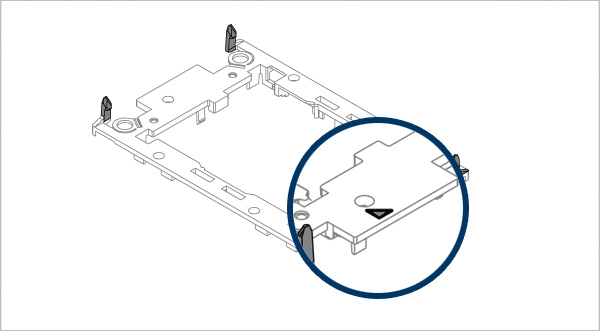
Please note that installing an LGA4189/ LGA4677 processor and heatsink requires a plastic CPU carrier such as the one shown above. These carriers are included with boxed retail CPUs or Motherboard and available separately via Intel sales partners for tray type CPUs.
Contact ARCTIC Support if the LGA4189 CPU Carrier are not available on your product version.
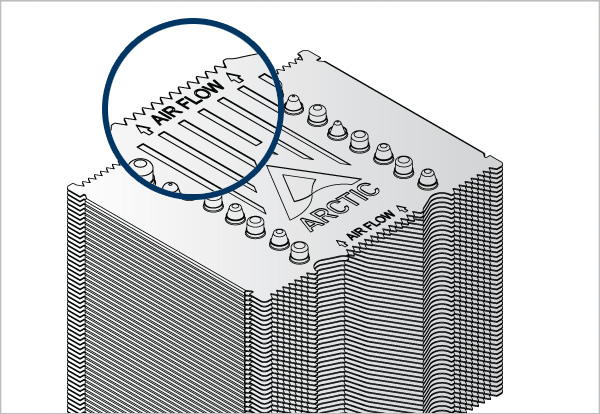

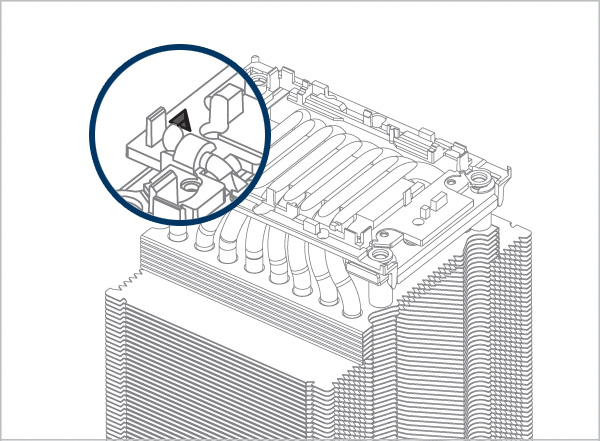
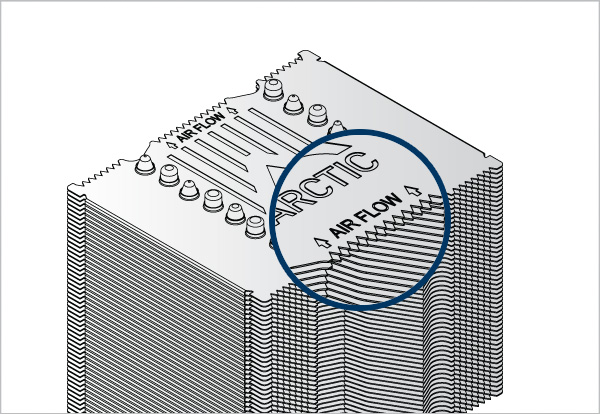
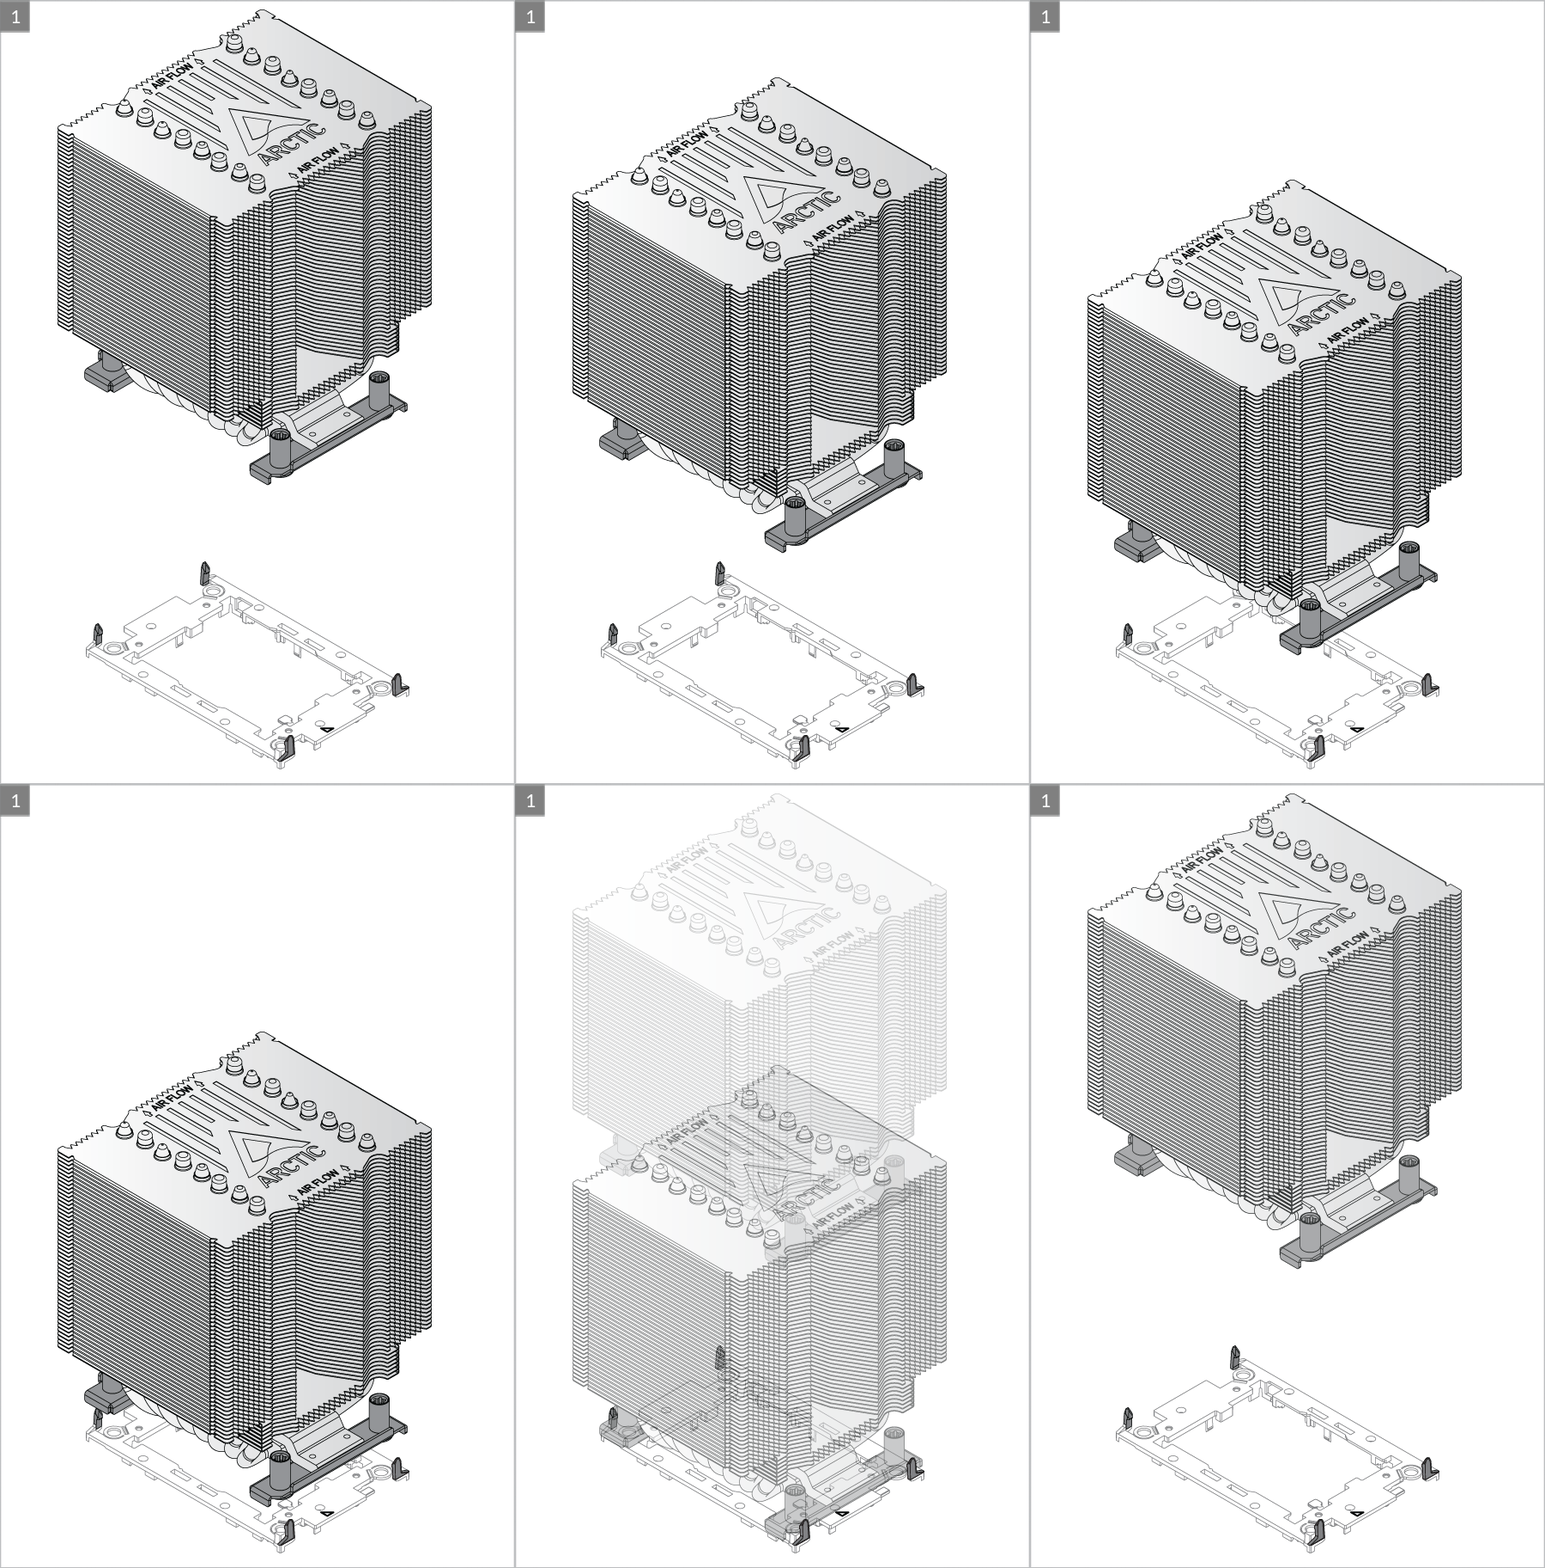
Line up Pin1 Marking on CPU carrier to outlet airflow arrow on Heatsink
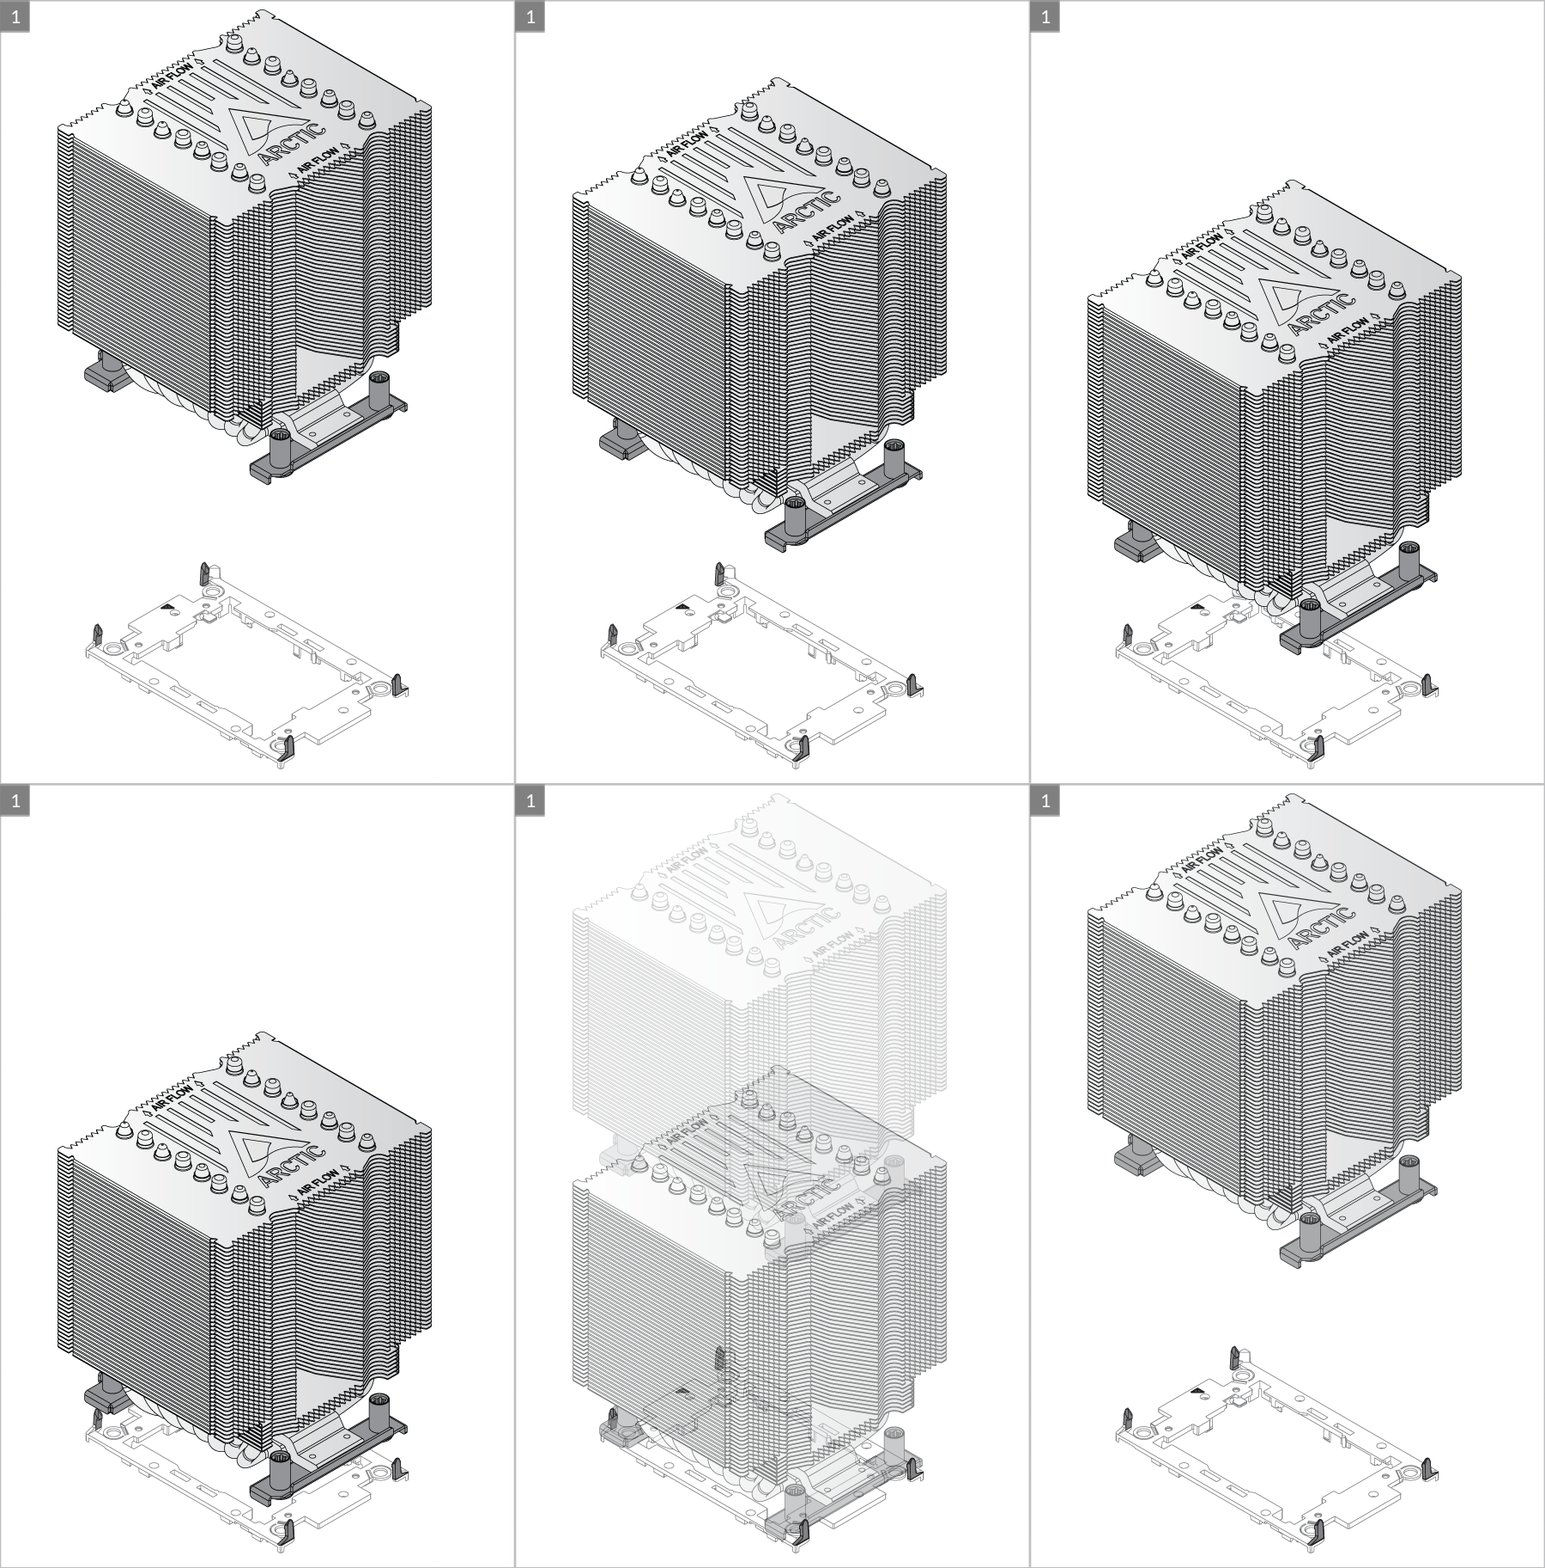

Make sure all locking tabs are properly attached to heatsink
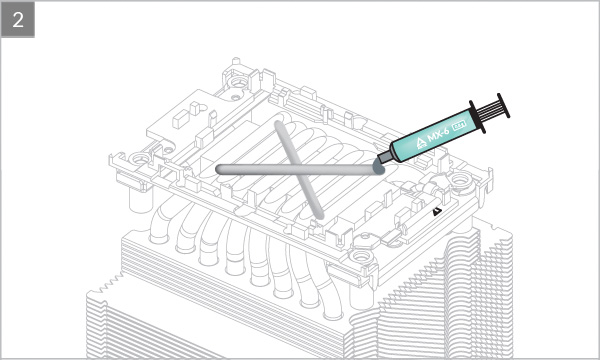


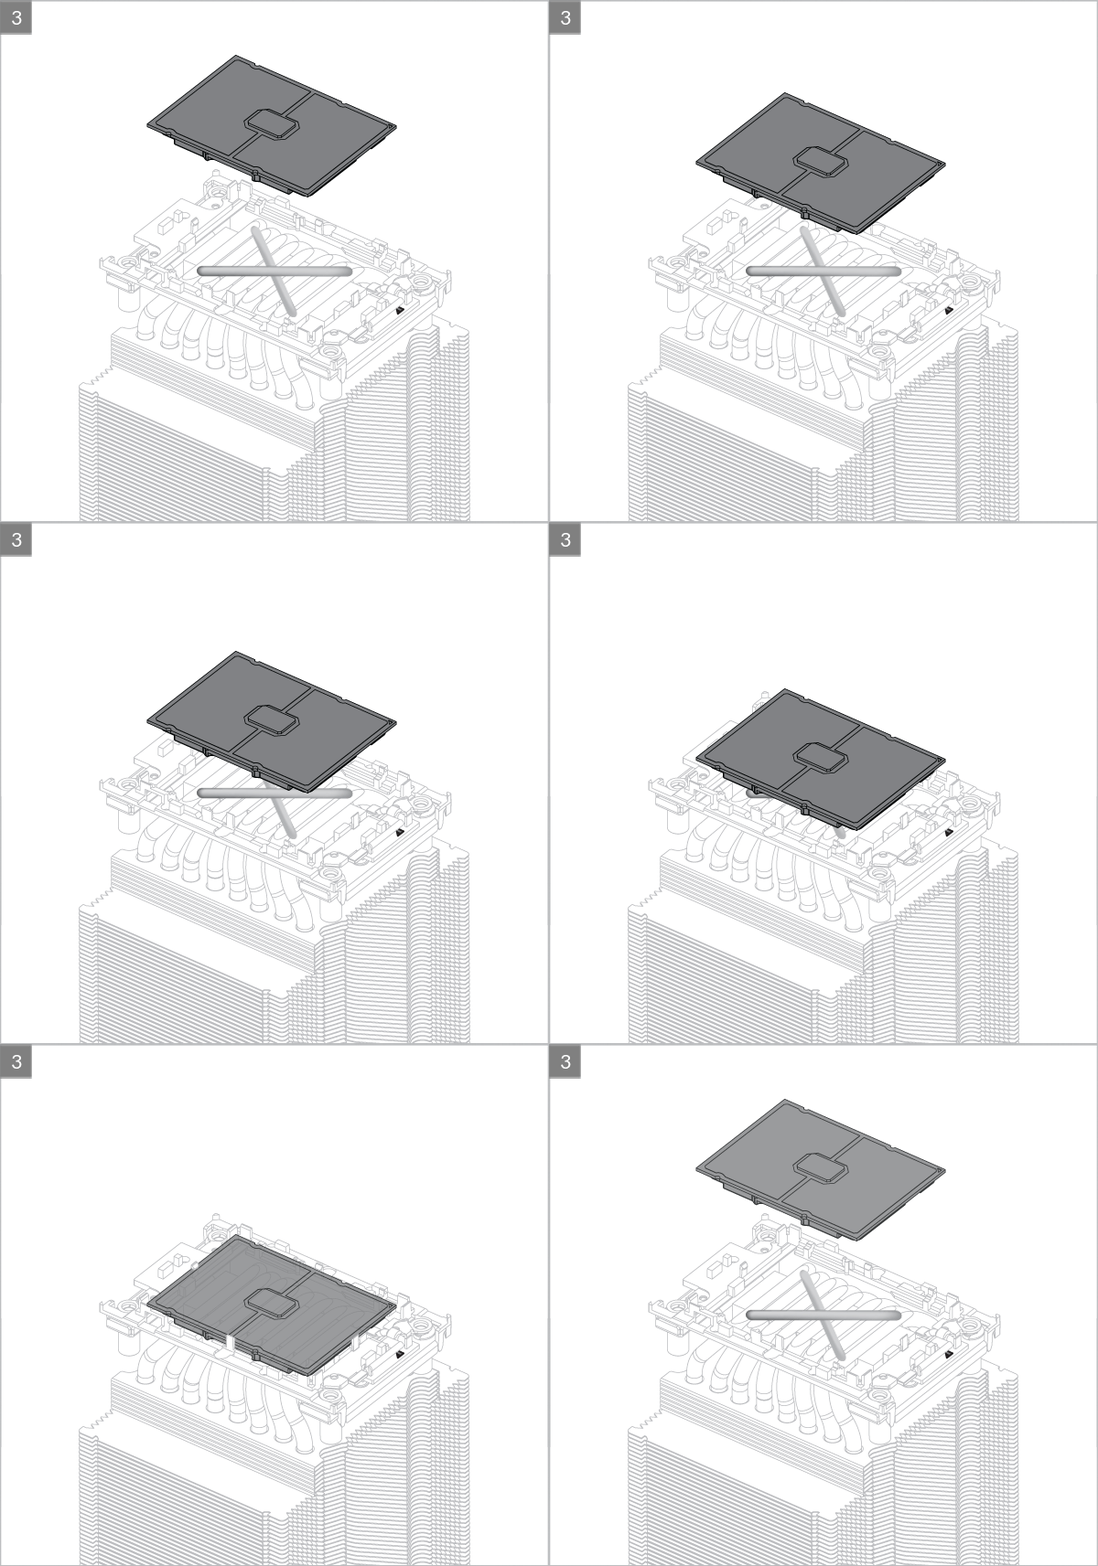
Align Pin1 marking on CPU carrier to Pin1 marking on CPU
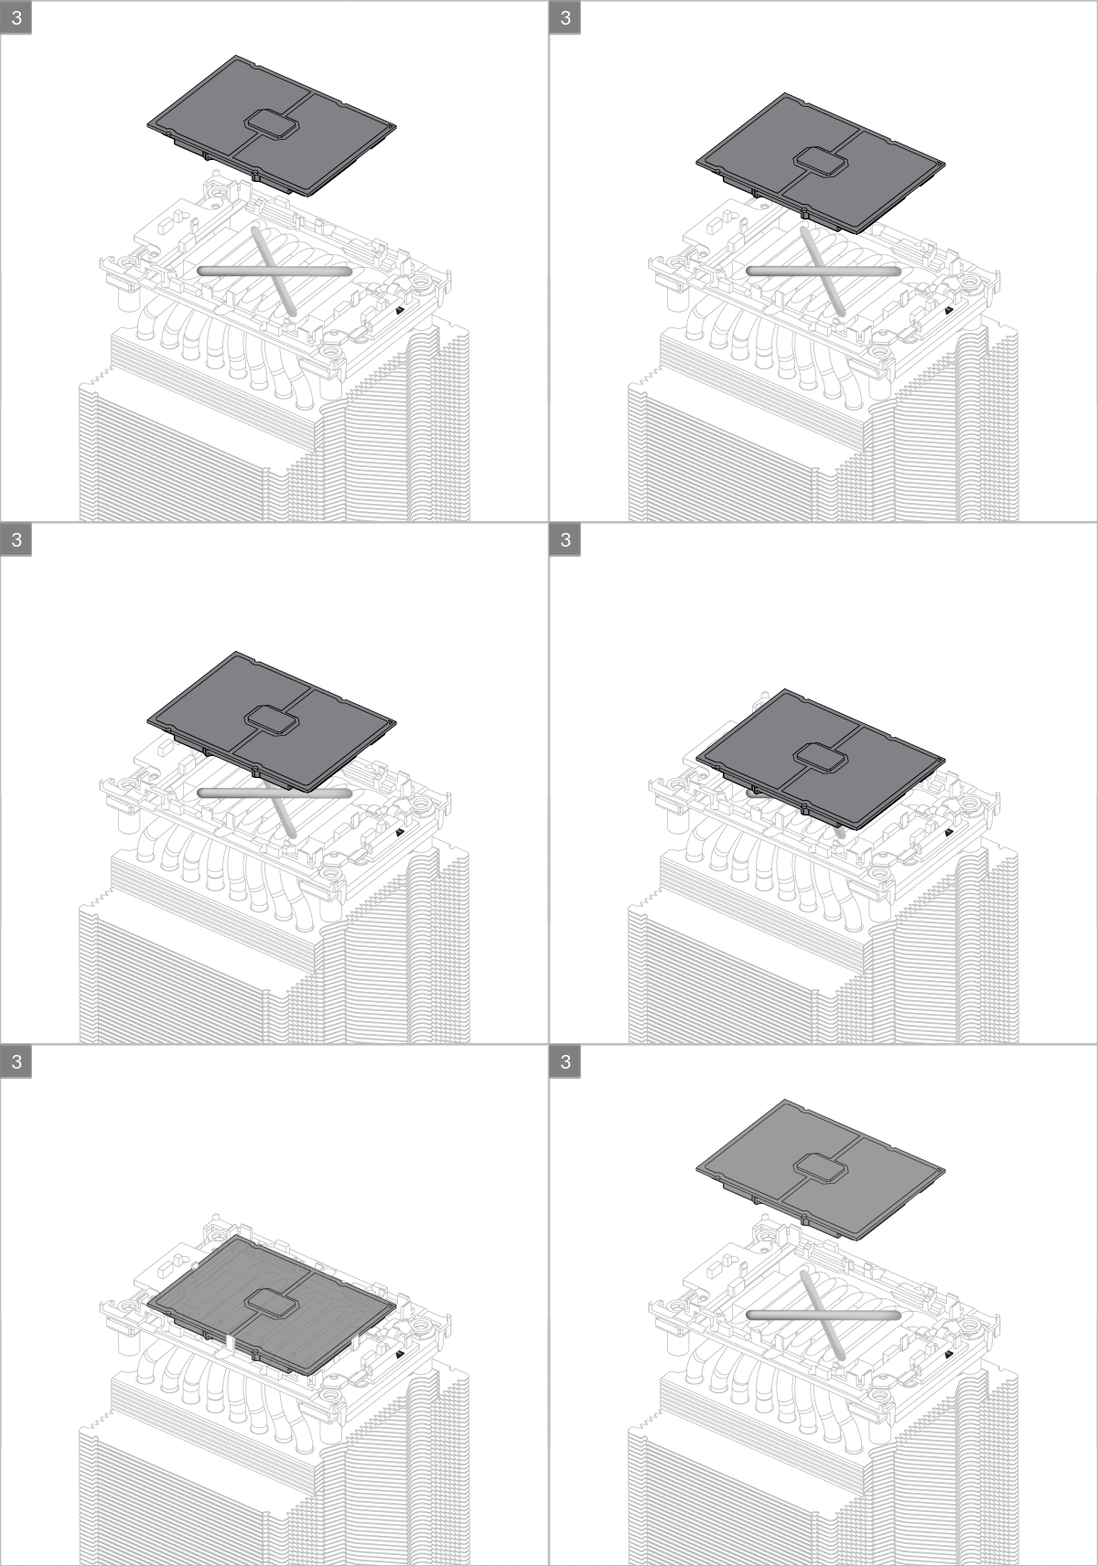

Make sure all locking tabs are properly attached to CPU.
Warning
Unsecured locking tabs may drop the CPU and cause damage to the CPU or the motherboard

Please note that installing an LGA4189/ LGA4677 processor and heatsink requires a plastic CPU carrier such as the one shown above. These carriers are included with boxed retail CPUs or Motherboard and available separately via Intel sales partners for tray type CPUs.
Contact ARCTIC Support if the LGA4189 CPU Carrier are not available on your product version.
Line up Pin1 Marking on CPU carrier to inlet airflow arrow on Heatsink

Make sure all locking tabs are properly attached to heatsink


Align Pin1 marking on CPU carrier to Pin1 marking on CPU

Make sure all locking tabs are properly attached to CPU.
Warning
Unsecured locking tabs may drop the CPU and cause damage to the CPU or the motherboard

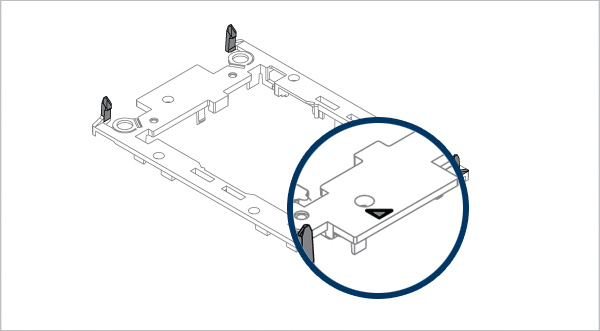
Please note that installing an LGA4189/ LGA4677 processor and heatsink requires a plastic CPU carrier such as the one shown above. These carriers are included with boxed retail CPUs or Motherboard and available separately via Intel sales partners for tray type CPUs.
Contact ARCTIC Support if the LGA4189 CPU Carrier are not available on your product version.

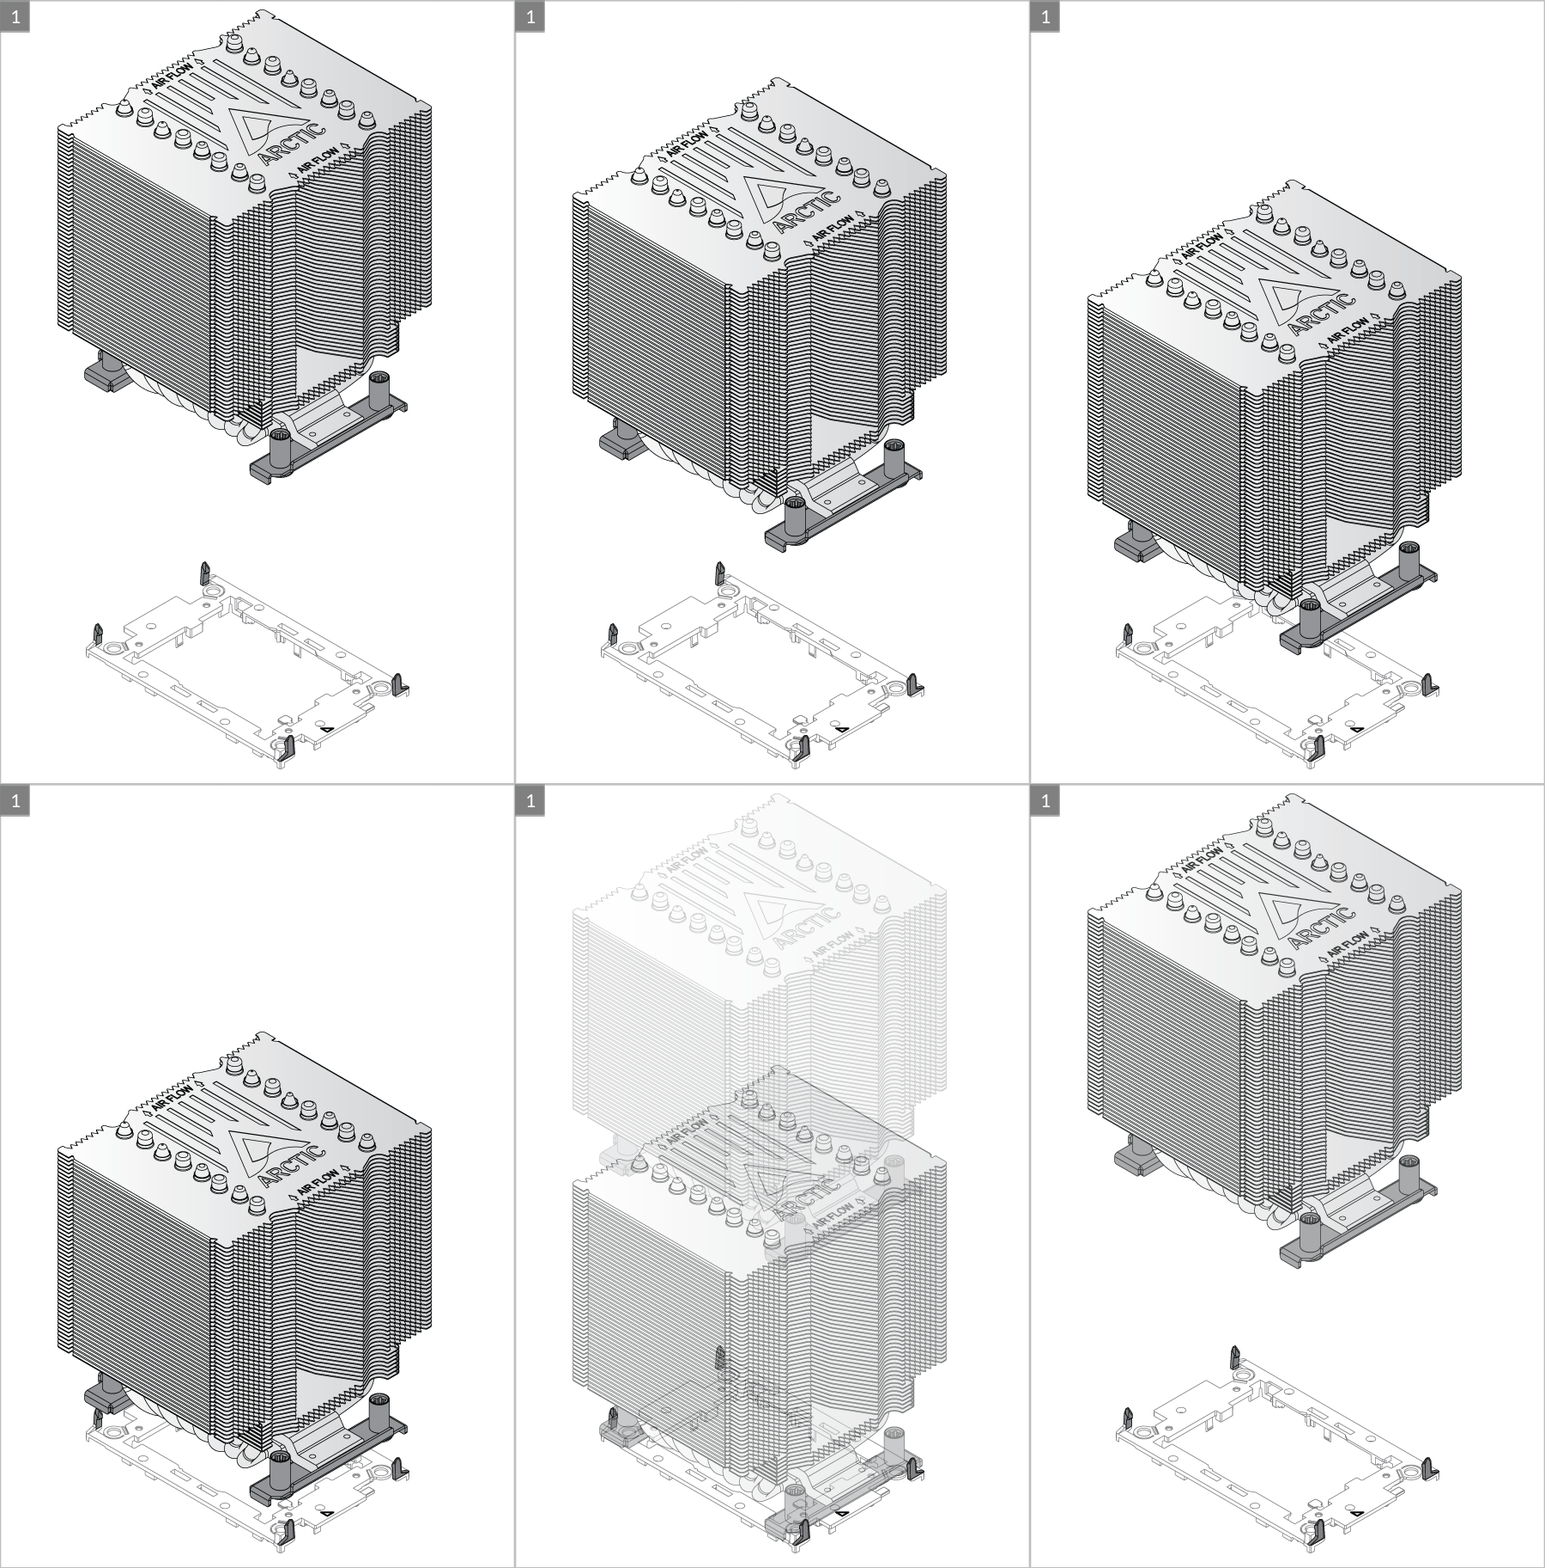
Line up Pin1 Marking on CPU carrier to inlet airflow arrow on Heatsink
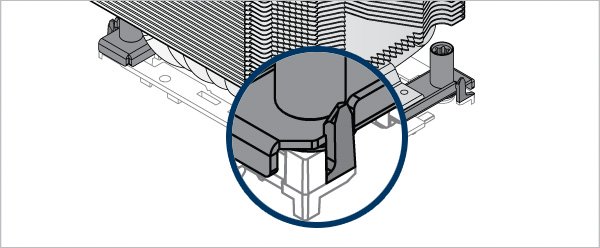
Make sure all locking tabs are properly attached to heatsink
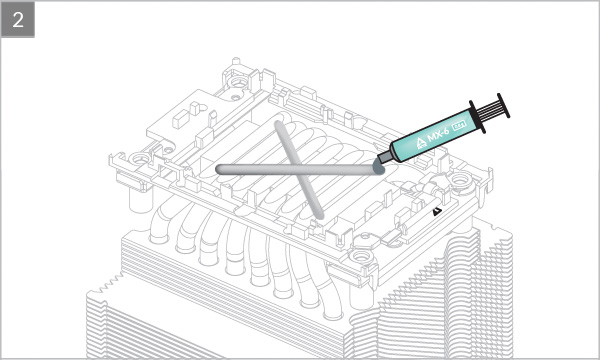


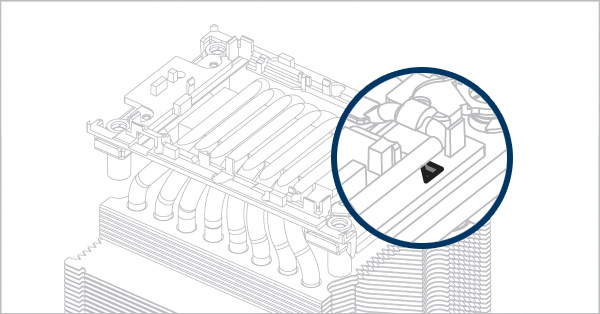
Align Pin1 marking on CPU carrier to Pin1 marking on CPU
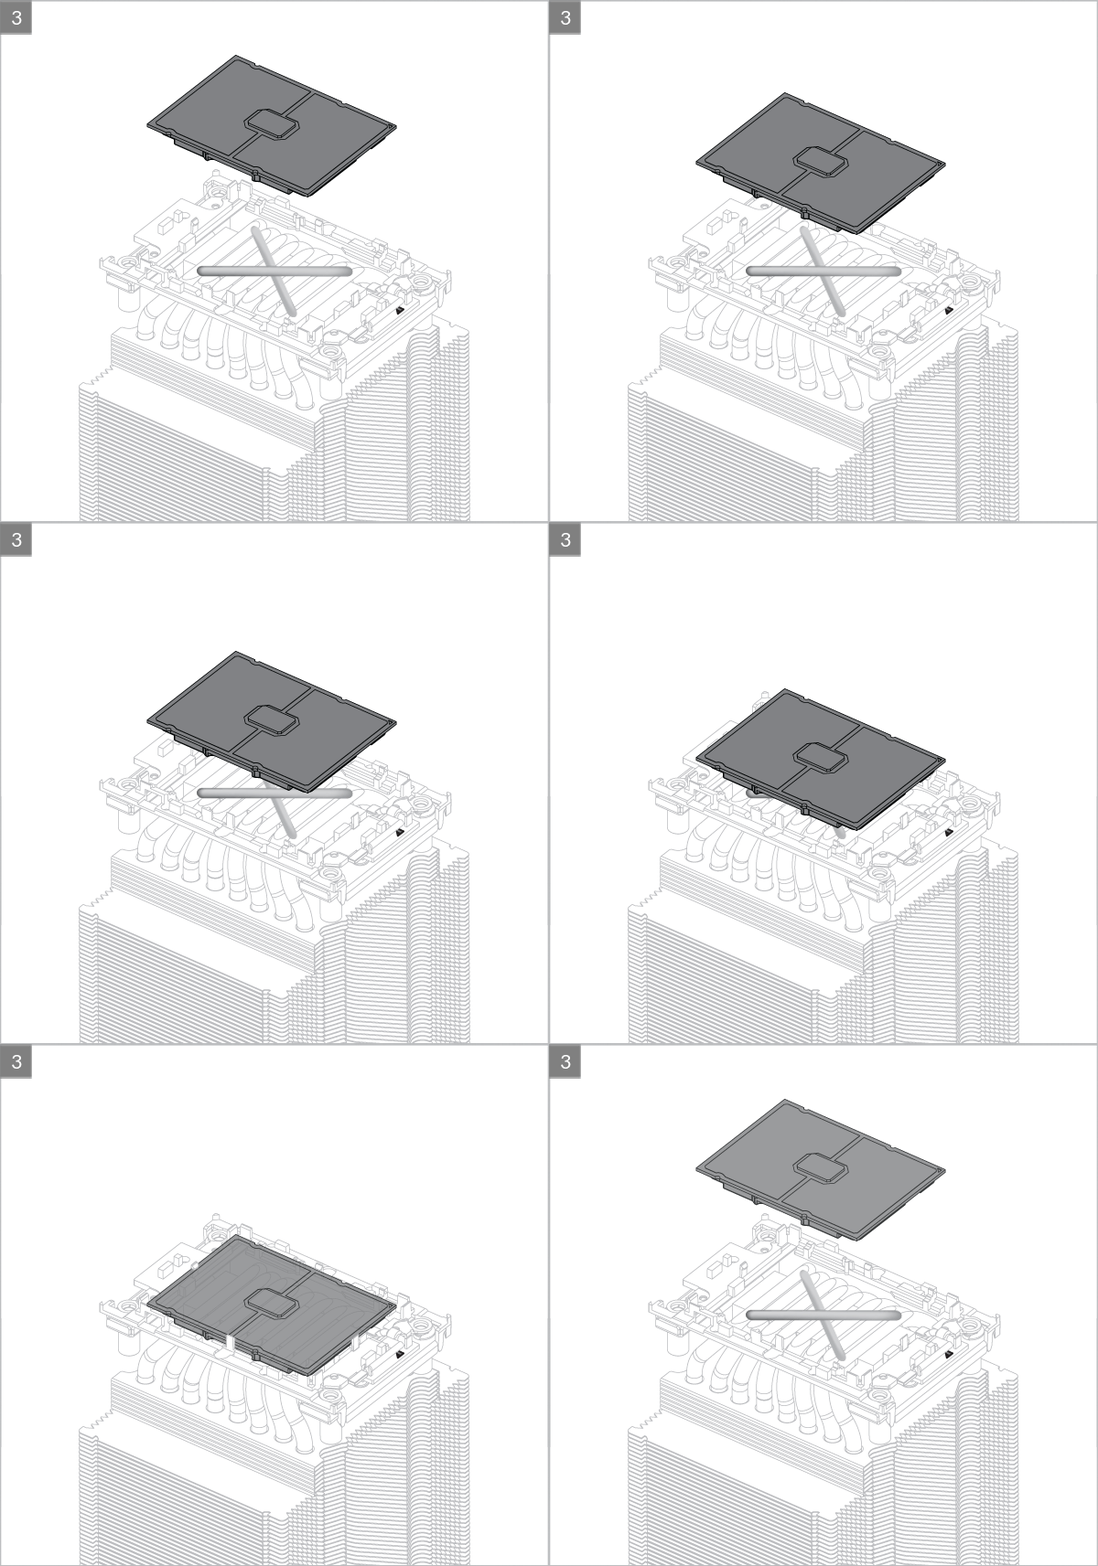

Make sure all locking tabs are properly attached to CPU.
Warning
Unsecured locking tabs may drop the CPU and cause damage to the CPU or the motherboard
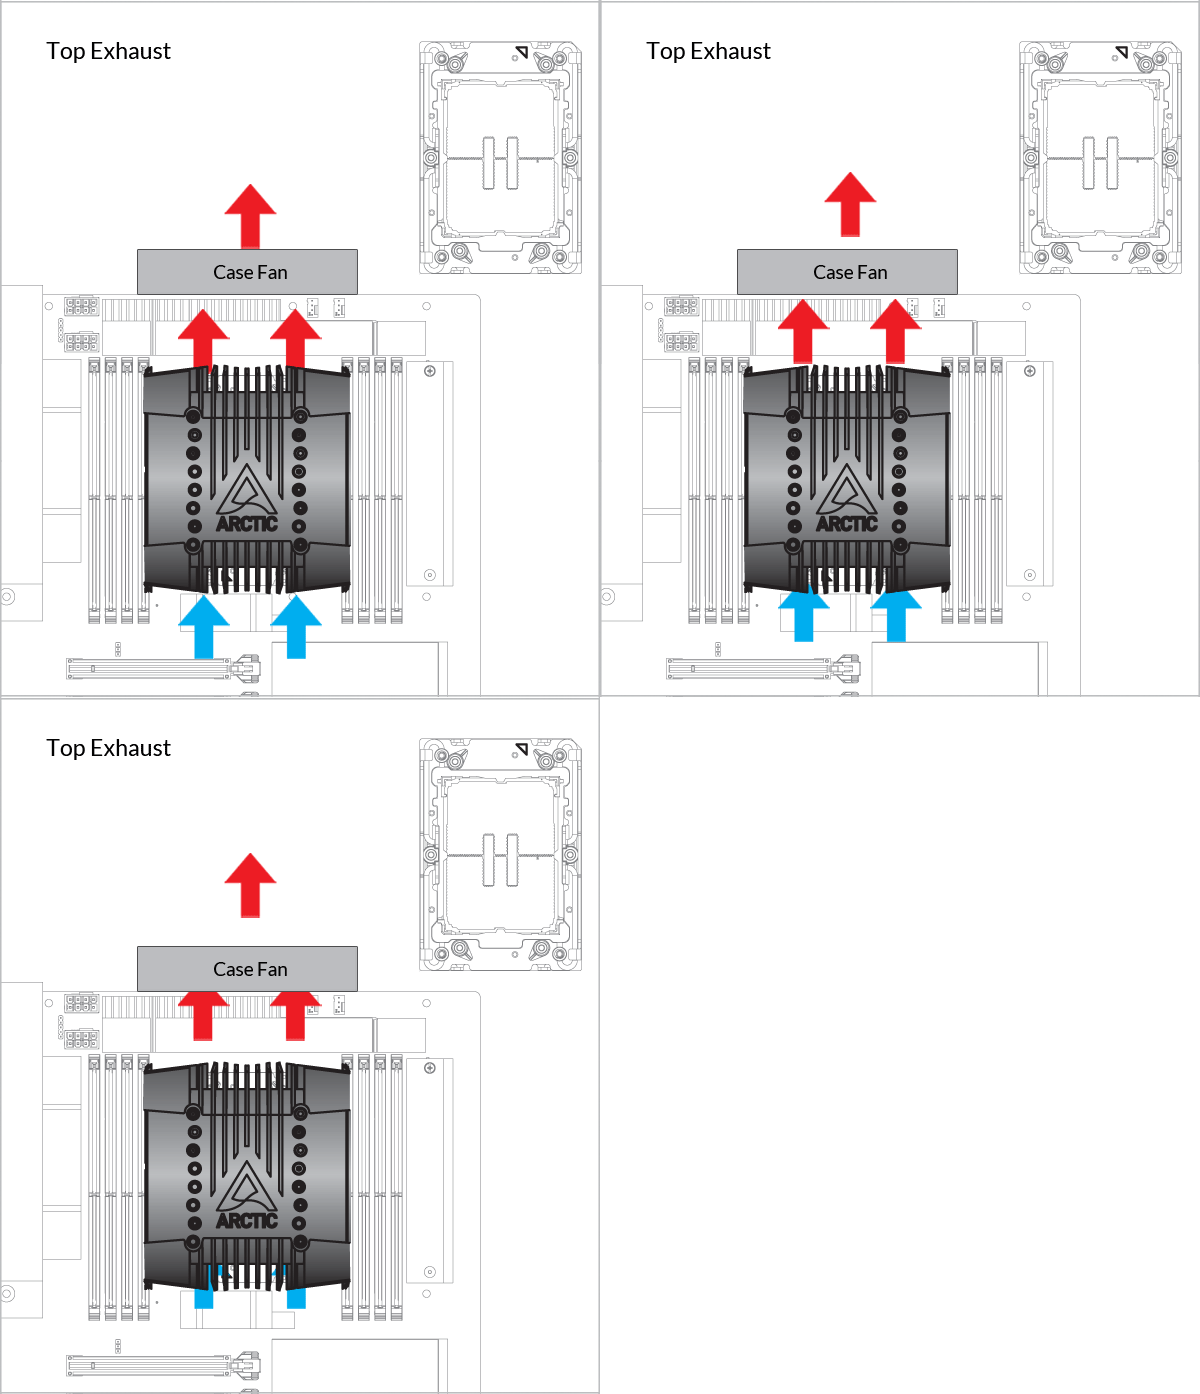

Please note that installing an LGA4189/ LGA4677 processor and heatsink requires a plastic CPU carrier such as the one shown above. These carriers are included with boxed retail CPUs or Motherboard and available separately via Intel sales partners for tray type CPUs.
Contact ARCTIC Support if the LGA4189 CPU Carrier are not available on your product version.


Line up Pin1 Marking on CPU carrier to outlet airflow arrow on Heatsink
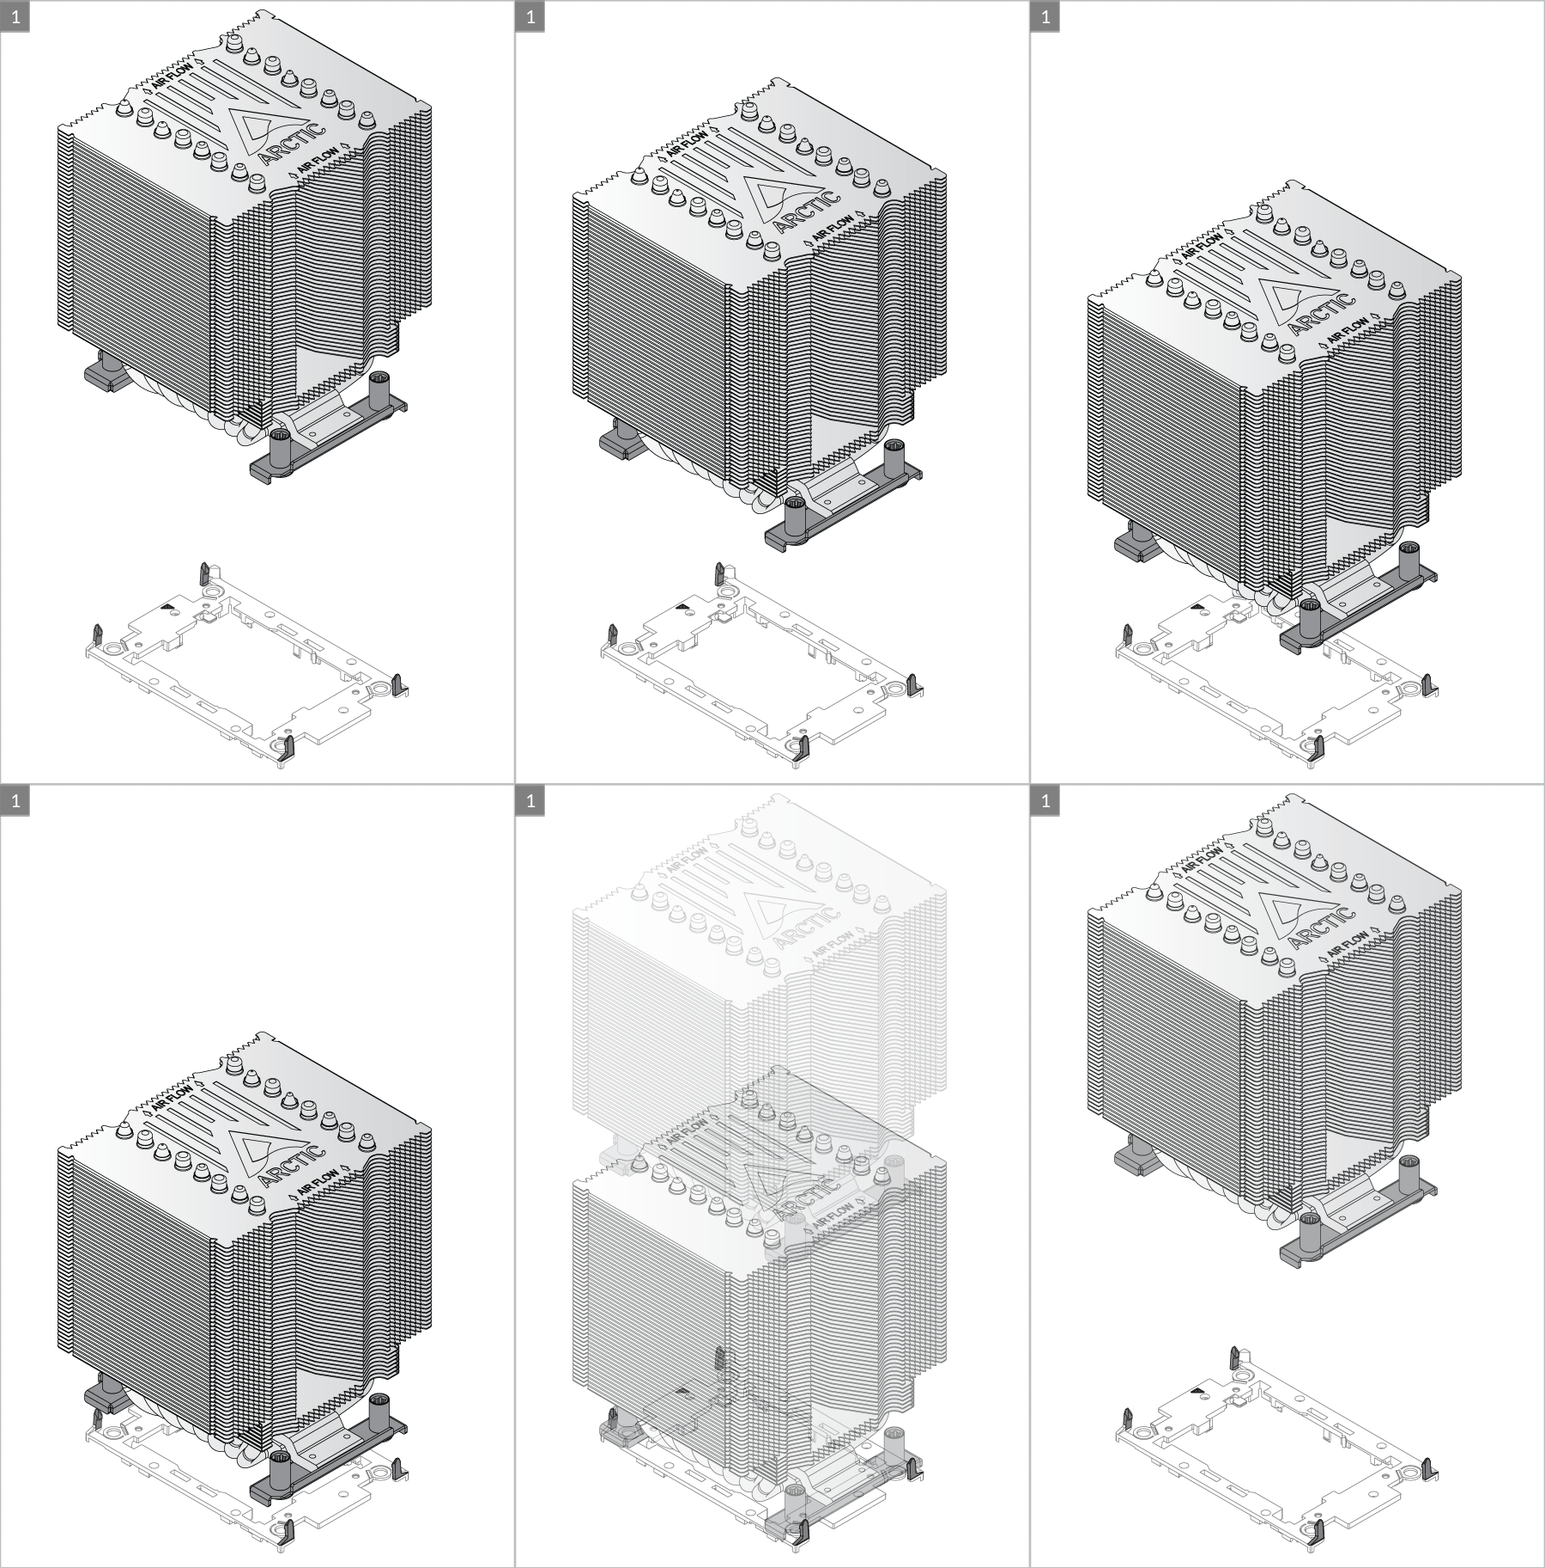

Make sure all locking tabs are properly attached to heatsink
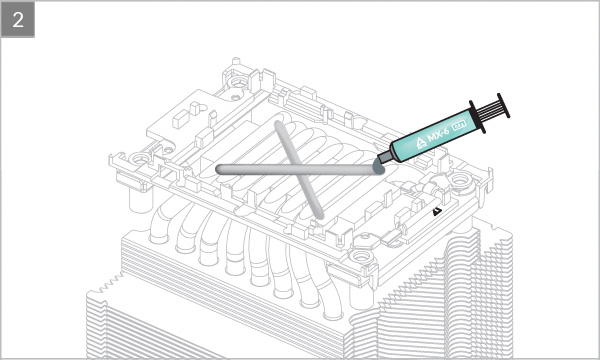


Align Pin1 marking on CPU carrier to Pin1 marking on CPU
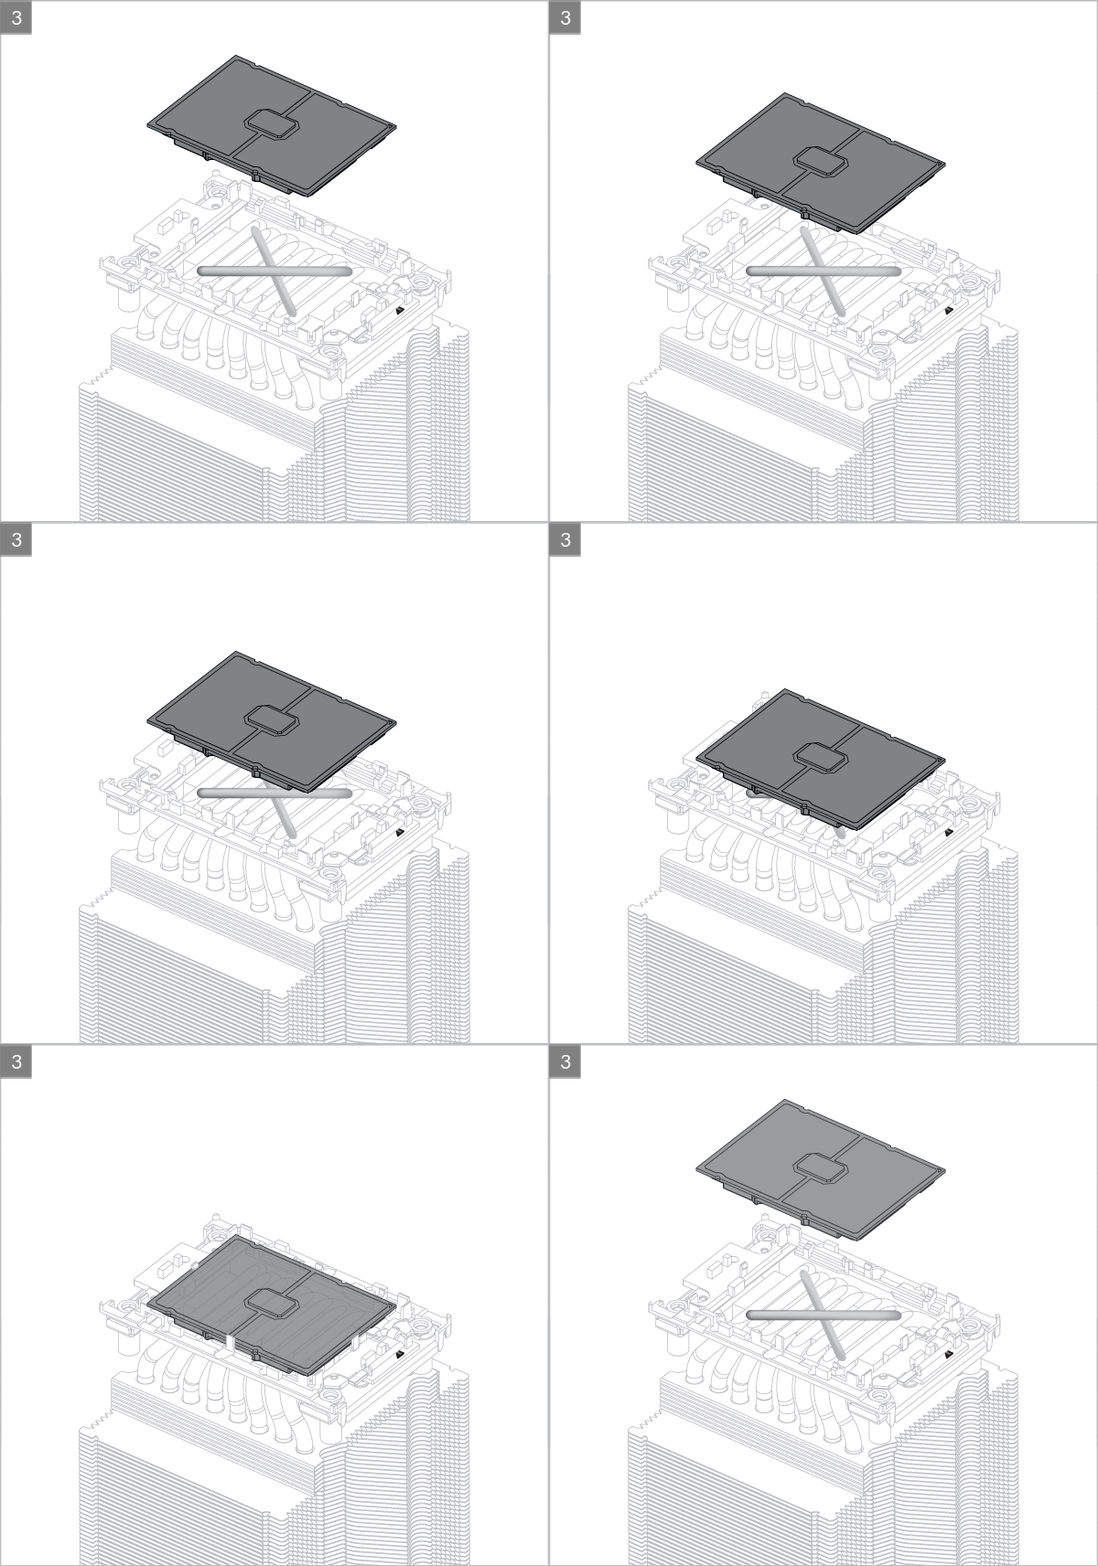
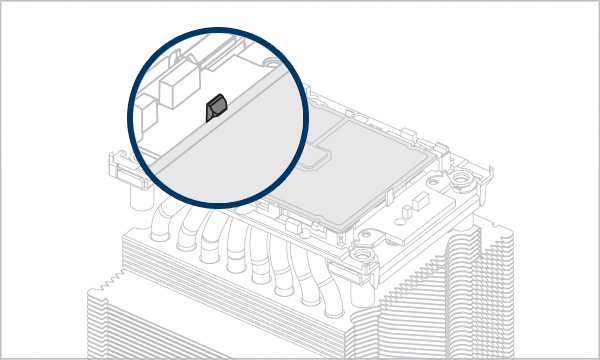
Make sure all locking tabs are properly attached to CPU.
Warning
Unsecured locking tabs may drop the CPU and cause damage to the CPU or the motherboard

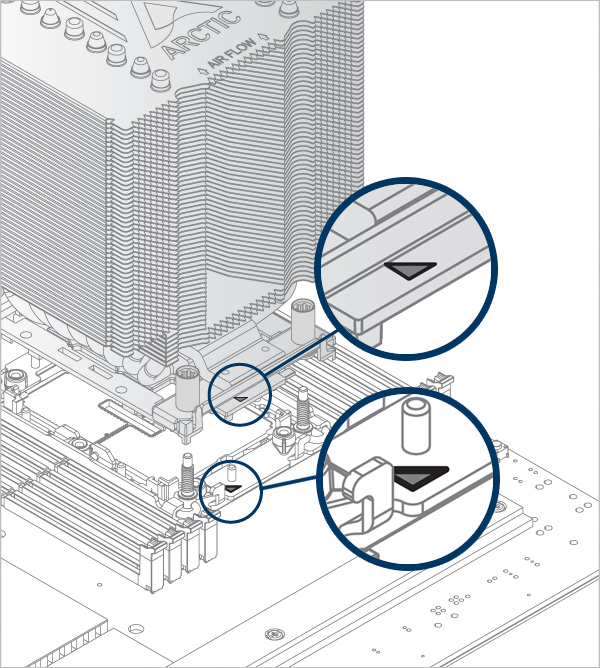
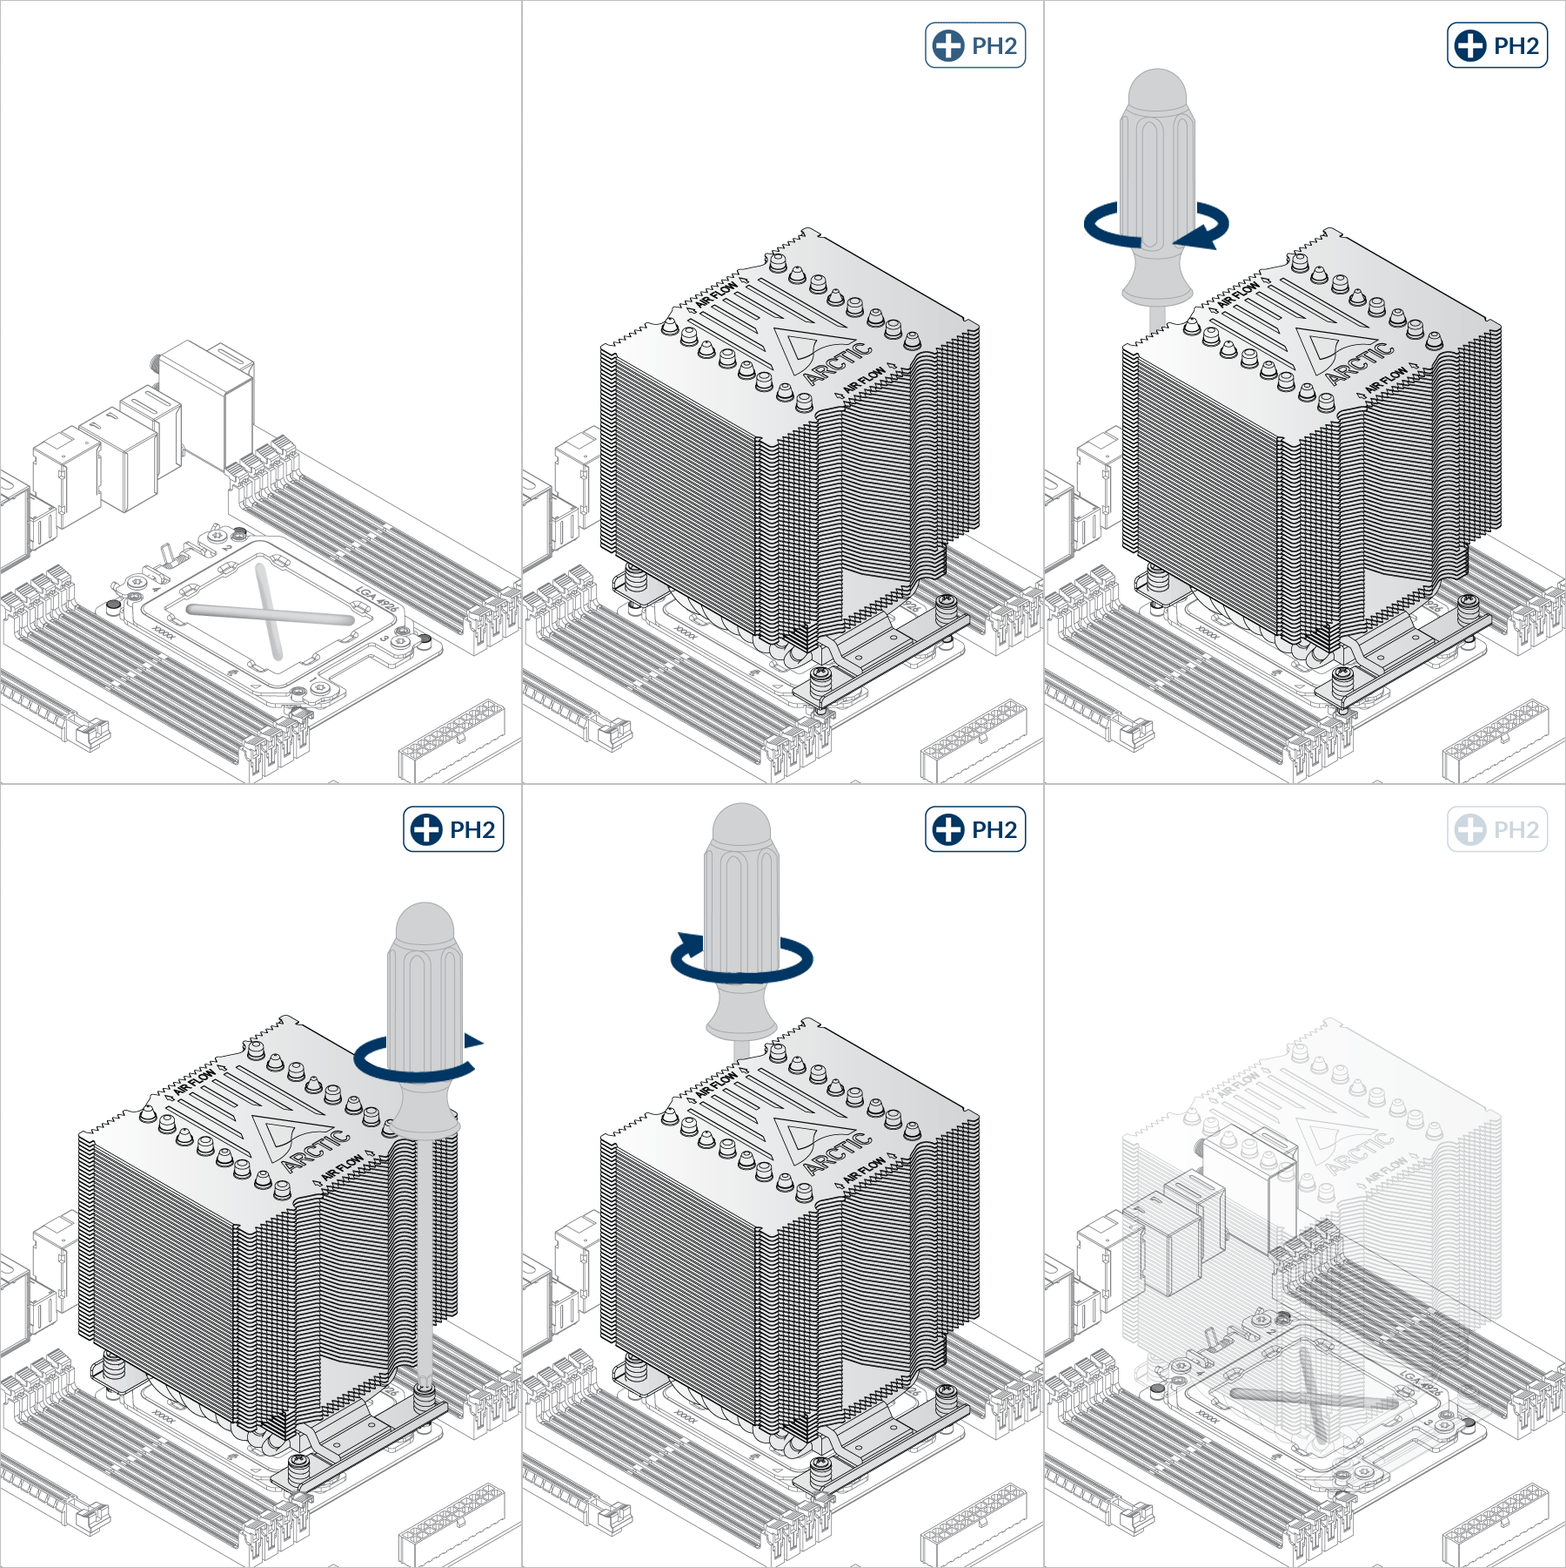
Align Pin1 marking on CPU carrier to Pin1 marking on socket
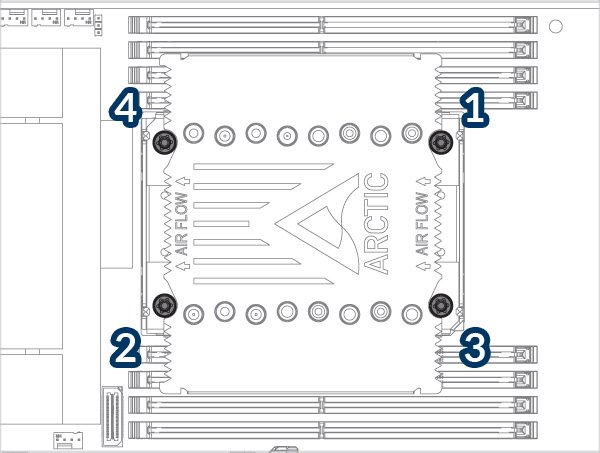
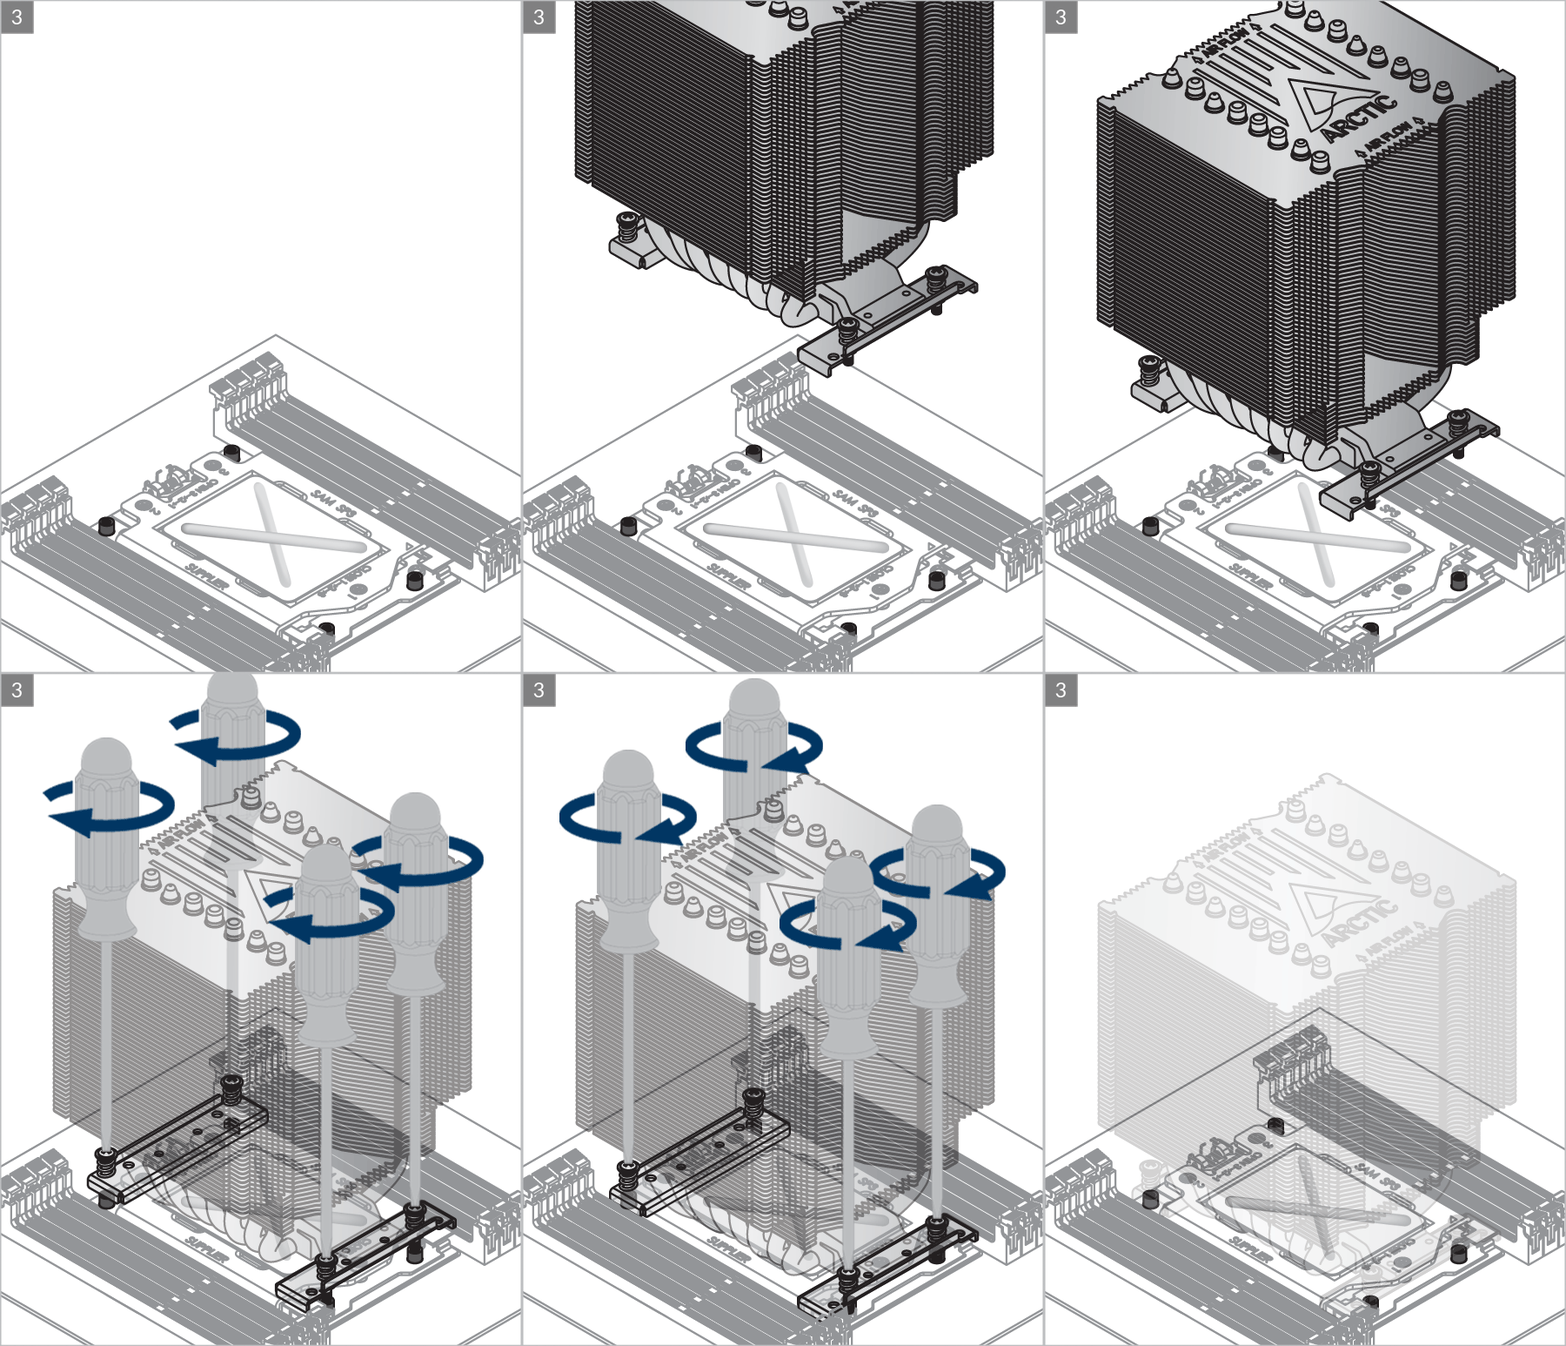
Follow order 1→2→3→4, 3 Turn Per-Nut.
Torque requirement: 8 in.lbf / 0.9 N.m.

Install push fan on the inlet side of the heatsink

Install pull fan on the outlet side of the heatsink


* Some mechanical interference with surrounding components may appear. The fan will not be controllable by PWM.
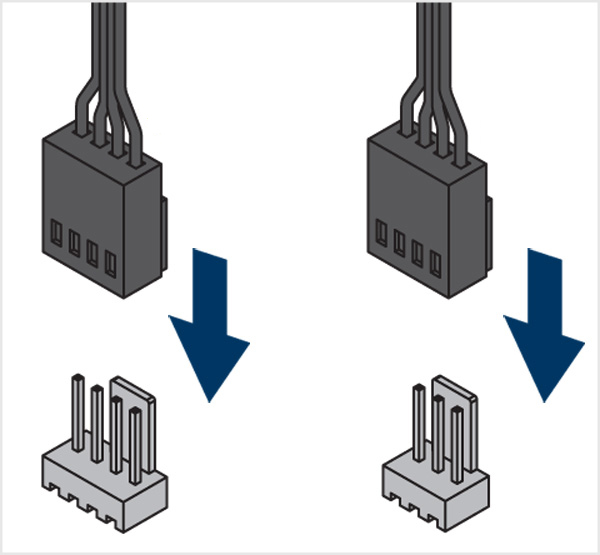
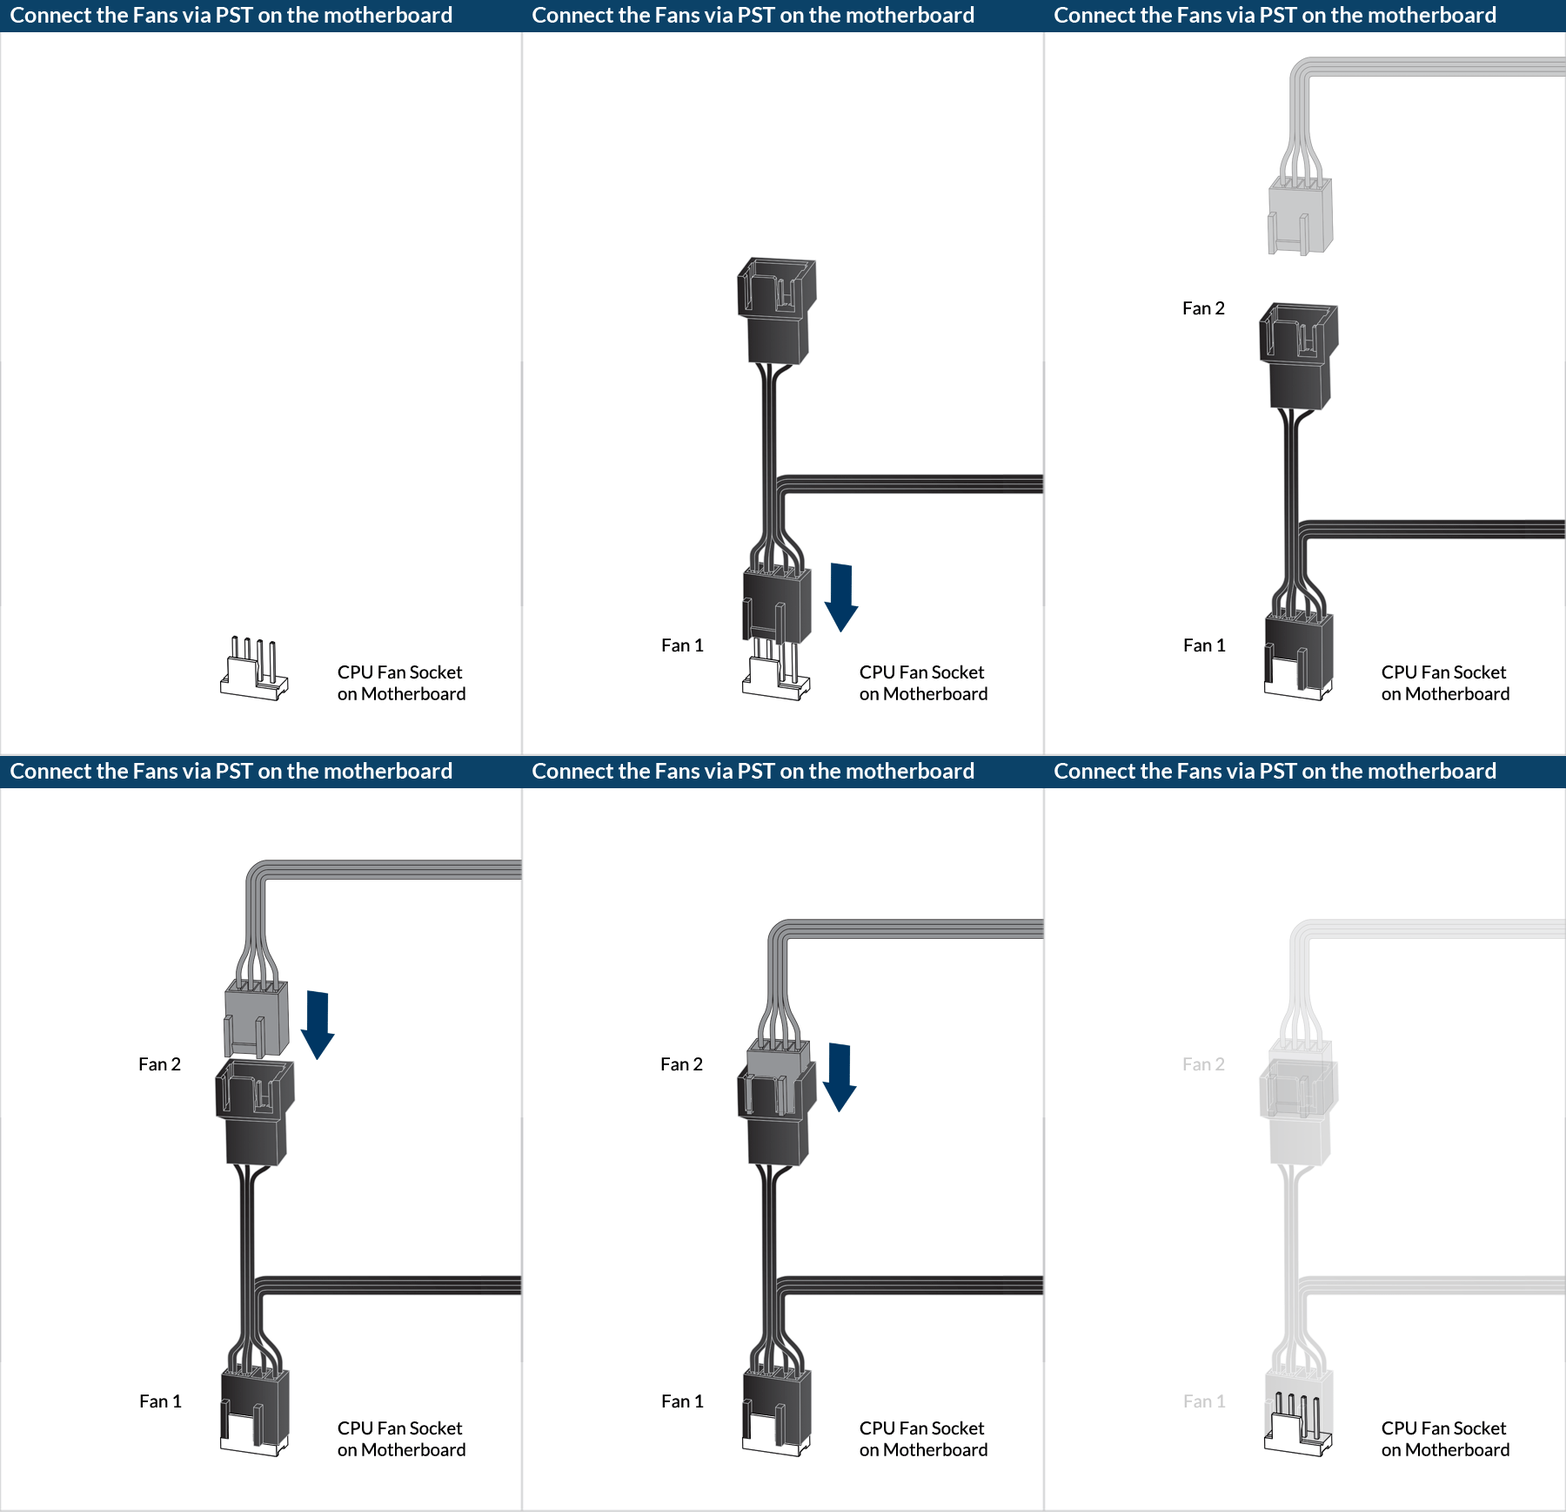

To get the best out of your cooler, it is recommended to adjust the fan speed control in the BIOS, follow this guide to adjust your PWM.
