很遗憾,本文档暂无中文版本,以下为英文版本。
- Double-sided M.2 SSD
- Single-sided M.2 SSD
Select your SSD Type

Different combination of M.2 SSD and Motherboard will lead to different orientation of the SSD. This installation guide refers to a M.2 module with M key with socket located on the right-hand side.


- M.2 SSD thickness below 2.9mm
- M.2 SSD thickness 2.9mm or above
Select M.2 SSD thickness

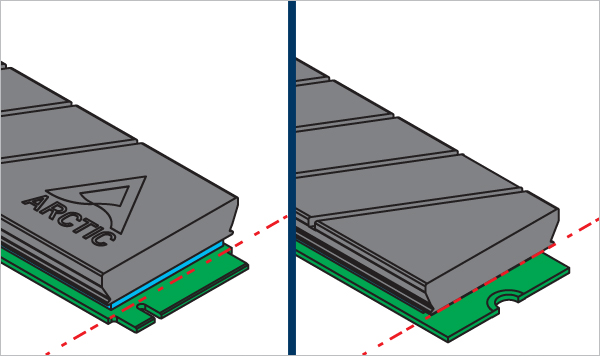
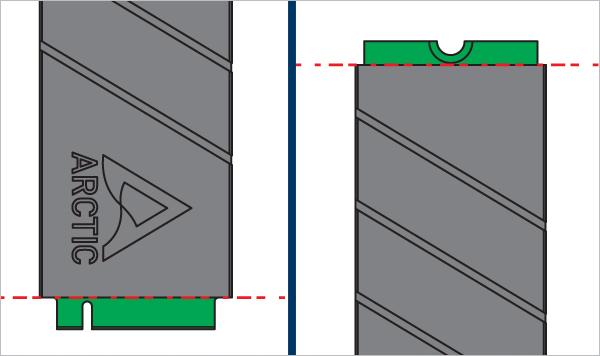
Ensure the SSD is correctly oriented, place the heatsink on its top surface, and align the heatsink edges with the SSD connector edge.


Ensure the SSD is correctly oriented, place the heatsink on its top surface, and align the heatsink edges with the SSD connector edge.


Required Tools
 SL4.0-6.0 Slotted Screwdriver
 Attention
Removing M2 Pro with a screwdriver could possibly leave scratch mark on the inside surface of heatsink.

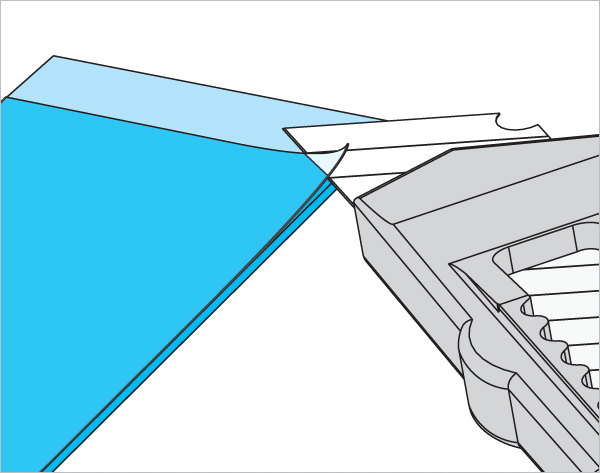
Insert the tip of a slotted screwdriver between the two halves of the cooler on the side located at the top of the ARCTIC logo. Gently rotate and leverage to separate the two parts of the cooler.


Different combination of M.2 SSD and Motherboard will lead to different orientation of the SSD. This installation guide refers to a M.2 module with M key with socket located on the right-hand side.


Ensure the SSD is correctly oriented *, place the heatsink on its top surface, and align the heatsink edges with the SSD connector edge.


Required Tools
SL4.0-6.0 Slotted Screwdriver
Attention
Removing M2 Pro with a screwdriver could possibly leave scratch mark on the inside surface of heatsink.
Insert the tip of a slotted screwdriver between the two halves of the cooler on the side located at the top of the ARCTIC logo. Gently rotate and leverage to separate the two parts of the cooler.