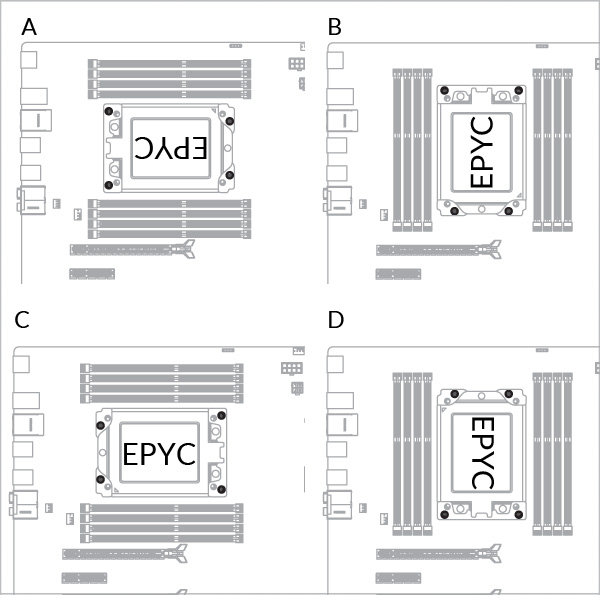
- AMD – SP3, TR4, sTRX4, sWRX8, SP6, sTR5
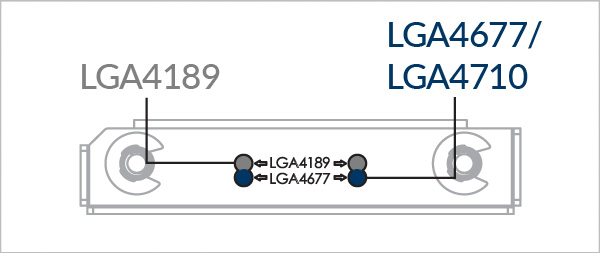
- Intel - LGA4710, LGA4677, LGA4189
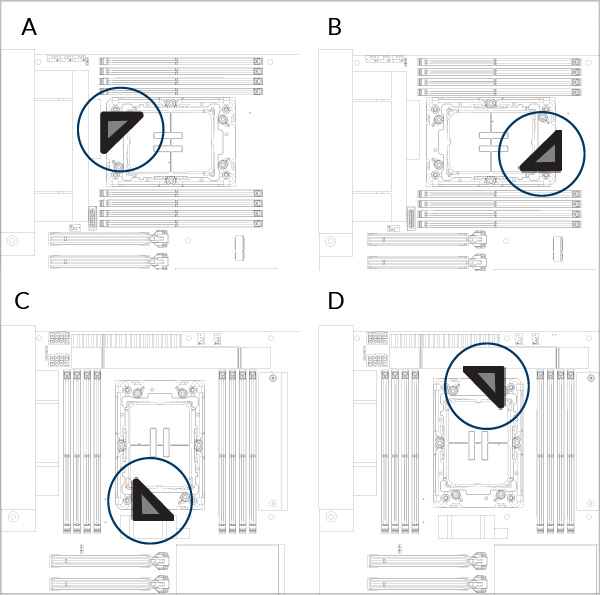
Elegir el zócalo del procesador
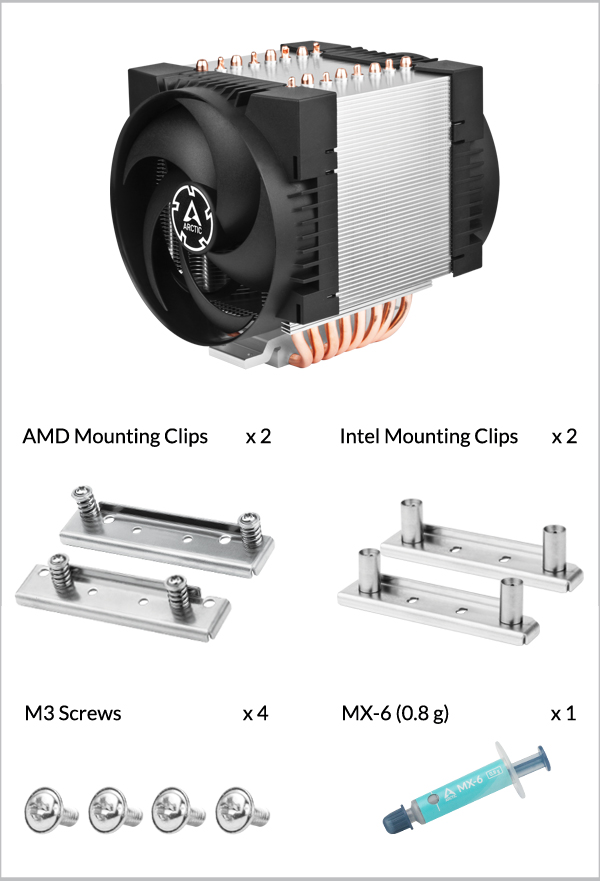
Herramientas necesarias
 Destornillador Phillips PH2

 Atención
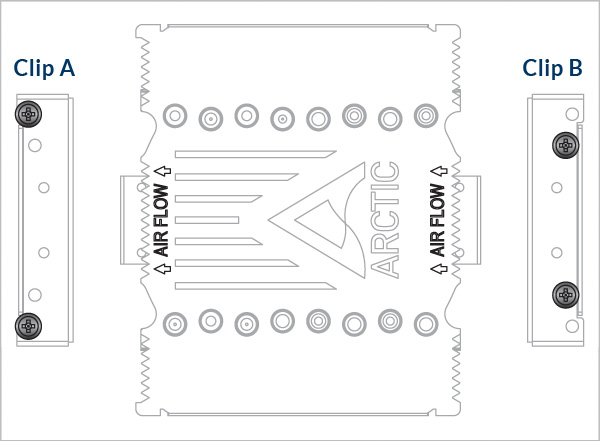
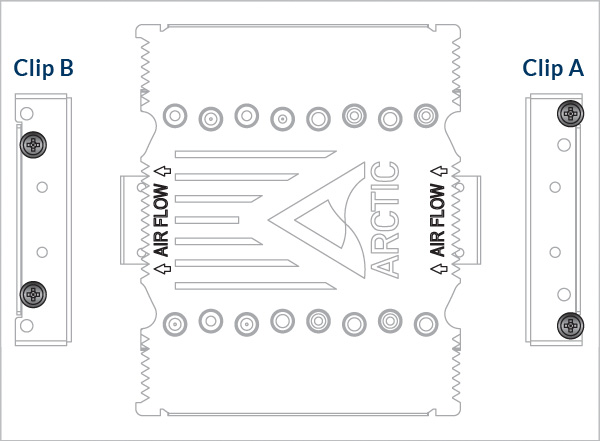
Atención: Los clips de montaje AMD son asimétricos. Asegúrese de montar los clips correctamente siguiendo las instrucciones siguientes.

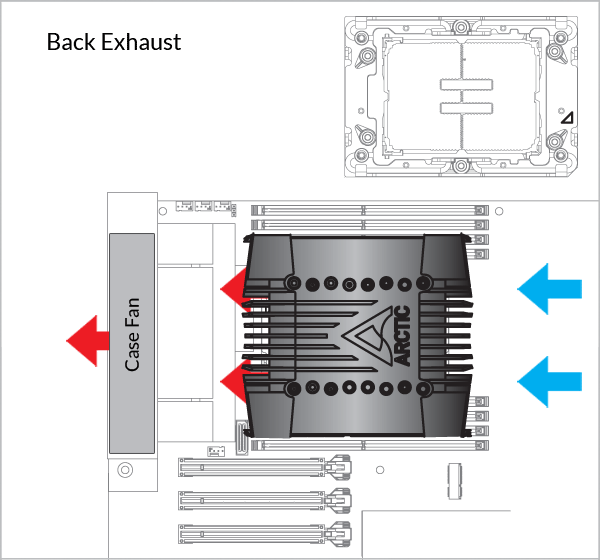
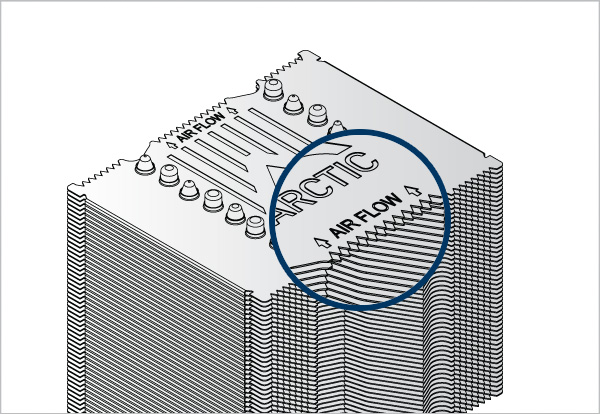
Alinee el clip A en el lado del aire de salida y el clip B en el lado del aire de entrada.


Atención
Atención: Los clips de montaje AMD son asimétricos. Asegúrese de montar los clips correctamente siguiendo las instrucciones siguientes.
Alinee el clip A en el lado del aire de salida y el clip B en el lado del aire de entrada.


Atención
Atención: Los clips de montaje AMD son asimétricos. Asegúrese de montar los clips correctamente siguiendo las instrucciones siguientes.

Alinee el clip A en el lado del aire de salida y el clip B en el lado del aire de entrada.


Atención
Atención: Los clips de montaje AMD son asimétricos. Asegúrese de montar los clips correctamente siguiendo las instrucciones siguientes.
Alinee el clip A en el lado del aire de salida y el clip B en el lado del aire de entrada.


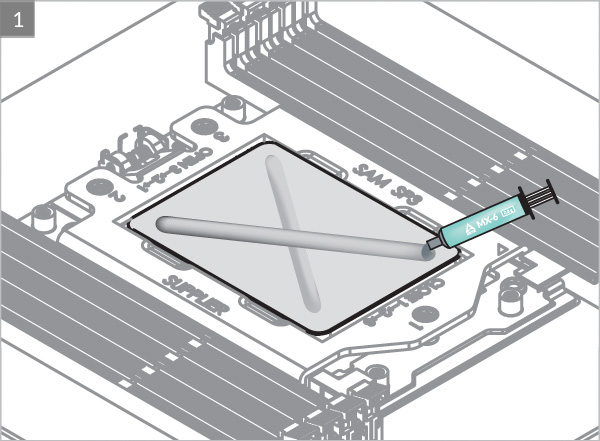

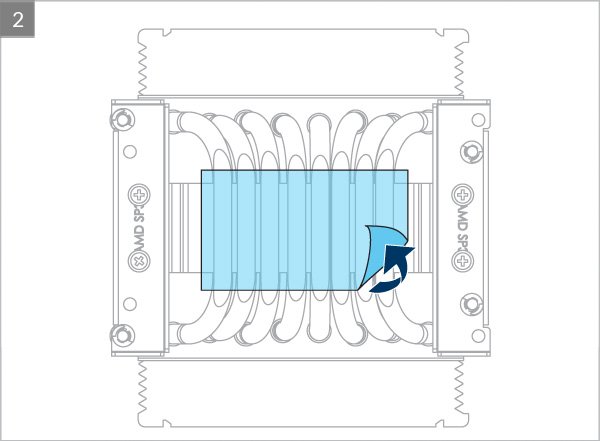
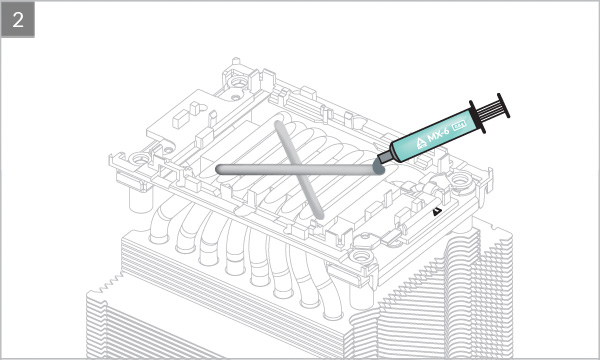
* Consulte este enlace para obtener más información sobre cómo aplicar correctamente las pastas térmicas.
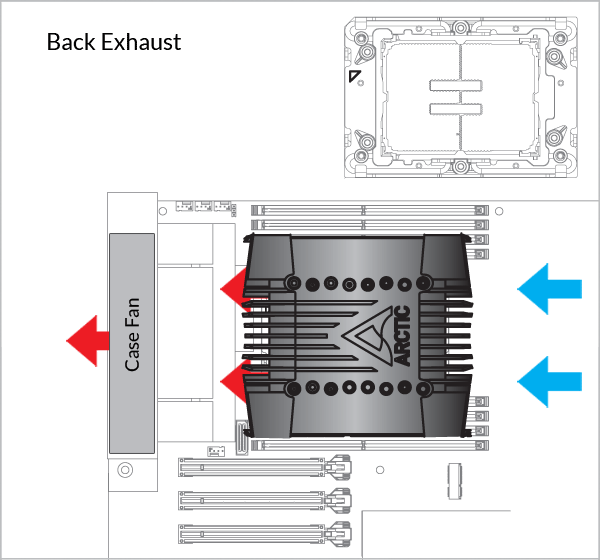
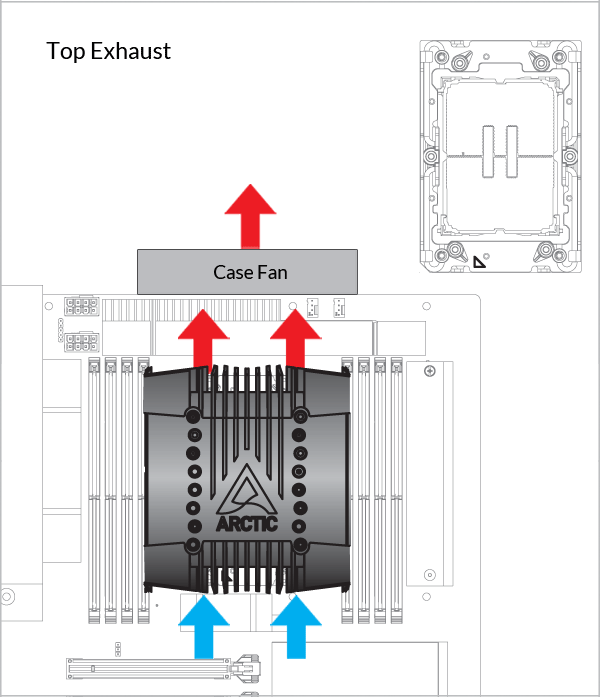
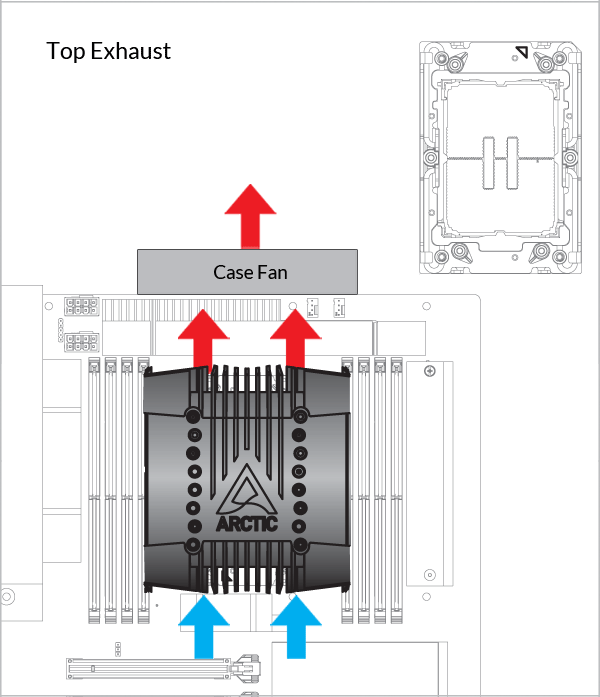
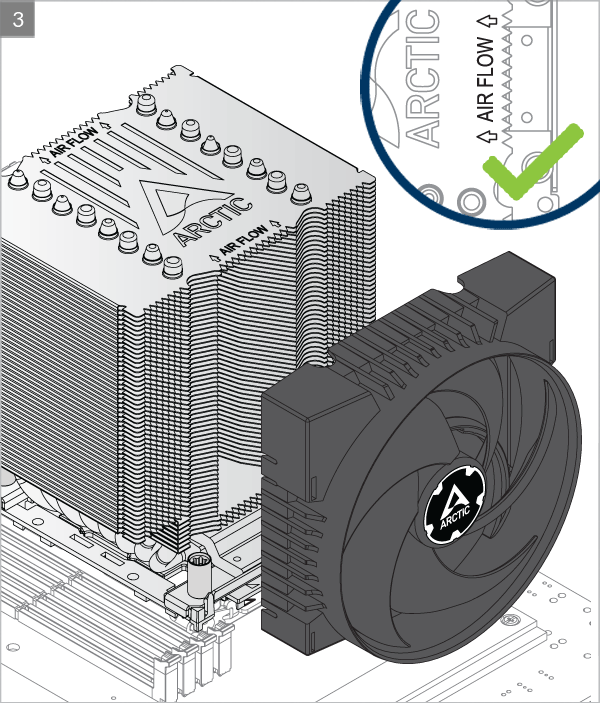
Instale el ventilador push en el lado de entrada del disipador térmico
Instale el ventilador pull en el lado de salida del disipador térmico
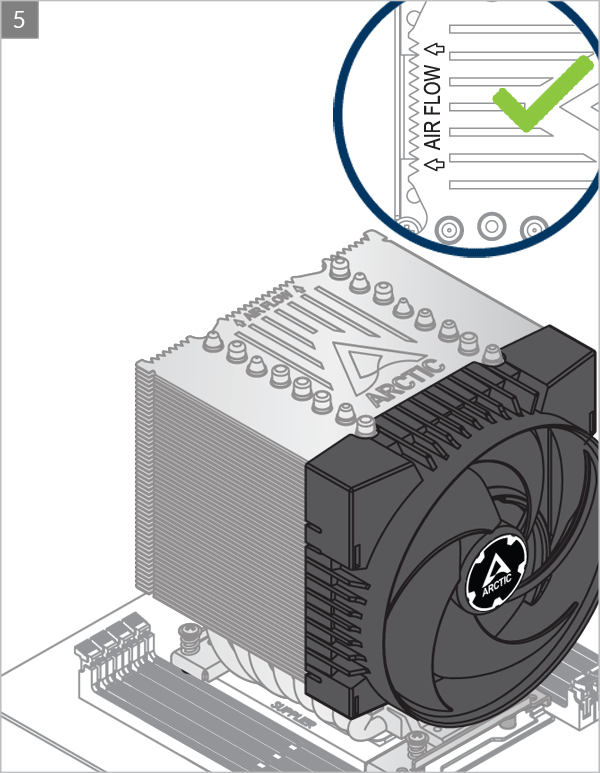
* Pueden aparecer algunas interferencias mecánicas con los componentes circundantes. El ventilador no será controlable por PWM.


Herramientas necesarias
 Destornillador Torx T30
Atención
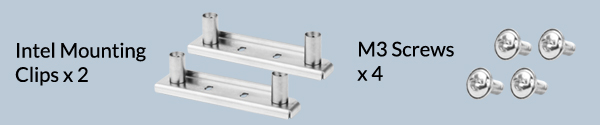
Los clips de montaje Intel tienen dos tipos de agujeros de montaje. Asegúrese de seleccionar los agujeros de fijación correctos para su zócalo.


Atención
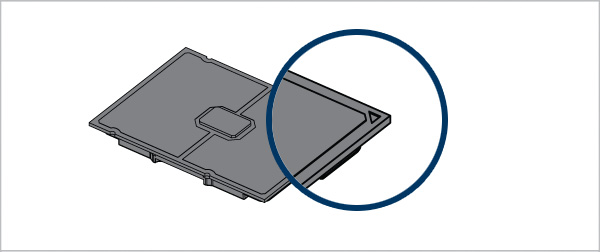
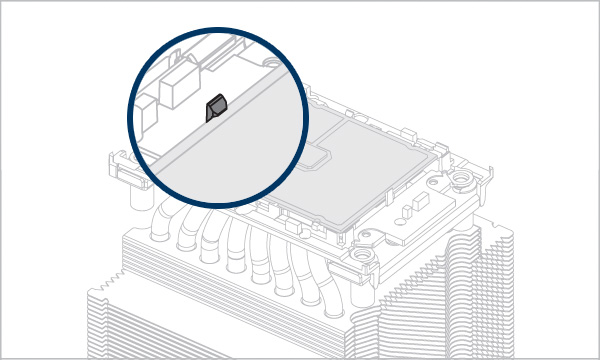
Tenga cuidado al retirar la cubierta antipolvo y compruebe la orientación del zócalo. Fíjese bien en el zócalo y compruebe si los pines están intactos. Un zócalo dañado puede impedir el arranque del sistema.
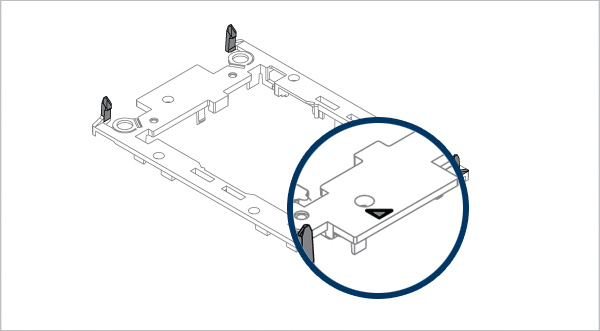
Controlar la orientación del zócalo
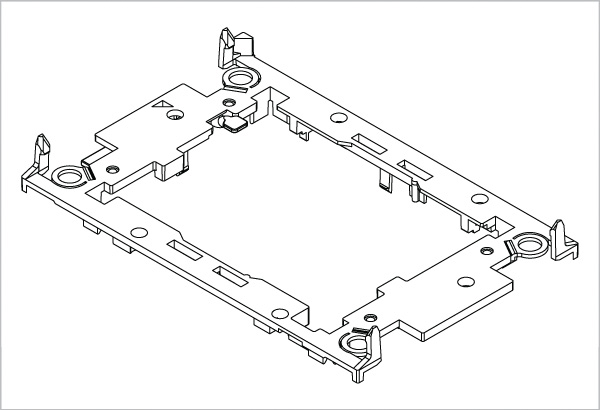
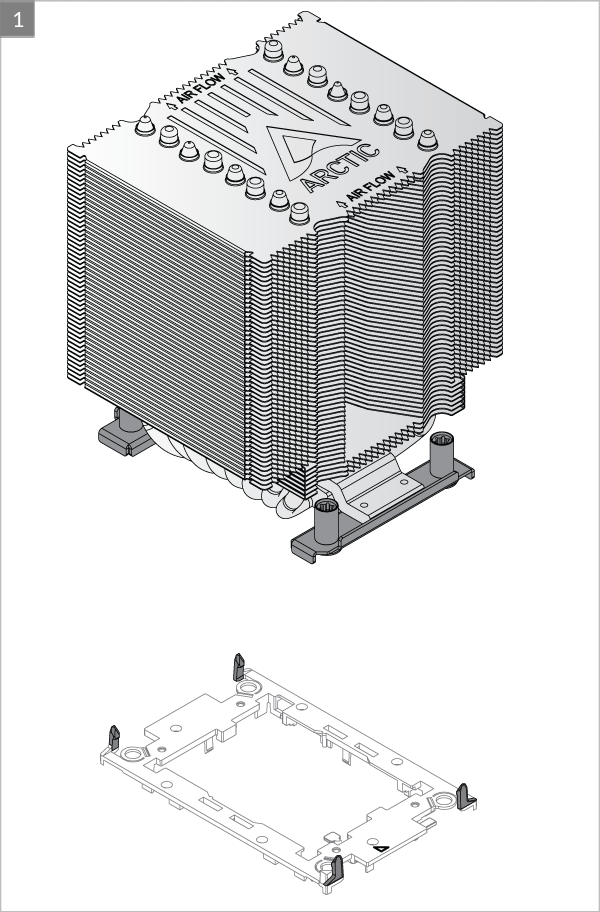
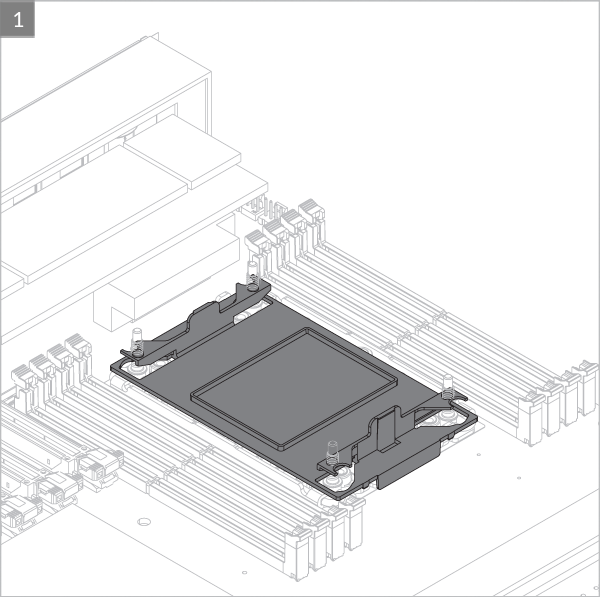
Tenga en cuenta que la instalación de un procesador LGA4189/LGA4677 y un disipador térmico requiere un soporte de plástico para CPU como el que se muestra arriba. Estos soportes se incluyen en las cajas de las CPU o placas base y están disponibles por separado a través de los distribuidores de Intel para las CPU de tipo tray.
Contacte con el Soporte de ARCTIC si el soporte para CPU LGA4189 no está disponible en la versión de su producto.

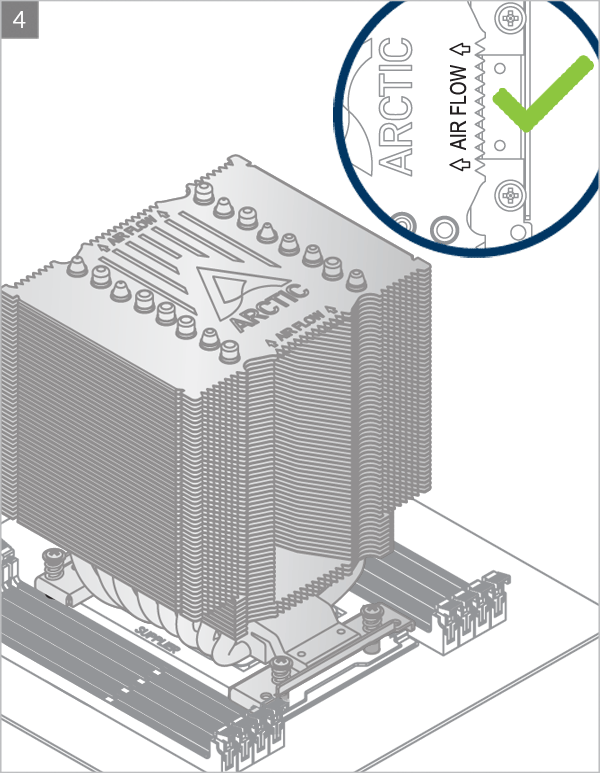
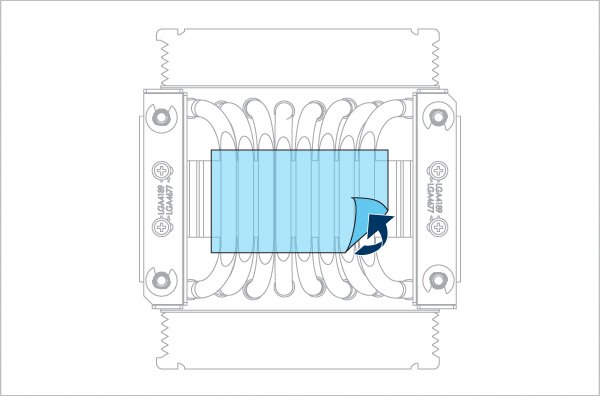
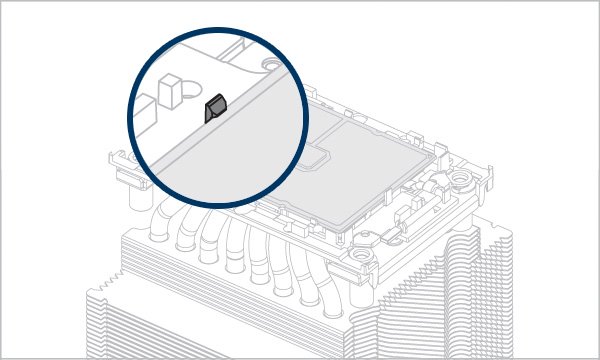
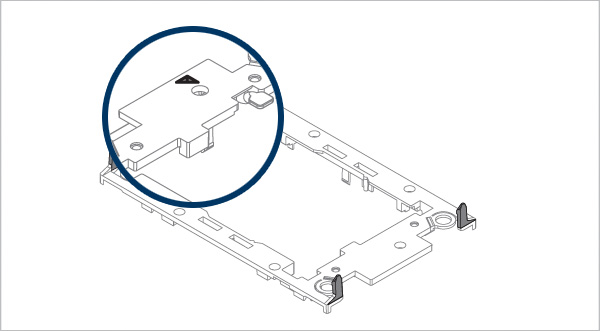
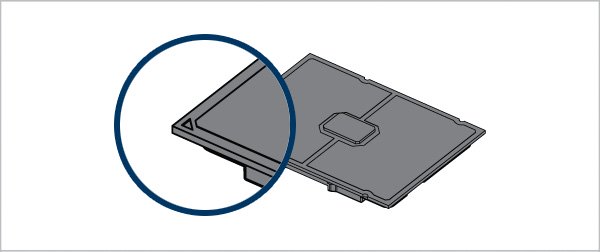
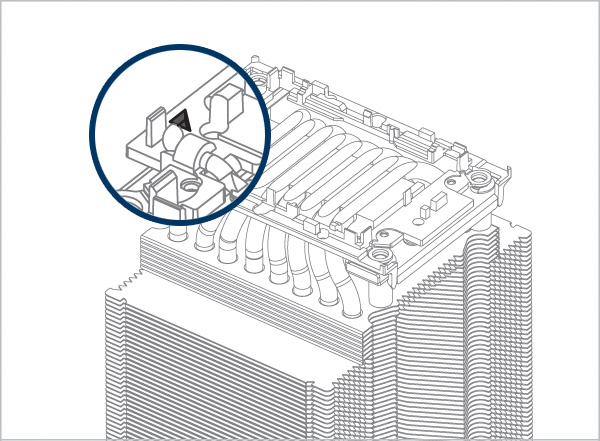
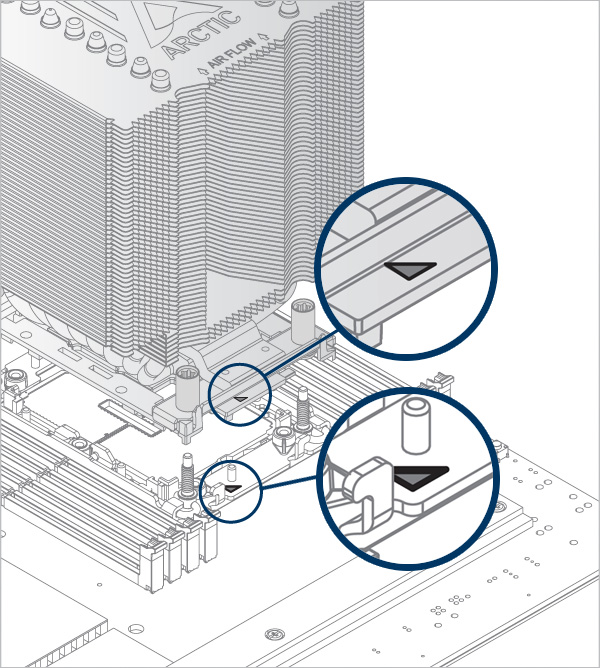
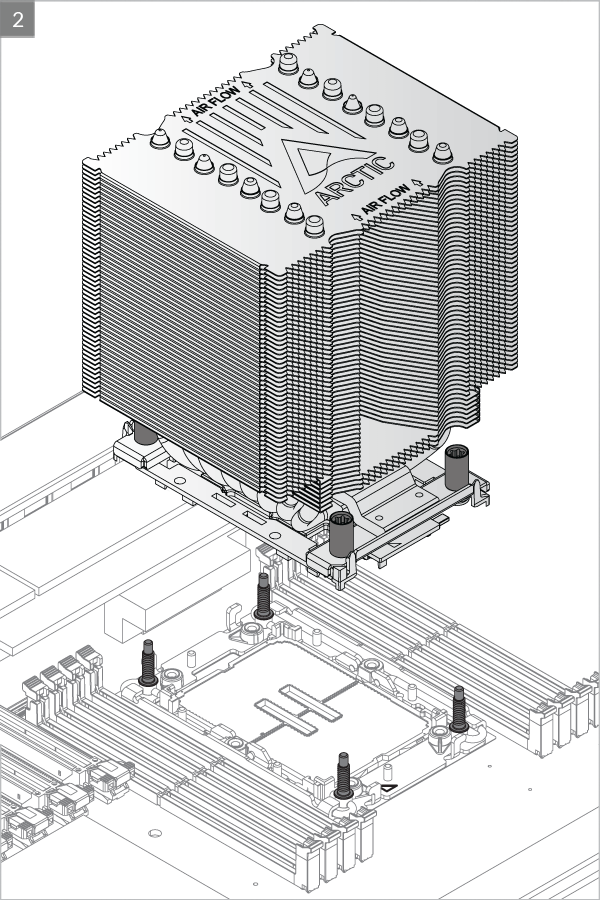
Alinee la marca Pin1 del soporte de la CPU con la flecha de salida de aire del disipador.
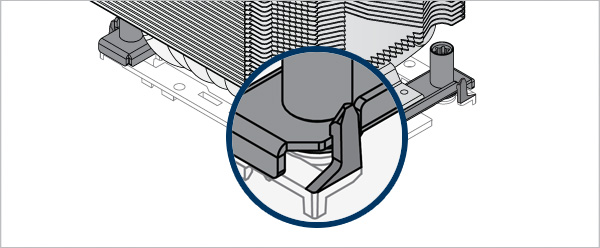
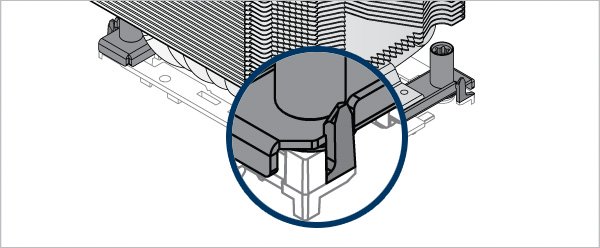
Asegúrese de que todas las lengüetas de bloqueo están bien fijadas al disipador de calor


Alinee la marca Pin1 del soporte de la CPU con la marca Pin1 de la CPU


Asegúrese de que todas las lengüetas de bloqueo están correctamente fijadas a la CPU.
Advertencia
Si las lengüetas de bloqueo no están bien fijadas, la CPU podría caerse y causar daños a la CPU o a la placa base
Tenga en cuenta que la instalación de un procesador LGA4189/LGA4677 y un disipador térmico requiere un soporte de plástico para CPU como el que se muestra arriba. Estos soportes se incluyen en las cajas de las CPU o placas base y están disponibles por separado a través de los distribuidores de Intel para las CPU de tipo tray.
Contacte con el Soporte de ARCTIC si el soporte para CPU LGA4189 no está disponible en la versión de su producto.

Alinee la marca Pin1 del soporte de la CPU con la flecha de entrada de aire del disipador térmico


Asegúrese de que todas las lengüetas de bloqueo están bien fijadas al disipador de calor


Alinee la marca Pin1 del soporte de la CPU con la marca Pin1 de la CPU

Asegúrese de que todas las lengüetas de bloqueo están correctamente fijadas a la CPU.
Advertencia
Si las lengüetas de bloqueo no están bien fijadas, la CPU podría caerse y causar daños a la CPU o a la placa base
Tenga en cuenta que la instalación de un procesador LGA4189/LGA4677 y un disipador térmico requiere un soporte de plástico para CPU como el que se muestra arriba. Estos soportes se incluyen en las cajas de las CPU o placas base y están disponibles por separado a través de los distribuidores de Intel para las CPU de tipo tray.
Contacte con el Soporte de ARCTIC si el soporte para CPU LGA4189 no está disponible en la versión de su producto.

Alinee la marca Pin1 del soporte de la CPU con la flecha de entrada de aire del disipador térmico
Asegúrese de que todas las lengüetas de bloqueo están bien fijadas al disipador de calor


Alinee la marca Pin1 del soporte de la CPU con la marca Pin1 de la CPU


Asegúrese de que todas las lengüetas de bloqueo están correctamente fijadas a la CPU.
Advertencia
Si las lengüetas de bloqueo no están bien fijadas, la CPU podría caerse y causar daños a la CPU o a la placa base
Tenga en cuenta que la instalación de un procesador LGA4189/LGA4677 y un disipador térmico requiere un soporte de plástico para CPU como el que se muestra arriba. Estos soportes se incluyen en las cajas de las CPU o placas base y están disponibles por separado a través de los distribuidores de Intel para las CPU de tipo tray.
Contacte con el Soporte de ARCTIC si el soporte para CPU LGA4189 no está disponible en la versión de su producto.

Alinee la marca Pin1 del soporte de la CPU con la flecha de salida de aire del disipador.


Asegúrese de que todas las lengüetas de bloqueo están bien fijadas al disipador de calor


Alinee la marca Pin1 del soporte de la CPU con la marca Pin1 de la CPU
Asegúrese de que todas las lengüetas de bloqueo están correctamente fijadas a la CPU.
Advertencia
Si las lengüetas de bloqueo no están bien fijadas, la CPU podría caerse y causar daños a la CPU o a la placa base
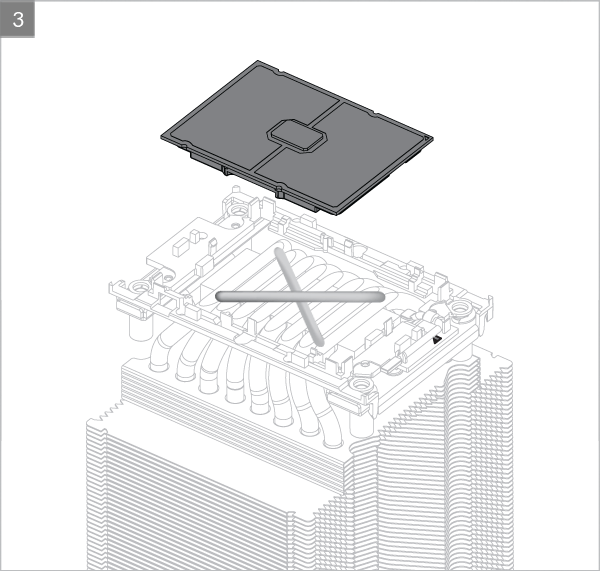
Alinee la marca Pin1 del soporte de la CPU con la marca Pin1 de la CPU.
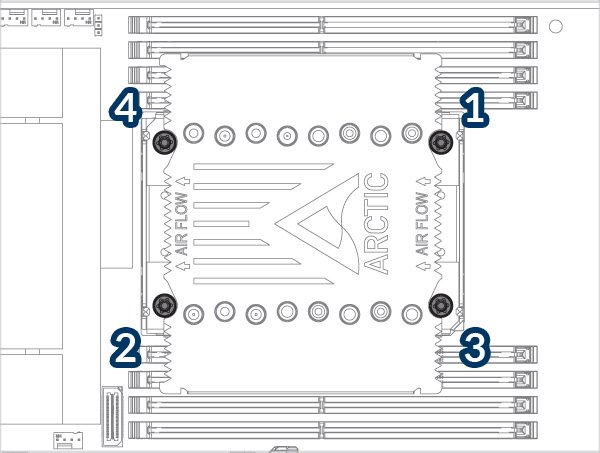
Siga el orden 1→2→3→4, 3 vueltas por tuerca.
Par de apriete requerido: 8 in.lbf / 0.9 N.m.
Instale el ventilador push en el lado de entrada del disipador térmico
Instale el ventilador pull en el lado de salida del disipador térmico
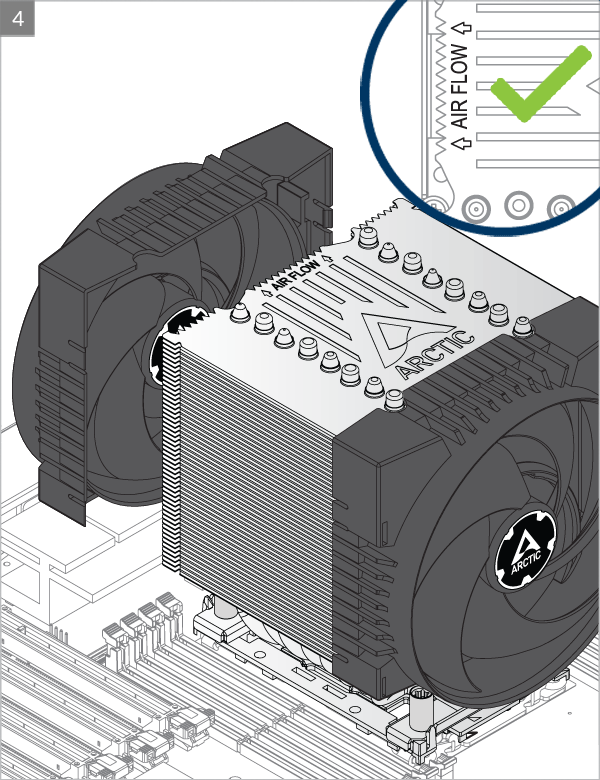

* Pueden aparecer algunas interferencias mecánicas con los componentes circundantes. El ventilador no será controlable por PWM.


Para obtener el mejor rendimiento de refrigeración, recomendamos ajustar la velocidad del ventilador en la BIOS. Sigue estas instrucciones para ajustar óptimamente la configuración PWM.
Productos Recomendados


