若要查看您的主機板是否相容,請點擊此連結。
- AMD – AM5, AM4
- Intel – LGA1851, LGA1700
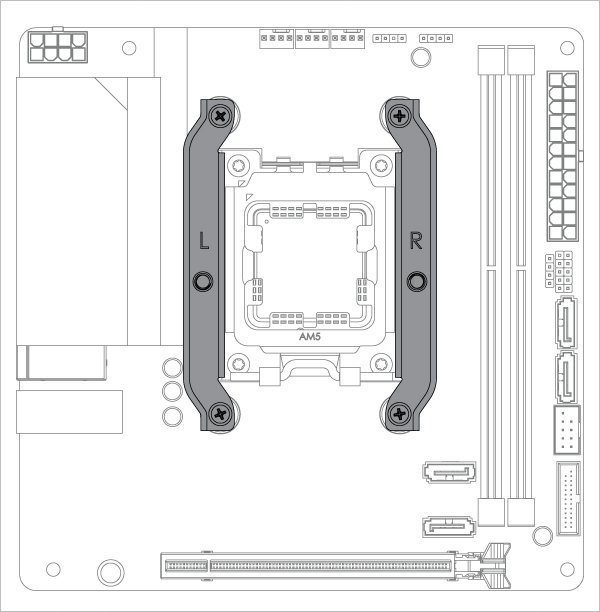
選擇您的 CPU 插槽
這裡提供可列印的快速入門指南。
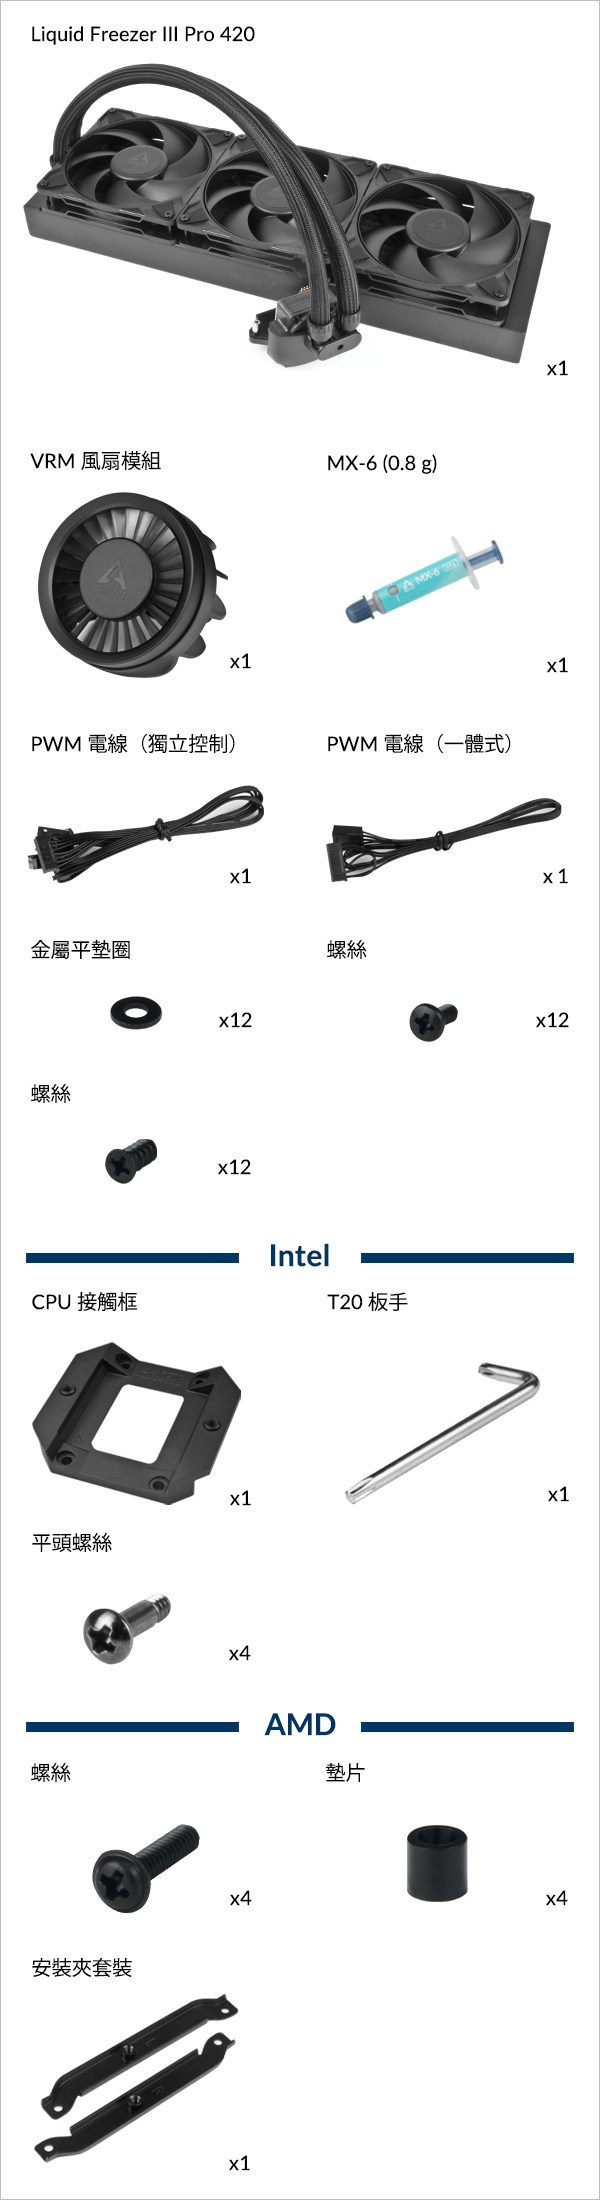
所需工具
 PH2 十字頭螺絲起子
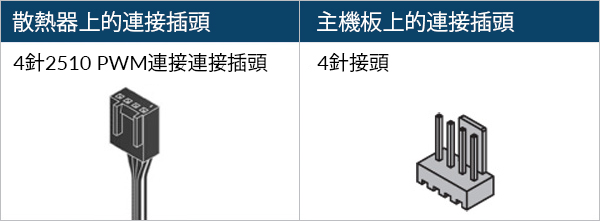
PWM電線(一體式)
單連接 PWM 電纜可同時控制水泵、VRM 和散熱器風扇的轉速,以及監控水泵轉速。
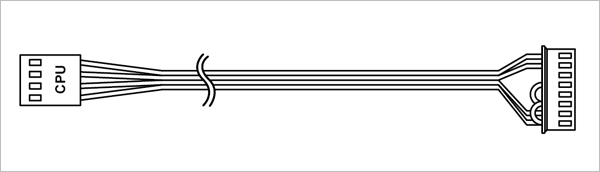
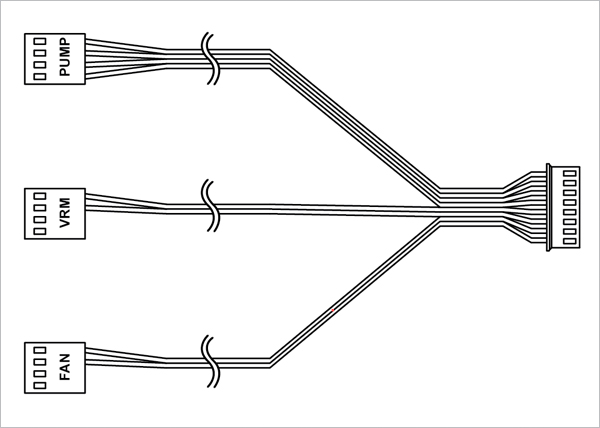
PWM電線(獨立控制)
PWM 電線(獨立控制)附有三個連接器,可分別控制和監控水泵/VRM 風扇/散熱器風扇的速度。

主機板上需要 3 個 4 針接頭
在將散熱器安裝到主機板上之前,請先連接 PWM 控制電纜。

如何(或不如何)安裝您的一體式水冷?
來自 GamersNexus 的 Steve 將向您解釋在 PC 機箱中組裝水冷一體式散熱器時應避免的錯誤。
本影片由 GamersNexus 製作,ARCTIC 已獲得 GamersNexus 的授權使用。
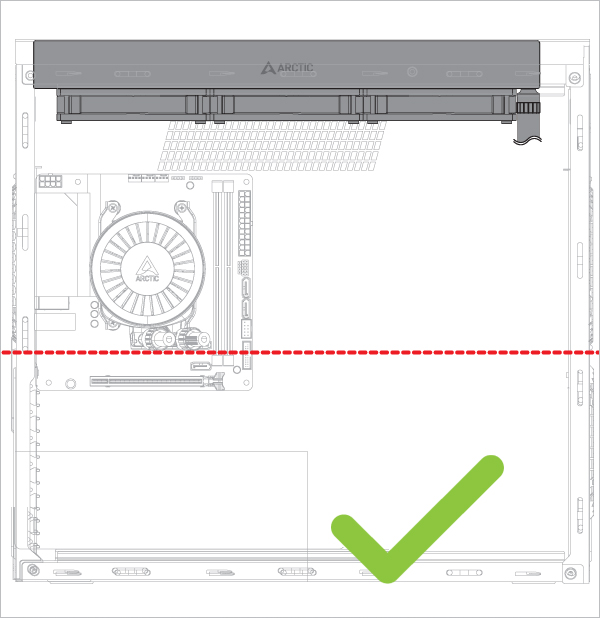
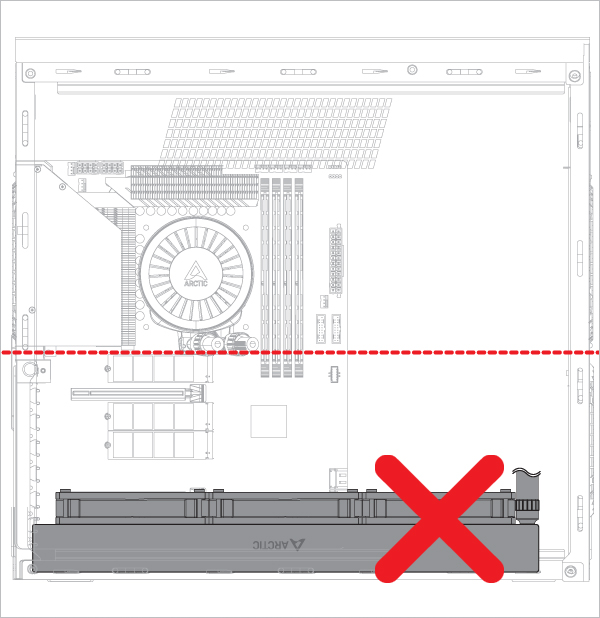
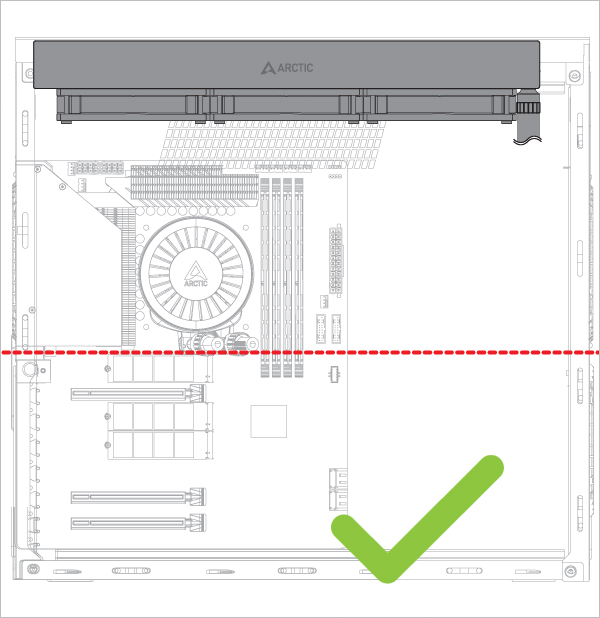
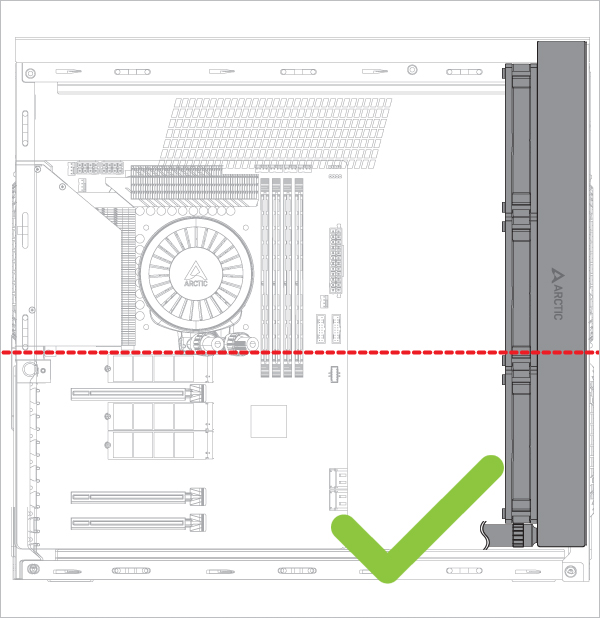
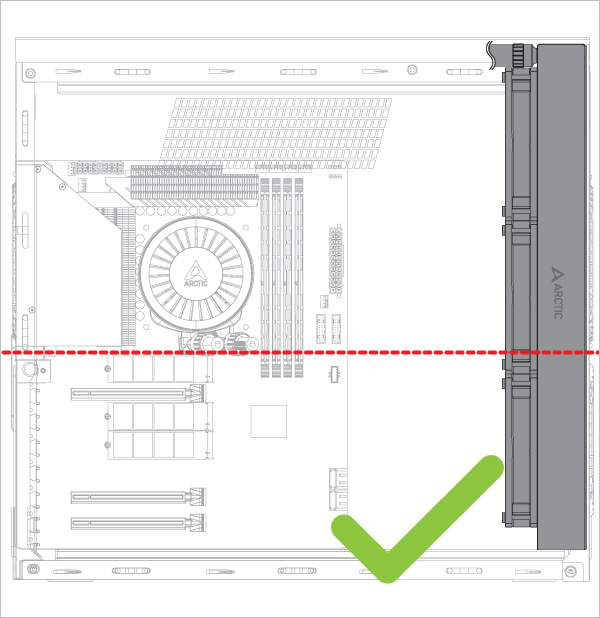
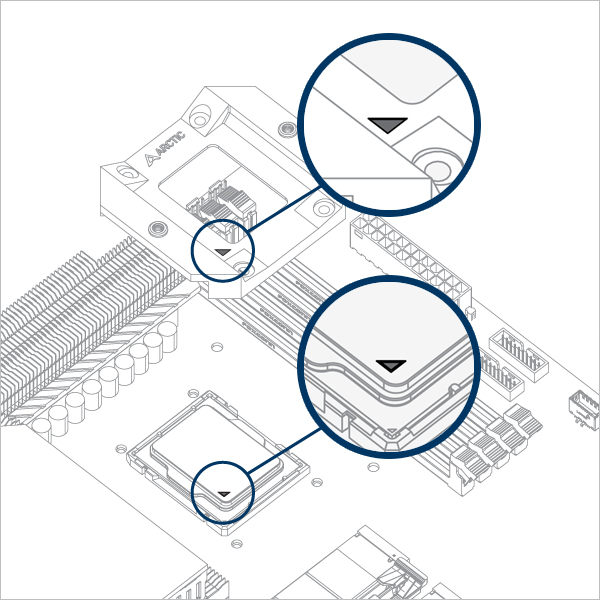
散熱器在水泵下方
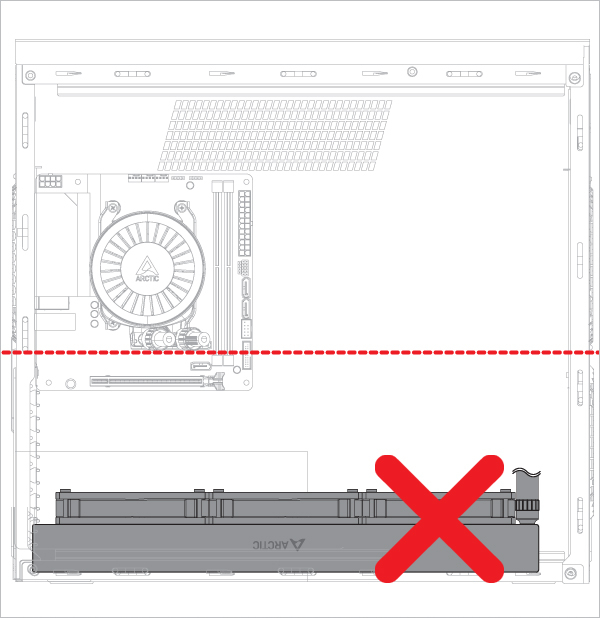
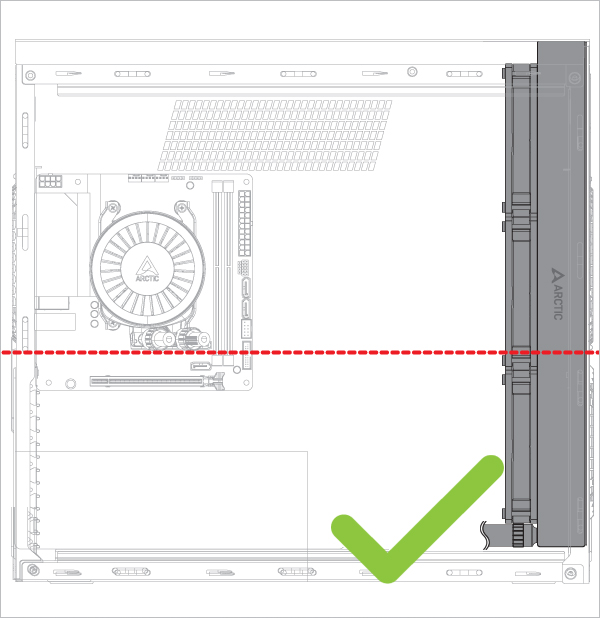
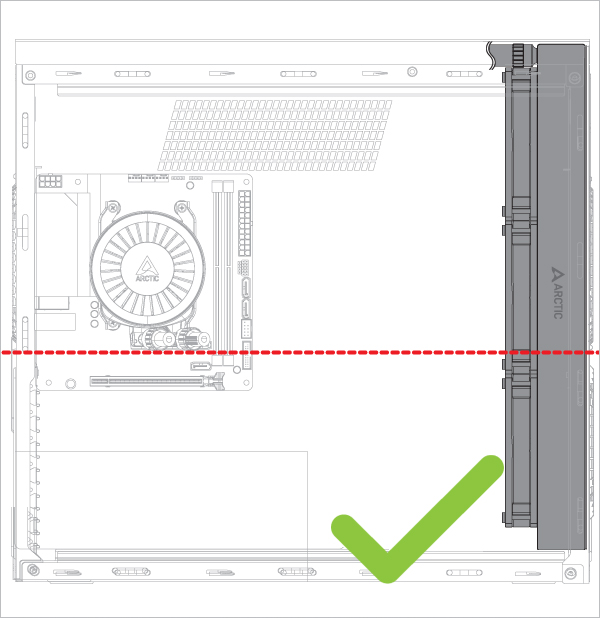
散熱器在水泵上方
冒泡噪音的問題


請僅依此方向安裝
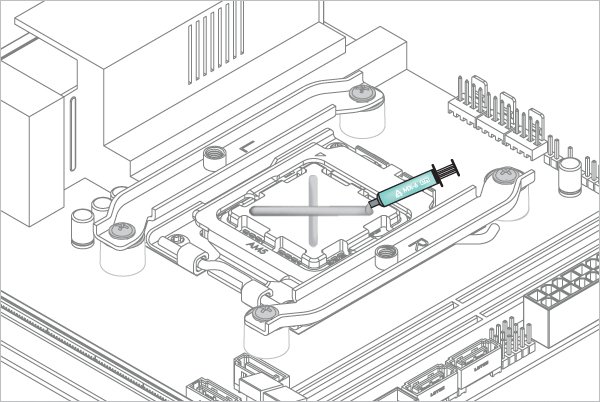
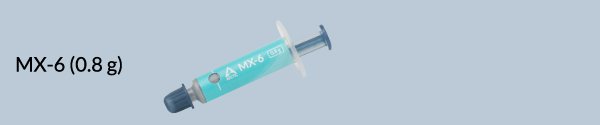
參考這裡了解更多關於如何塗抹導熱矽脂的資訊。

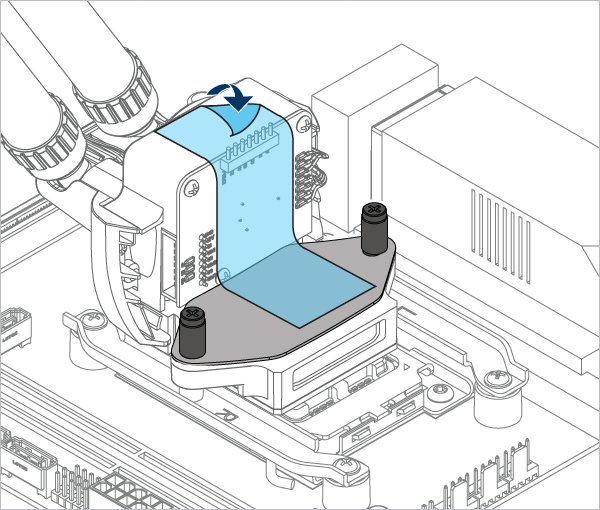
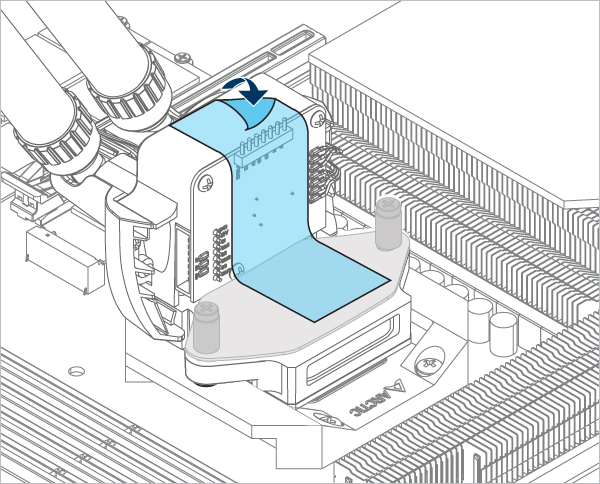
擰緊螺絲,直到兩顆螺絲都與螺紋嚙合,然後交替地將它們完全擰緊。
對於 AM4:偏移安裝方式會使部分CPU蓋外露;這是刻意的,因為 CPU 熱點偏離中心,這樣已經足夠完全被覆蓋。


請確保將主機板上的所有連接器都已插入。
PWM 線纜(一體式)= 1 個插頭
PWM 線纜(獨立控制)= 3 個插頭

請確保將接頭設定為 PWM 控制而非 DC 控制。有關詳細說明,請按照BIOS 設定指南調整 PWM 設定。
這裡提供可列印的快速入門指南。
所需工具
PH2 十字頭螺絲起子
 T20 Torx螺絲起子(包裝內含)
PWM電線(一體式)
單連接 PWM 電纜可同時控制水泵、VRM 和散熱器風扇的轉速,以及監控水泵轉速。

PWM電線(獨立控制)
PWM 電線(獨立控制)附有三個連接器,可分別控制和監控水泵/VRM 風扇/散熱器風扇的速度。
主機板上需要 3 個 4 針接頭
在將散熱器安裝到主機板上之前,請先連接 PWM 控制電纜。

如何(或不如何)安裝您的一體式水冷?
來自 GamersNexus 的 Steve 將向您解釋在 PC 機箱中組裝水冷一體式散熱器時應避免的錯誤。
本影片由 GamersNexus 製作,ARCTIC 已獲得 GamersNexus 的授權使用。
散熱器在水泵下方
散熱器在水泵上方
冒泡噪音的問題


注意力
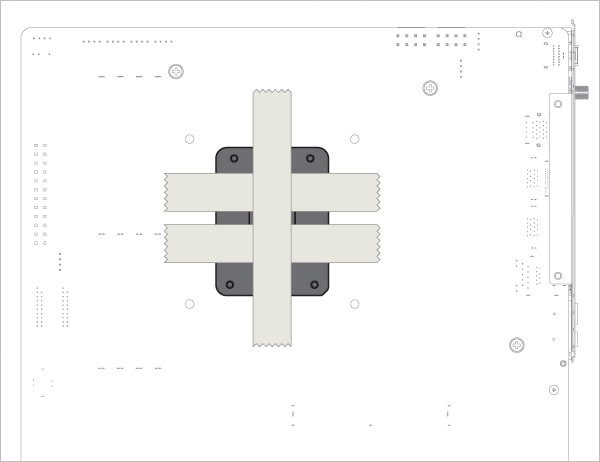
根據主機板的狀態,採用以下兩種方式之一固定插槽背板。
Place a thick padding (e.g., packaging inner card) under the socket backplate to support the socket backplate on a flat, horizontal surface.

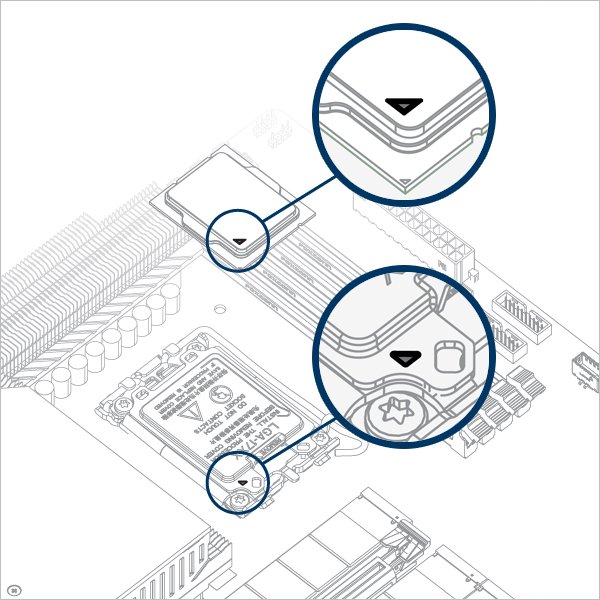
打開獨立裝載機構(ILM),對齊和放置將 CPU 插入插槽
注意力
請妥善保管拆卸下來的零件,以便日後重新組裝。如果主機板需要返廠維修或保修,則必須重新安裝ILM晶片。

注意力
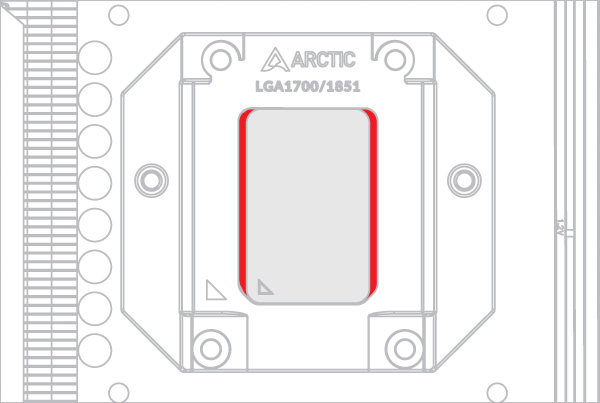
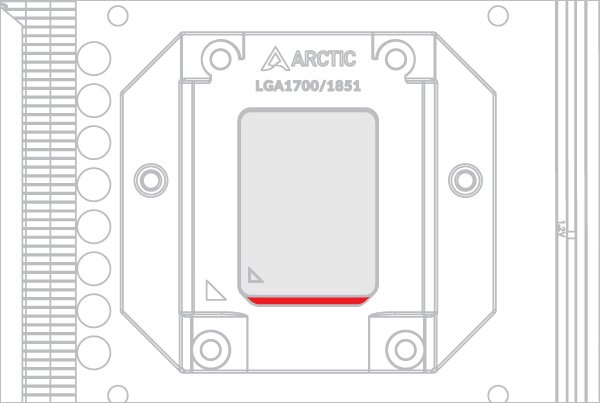
CPU接觸框設計為相容於LGA1851和LGA1700 CPU,請在下方選擇以查看您的CPU適配情況。

警告
先將 4 個螺絲旋入 2 圈,然後再按交叉順序均勻地擰緊,以免損壞 CPU。

CPU接觸框鎖緊後,即可移除厚墊片。
在主機板背面貼上美紋紙,以固定插槽背板。將電腦機殼平放在水平面上。
打開獨立裝載機構(ILM),對齊和放置將 CPU 插入插槽
注意力
請妥善保管拆卸下來的零件,以便日後重新組裝。如果主機板需要返廠維修或保修,則必須重新安裝ILM晶片。
注意力
CPU接觸框設計為相容於LGA1851和LGA1700 CPU,請在下方選擇以查看您的CPU適配情況。
警告
先將 4 個螺絲旋入 2 圈,然後再按交叉順序均勻地擰緊,以免損壞 CPU。
旋緊 CPU 接觸框後,即可移除貼在背板上的美紋膠帶。
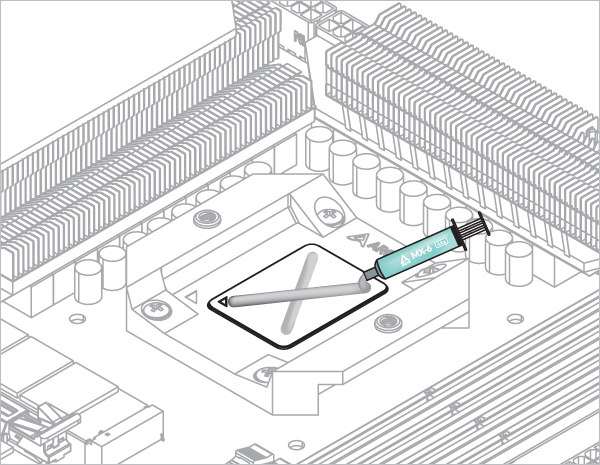

參考這裡了解更多關於如何塗抹導熱矽脂的資訊。
擰緊螺絲,直到兩顆螺絲都與螺紋嚙合,然後交替地將它們完全擰緊。


請確保將主機板上的所有連接器都已插入。
PWM 線纜(一體式)= 1 個插頭
PWM 線纜(獨立控制)= 3 個插頭

請確保將接頭設定為 PWM 控制而非 DC 控制。有關詳細說明,請按照BIOS 設定指南調整 PWM 設定。