Instalace
Krok 1: Identifikace správného záhlaví na základní desce
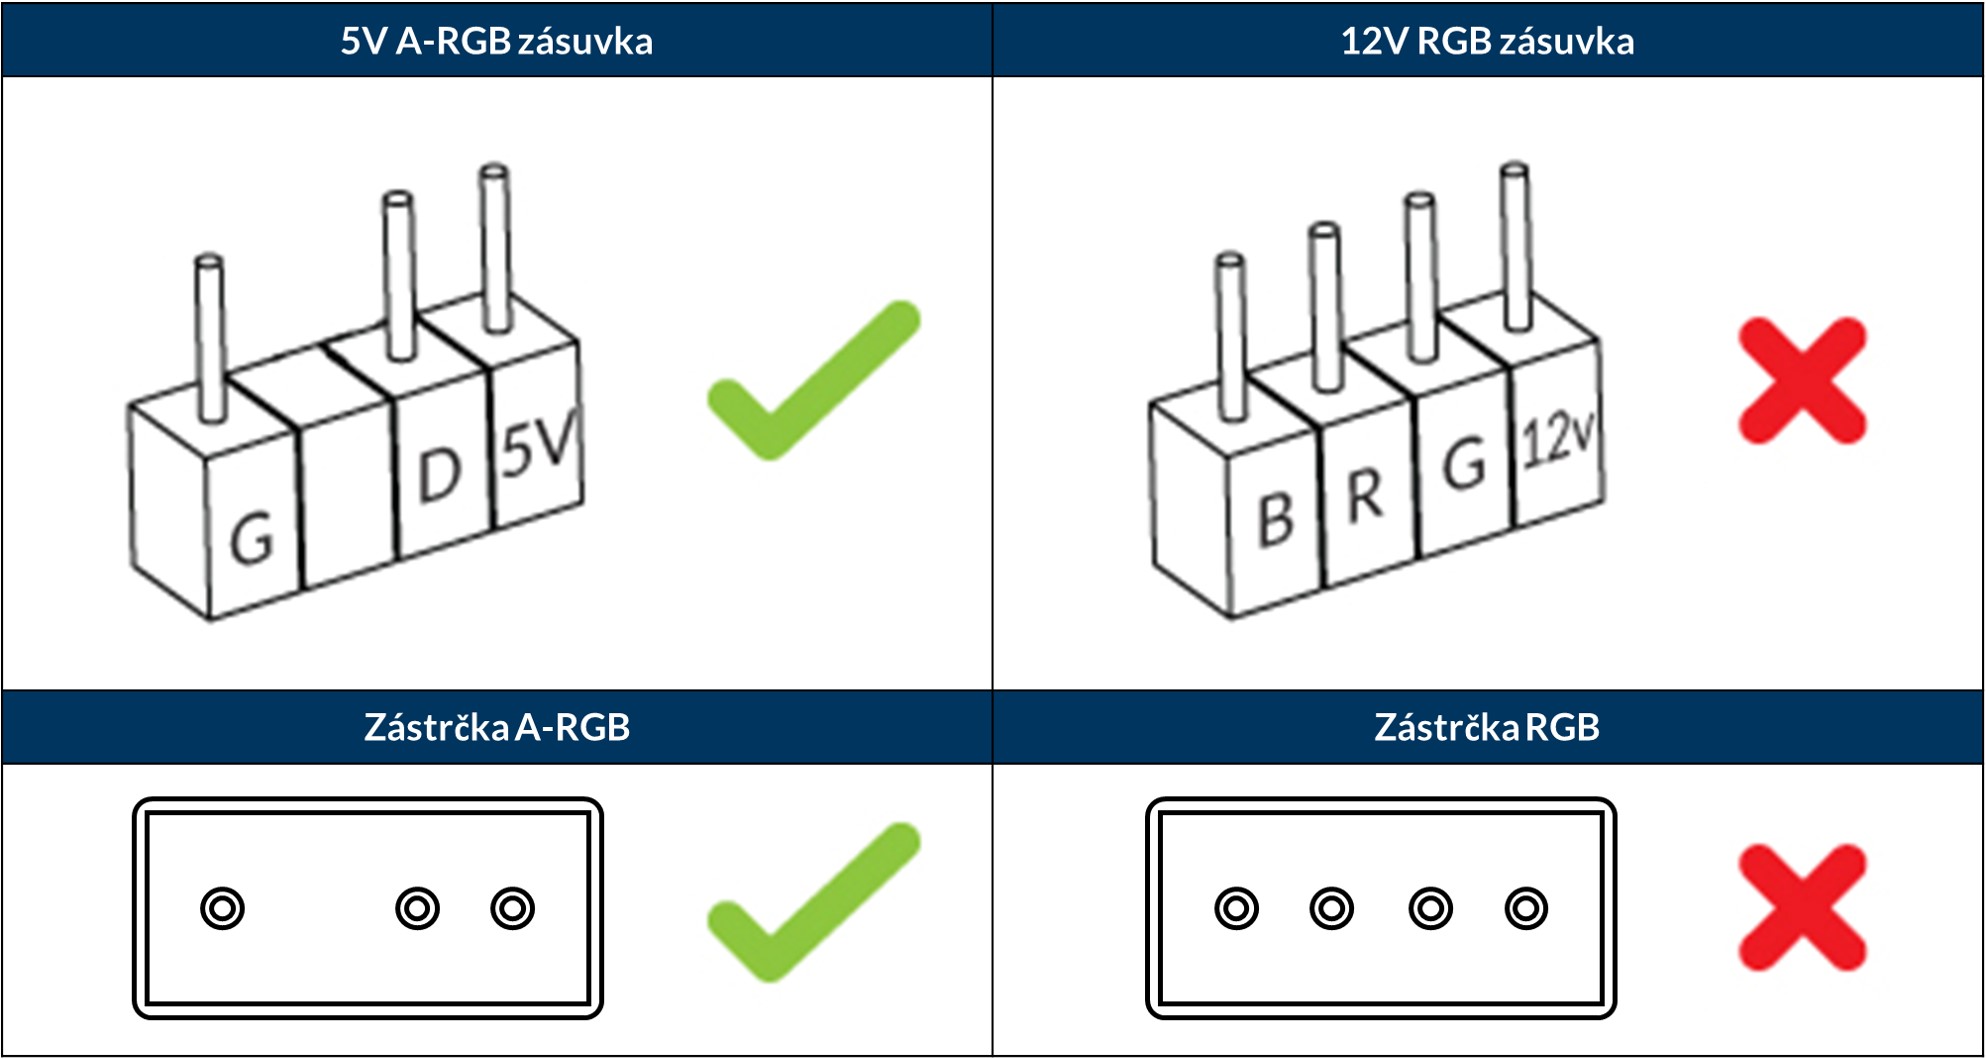
V závislosti na značce a úrovni nejnovější základní desky obvykle nabízejí dva typy vizuálně rozlišitelných záhlaví souvisejících s osvětlením RGB:
 Upozornění
RGB a A-RGB nejsou vzájemně kompatibilní!
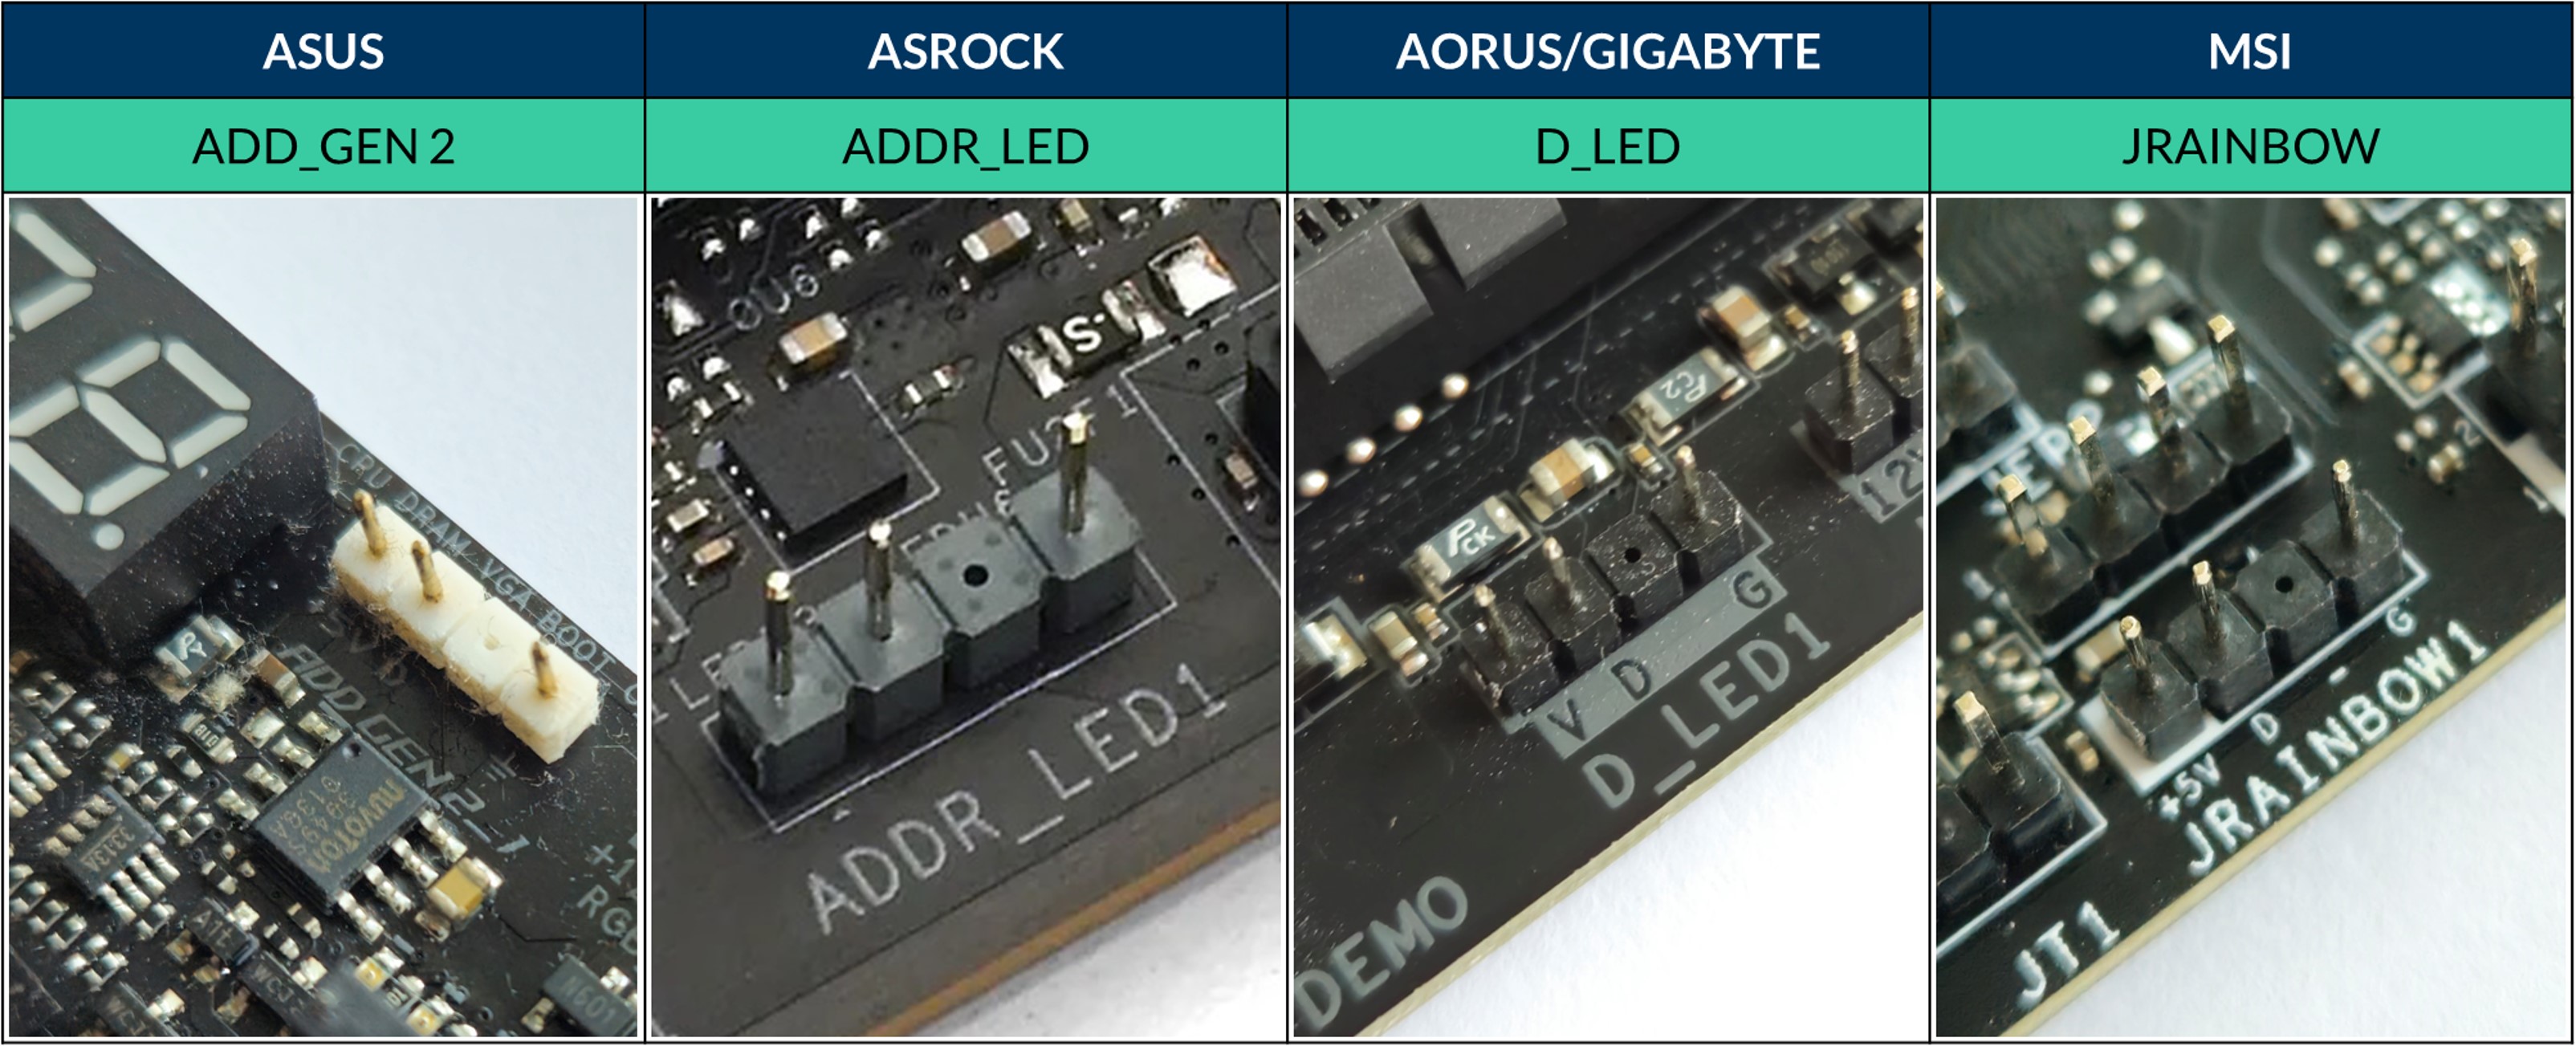
Pro 5V A-RGB Header budou mít různí výrobci na základní desce různé názvy. Další podrobnosti naleznete v příručce k základní desce.
Krok 2: Připojení zástrčky A-RGB k hlavičce A-RGB na vaší základní desce

Na některých produktech A-RGB společnosti ARCTIC může mít zástrčka A-RGB místo toho označení šipky, které by mělo být v souladu s 5V na zásuvce A-RGB na základní desce.
(Volitelně) Krok 3: Jak zřetězit fanoušky

Pozor
Protože některé základní desky mají omezený počet A-RGB konektorů, produkty A-RGB od společnosti ARCTIC jsou dodávány s kabely umožňujícími řetězové zapojení (daisy-chain), díky kterým lze ovládat až 5 ventilátorů na jeden konektor. Toto omezení je dáno celkovým proudem dostupným na konektoru a lze jej obejít použitím napájecího injektoru.
Daisy-chaining je schéma zapojení, kde jsou dvě nebo více zařízení zapojena do sebe tak, aby vytvořila souvislý řetězec, čímž je spojí do série. Výsledkem je, že signál pro barvu a světelné efekty pro každou LED vyslanou ze záhlaví lze ovládat nezávisle.
Rozbočovače nebo dělené spoje se týkají schématu zapojení, kde jsou dvě nebo více zařízení zapojena paralelně. V důsledku toho je signál pro barevné a světelné efekty vysílaný ze záhlaví pro každou LED také rozdělen do dvou nebo více kopií sebe sama.
Ovládání softwaru
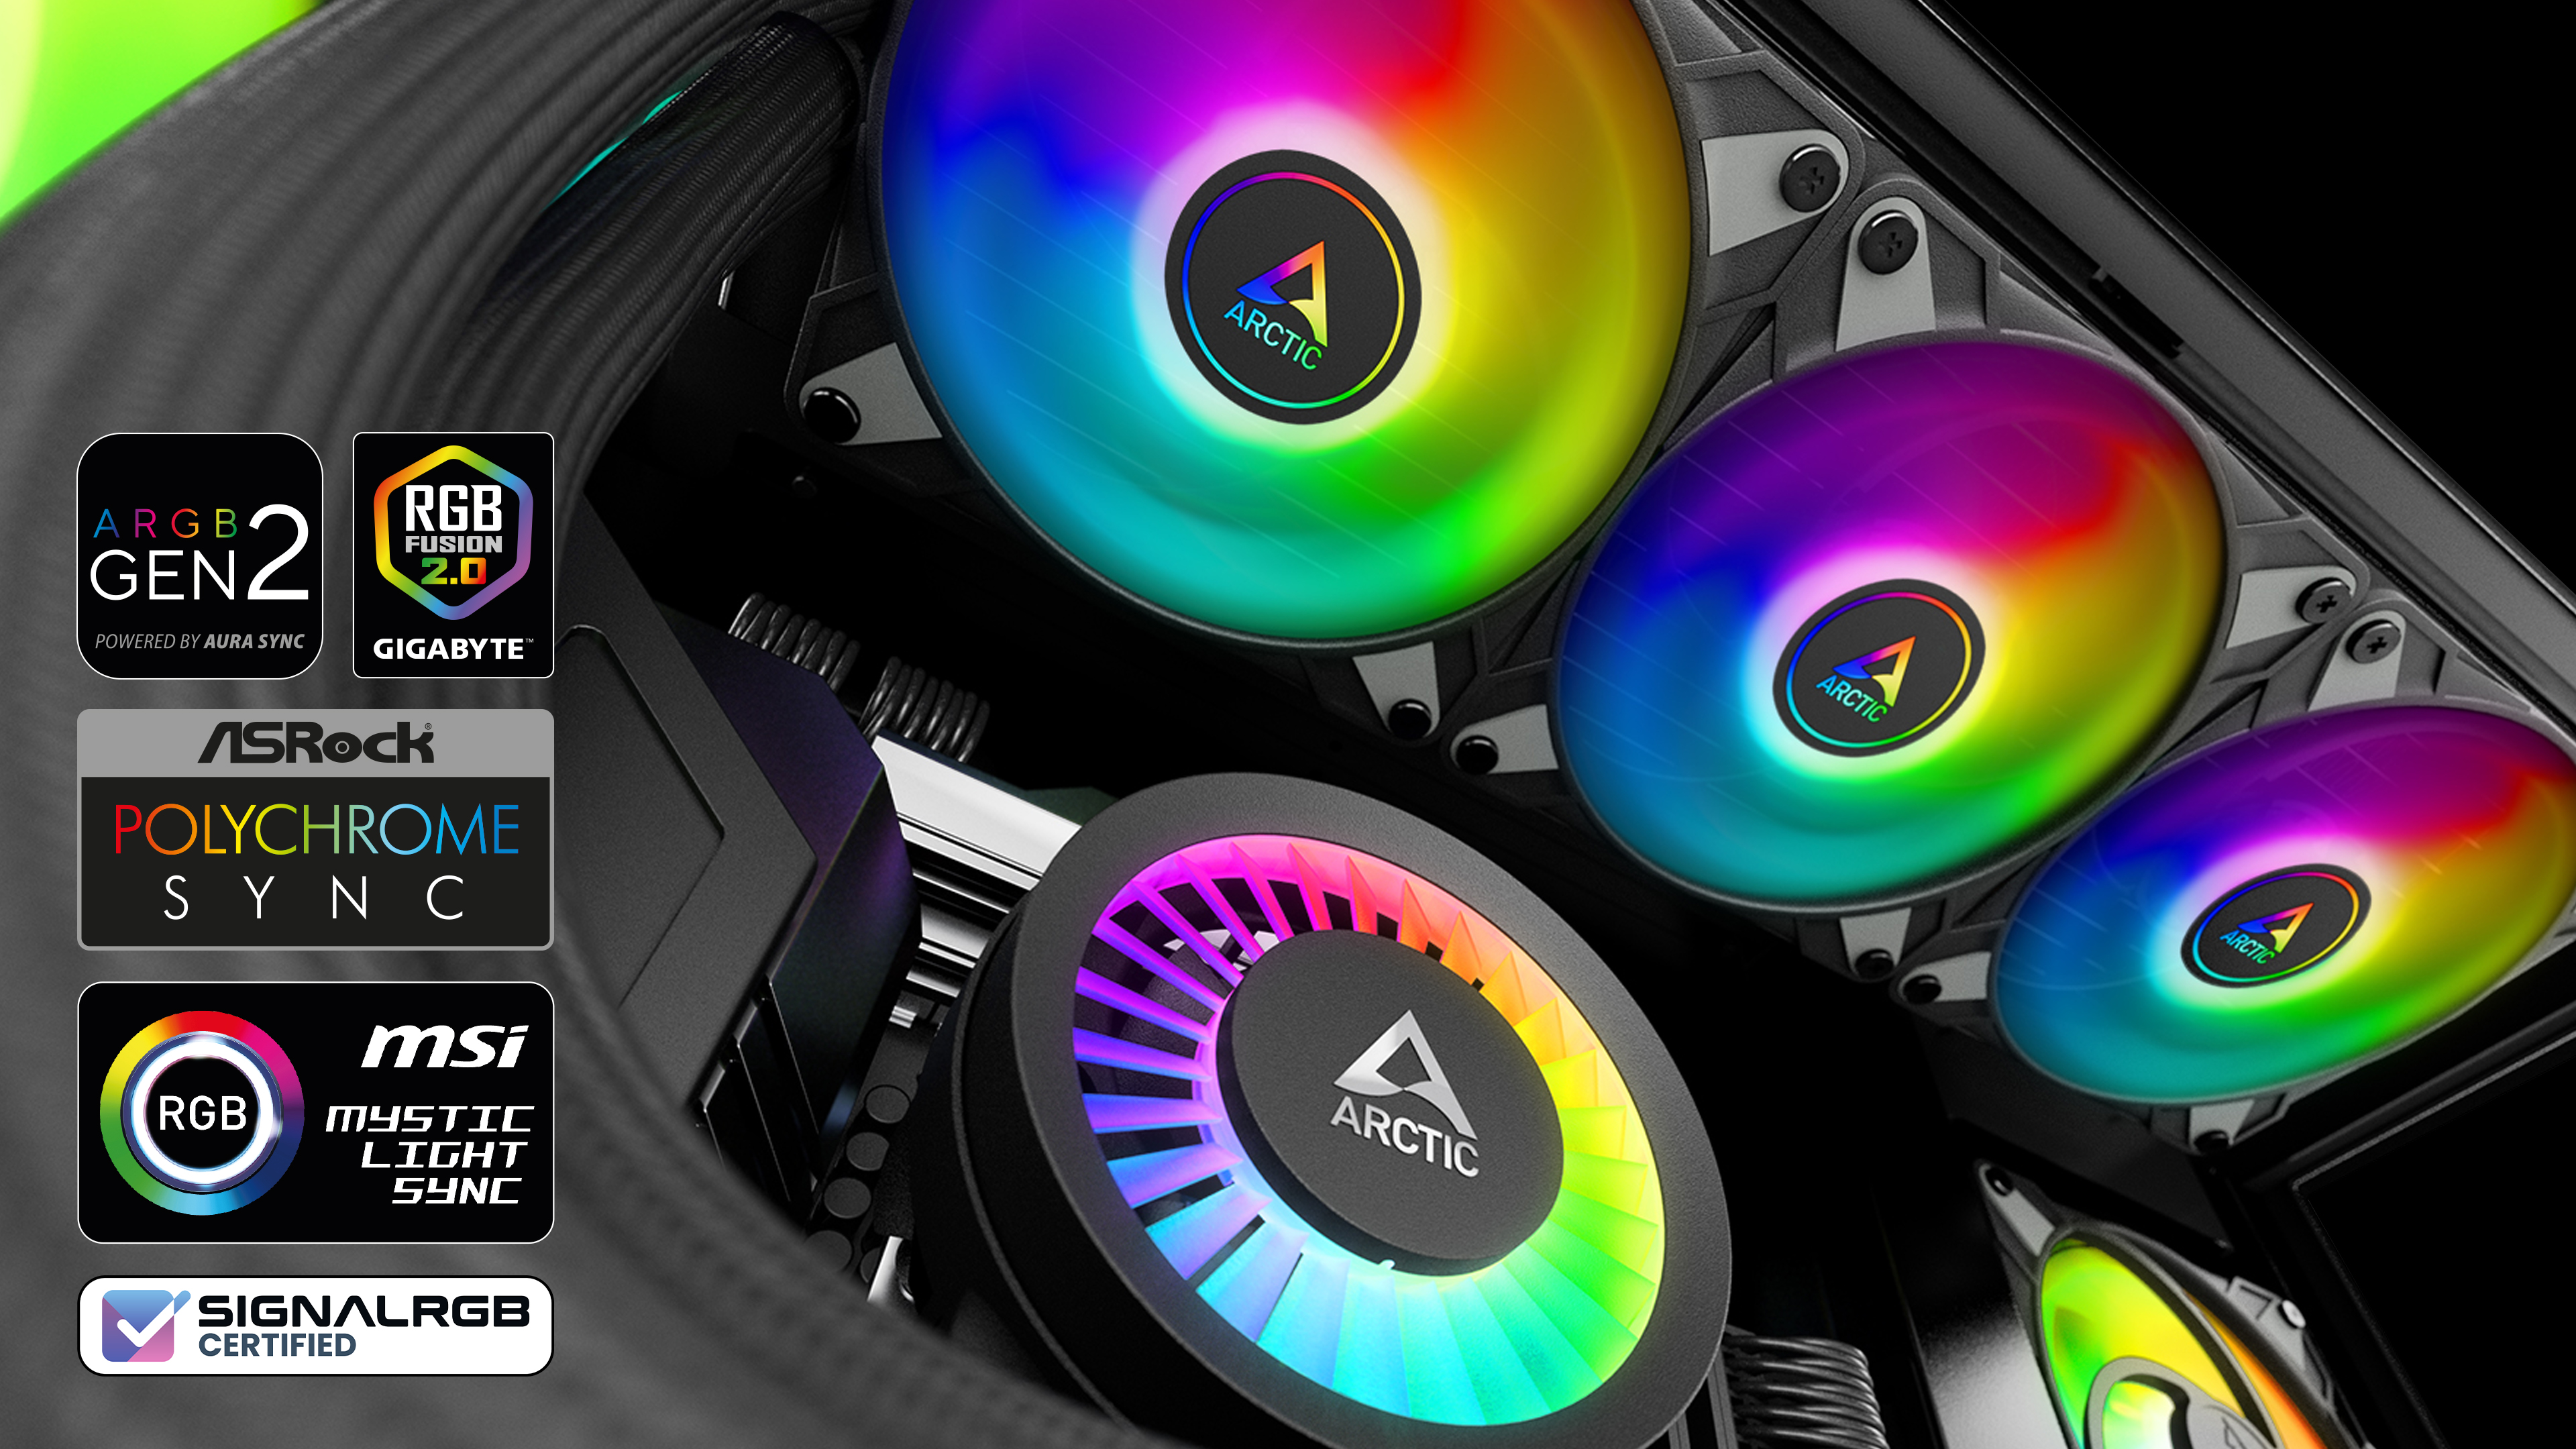
Produkty A-RGB společnosti ARCTIC jsou kompatibilní s celou řadou základních desek (včetně ASUS, GIGABYTE, ASRock a MSI). Zatímco většina základních desek má svůj vlastní RGB software, jejich funkčnost je často omezená a nemusí nabízet podporu pro všechny komponenty umožňující RGB v daném nastavení.

Pro úplnou kontrolu a lepší synergii s periferiemi společnost ARCTIC doporučuje používat SignalRGB, bezplatnou aplikaci, která vám umožní přizpůsobit osvětlení RGB ve vašem nastavení tak, jak uznáte za vhodné. Nabízejí také podporu pro širokou škálu periferií.
Nastavení a konfigurace produktů ARCTIC na SignalRGB
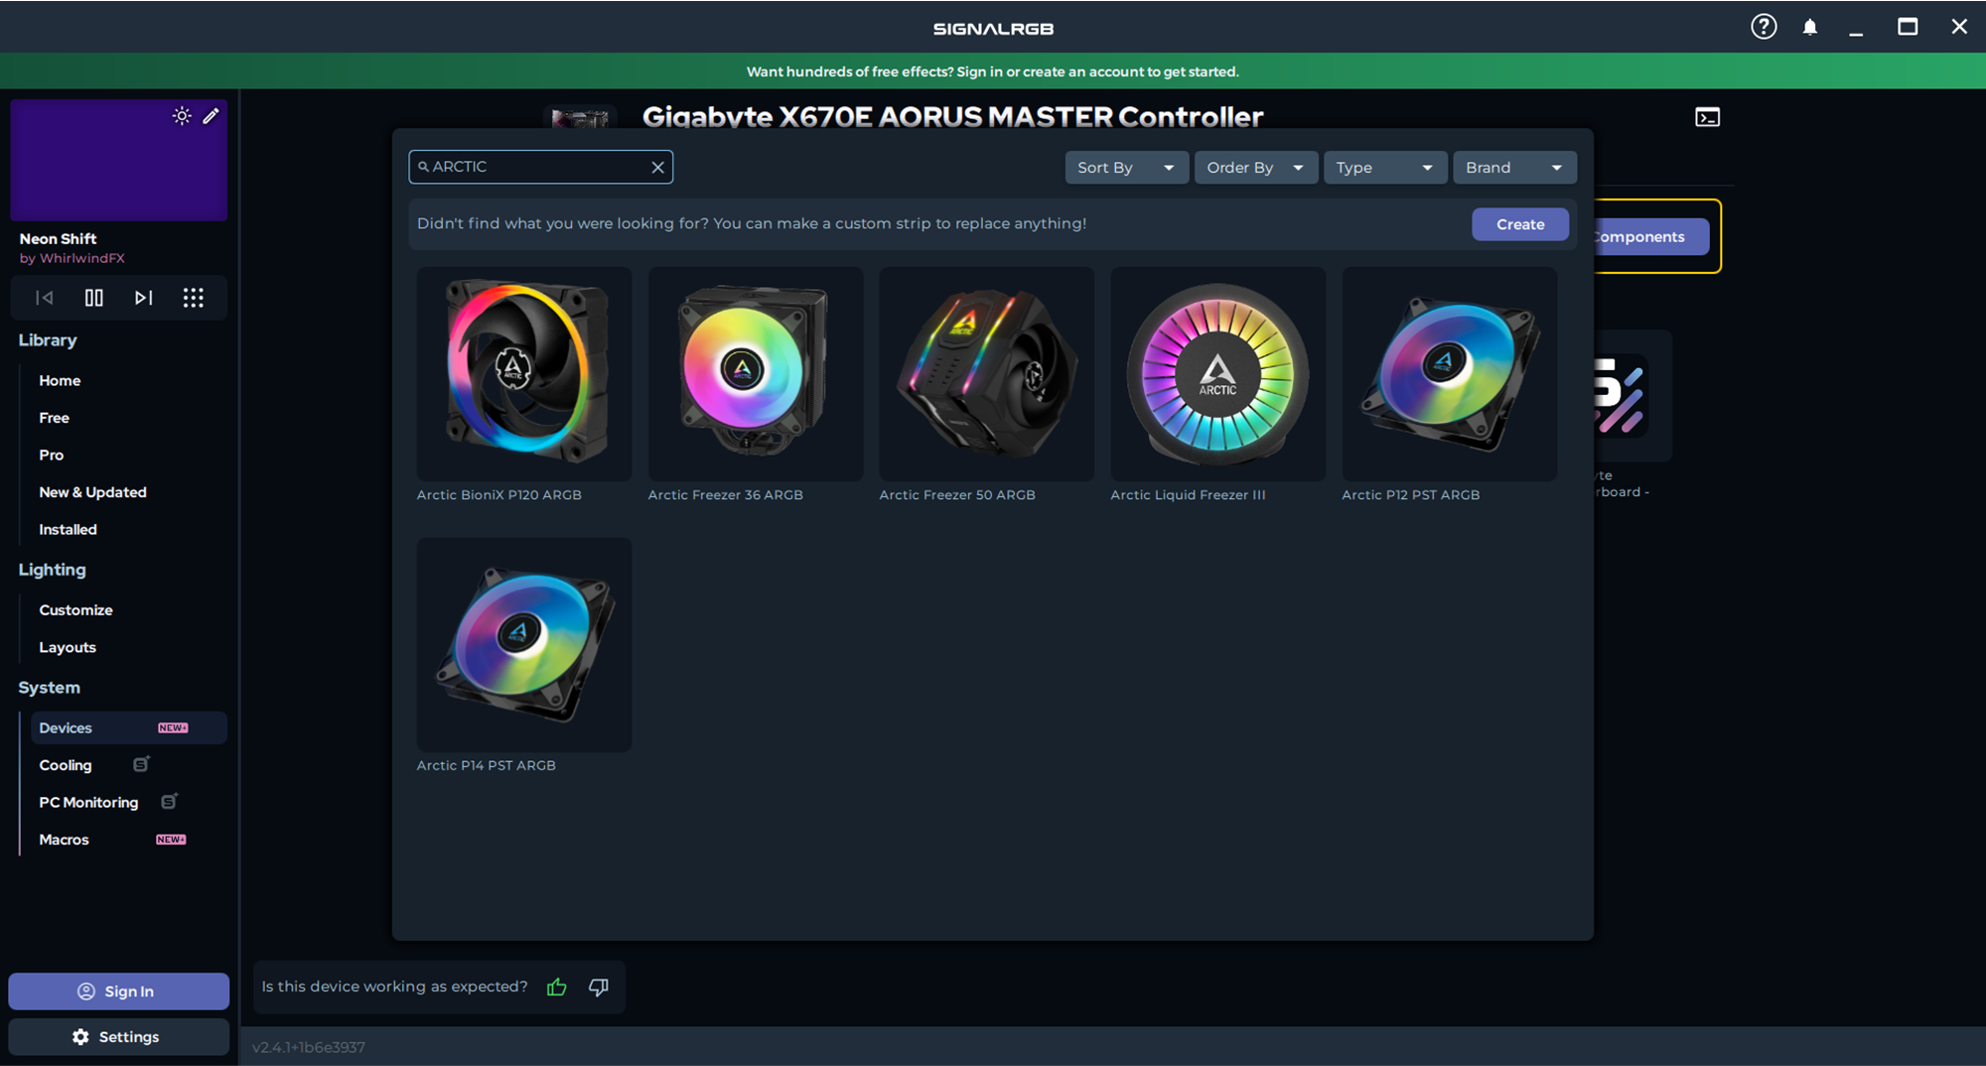
Stáhněte si SignalRGB Začínáme s SignalRGB Konfigurace zařízeníPomocí rozbalovací nabídky třídění a vyhledávací lišty v SignalRGB vyhledejte produkty A-RGB společnosti ARCTIC!
Potřebujete další pomoc? Podívejte se na fóra SignalRGB Kontaktujte podporu SignalRGB Kontaktujte podporu ARCTIC
Problémy s asynchronními světelnými efekty lze vyřešit otočením zařízení pomocí SignalRGB.
- Pokud momentálně nepoužíváte SignalRGB, začněte si prosím stahováním SignalRGB.
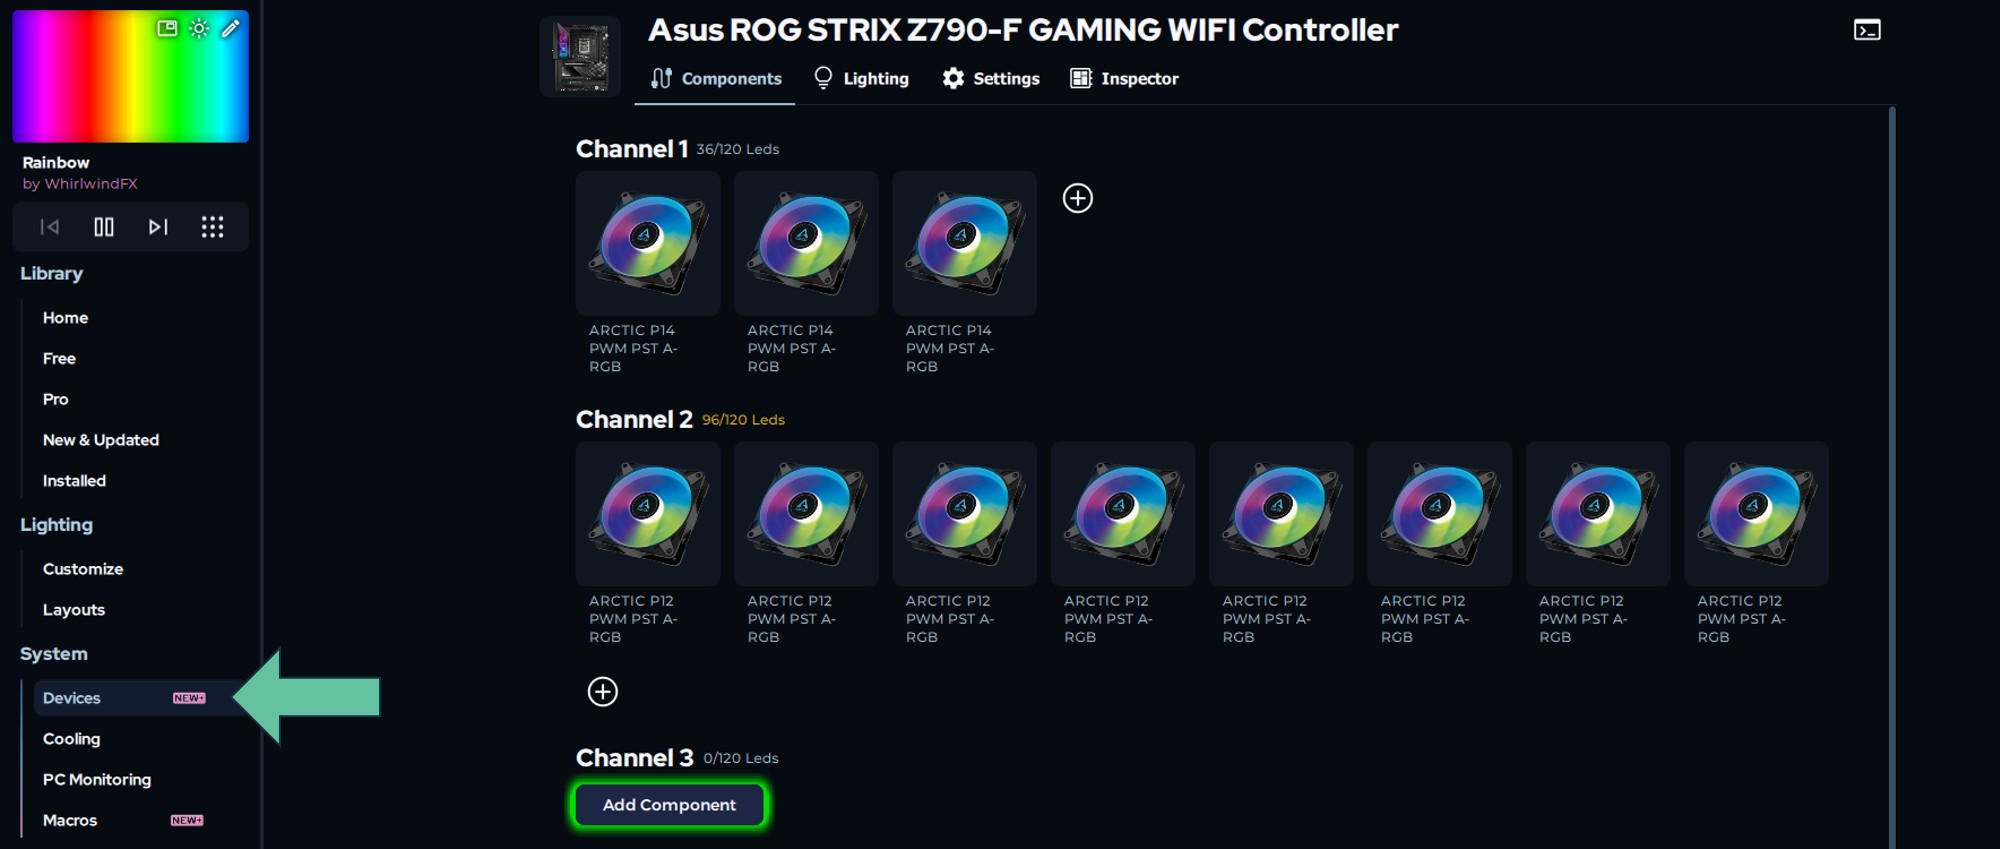
- Pomocí SignalRGB nejprve nastavte svá zařízení v části Zařízení v části Systém:
- Uspořádejte nainstalovaná zařízení v části „Rozvržení“ v části „Osvětlení“:

- U jakéhokoli zařízení s asynchronním světelným efektem vyberte toto zařízení v rozvržení a zadejte 180 do pole "Otočení"

Doporučené produkty
")
")